
Easy Halloween Spider Web Cookies Royal Icing are my go to when I want something that looks fancy but is actually pretty doable on a regular weeknight. You know that moment when you realize Halloween is basically tomorrow and you promised to bring treats, but you do not want to spend hours making a complicated dessert. These cookies solve that. They are crisp, cute, a little spooky, and they get a lot of reactions for something that is mostly just piping and a tiny bit of patience. If you can draw a wobbly circle, you can make these. 
What You Need to Make These Fun Spider Cookies:
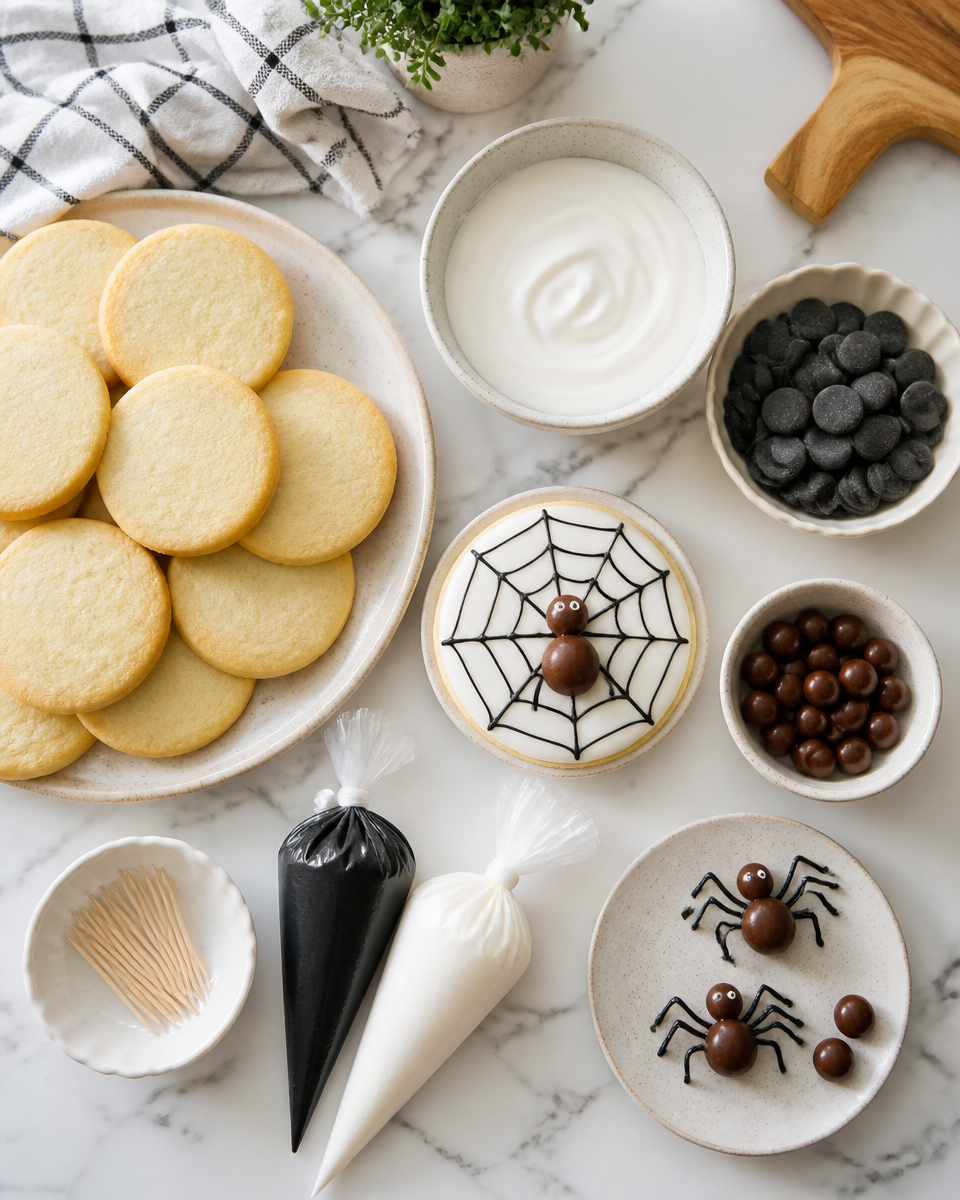
Let us keep this simple and realistic. You do not need a professional bakery setup. You need a solid cookie base, royal icing that behaves, and a few tools that make your life easier.
If you are in the mood for more cookie inspiration for the season, I also love these soft chewy classics when the weather cools down: easy molasses cookies soft chewy old fashioned. They have that cozy spice vibe that just feels right in October.
Ingredients and tools that help a lot
- Sugar cookies baked and fully cooled (round cookies make the web design easier)
- Royal icing in white (or tinted light gray if you want a moodier web)
- Black candy melts or thick black royal icing for spiders
- Mini chocolate candies or chocolate chips for spider bodies (optional but cute)
- Piping bags or squeeze bottles
- Small round piping tip (or just snip a tiny hole in the bag)
- Toothpicks for pulling the web lines
- Parchment paper or a tray for drying
Now about royal icing consistency, because this is the thing that makes or breaks the look. You want two consistencies:
Flood icing that settles smooth in about 10 to 15 seconds when you tap the cookie. And detail icing that is thicker so your lines stay sharp for the web rings.
One more thing that matters more than people admit: start with cookies that are fairly flat. If your cookies are puffy or domed, the icing slides around and the web gets messy fast.
;
How to Make Cookie Spiderwebs
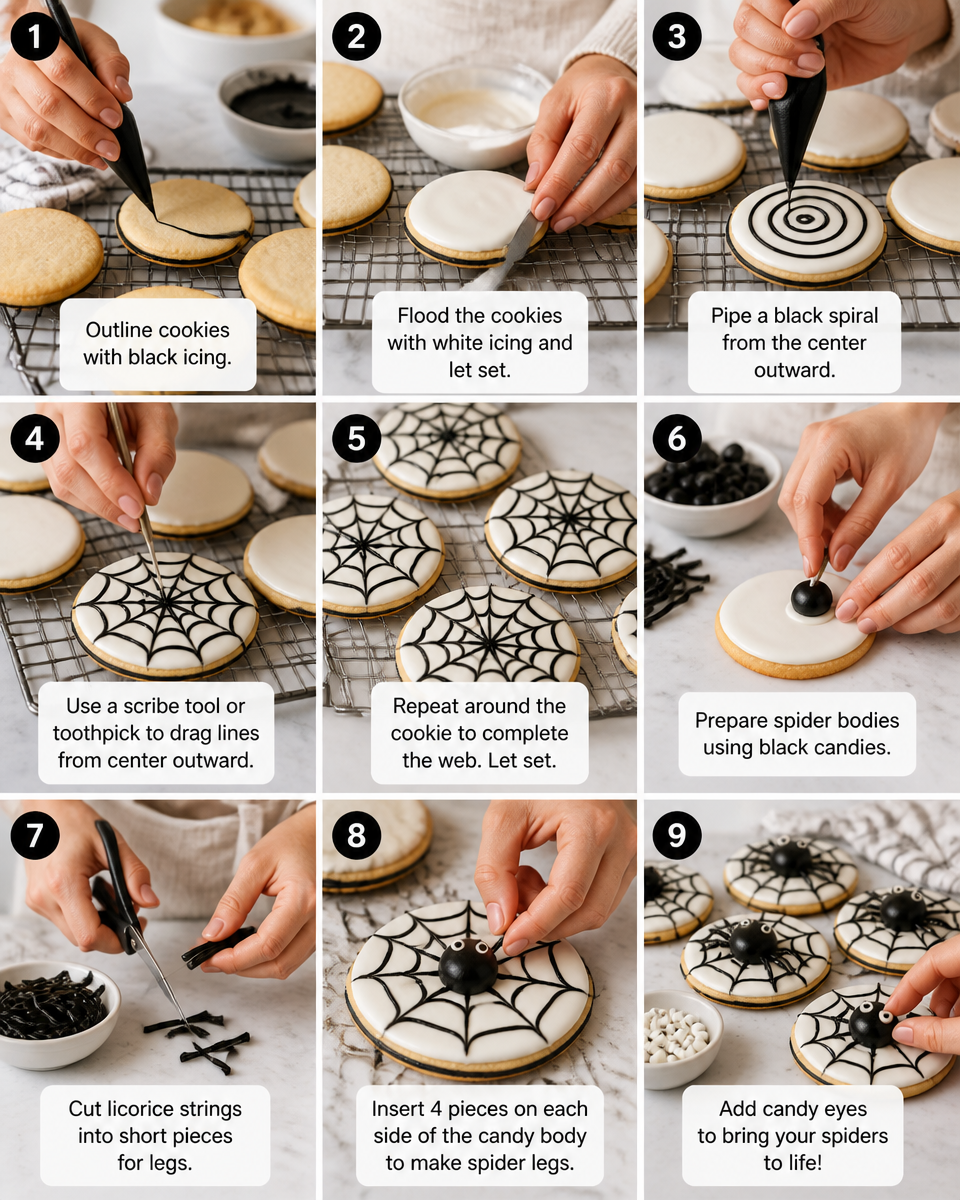
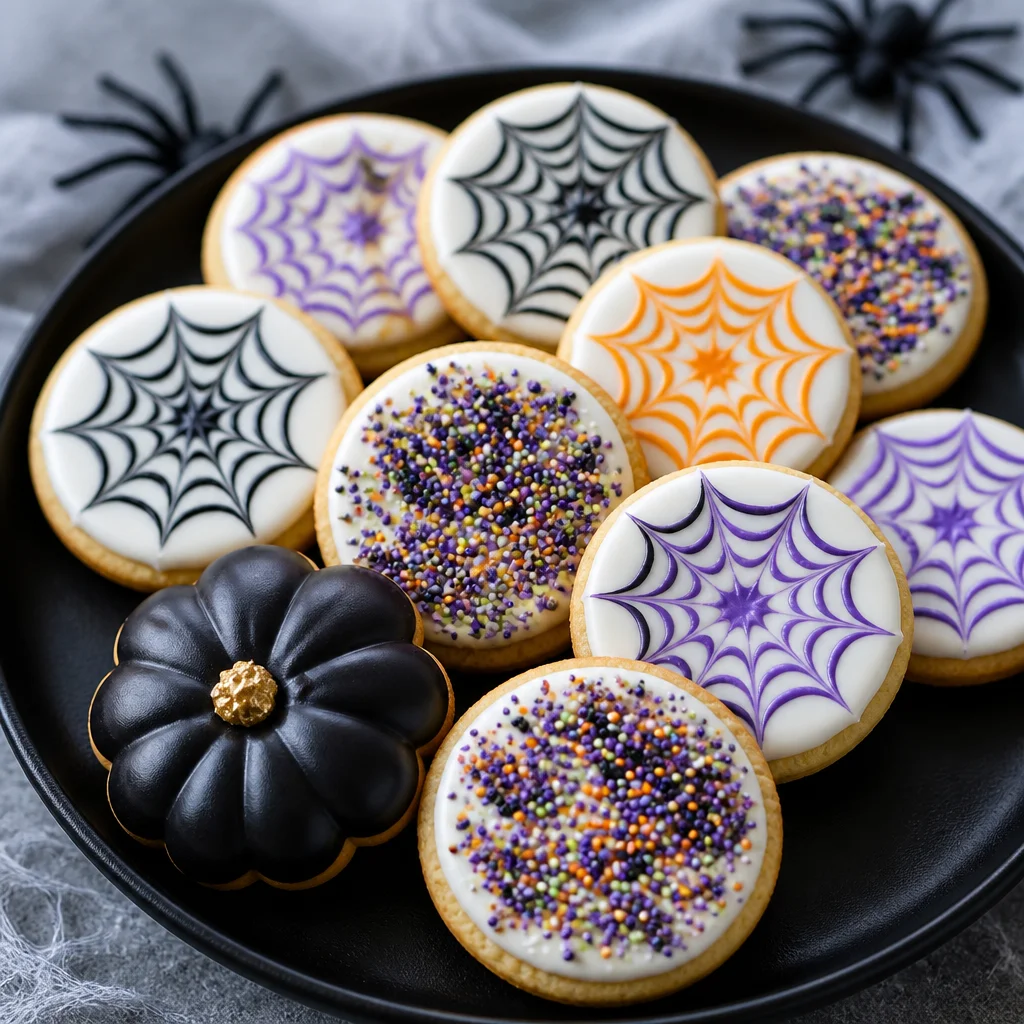
This is the fun part. The whole trick is making circles and then dragging lines through them while the icing is still wet. You do not need perfect symmetry. In fact, slightly imperfect webs look more natural and spooky.
Here is the basic flow I use every time:
Step 1: Outline the cookie with your flood icing, then fill it in. Use a toothpick to gently nudge icing into any gaps near the edge.
Step 2: While the flood layer is still wet, pipe a spiral or several circles on top using your thicker icing. Start in the center and work outward.
Step 3: Take a clean toothpick and drag lines from the center to the edge. Wipe the toothpick between drags if it starts to pick up too much icing. I usually do 8 to 12 pulls depending on cookie size.
Step 4: Lightly tap the cookie on the counter. This helps everything settle together so the web looks clean instead of bumpy.
My biggest tip: do only a few cookies at a time. If you flood 20 cookies and then start adding web rings, the first ones will already be setting and the drag lines will crack. I usually work in batches of 4 to 6.
Also, if you want another Halloween treat that is more snacky than bake and decorate, you should see these: creepy crawly Oreo spider Halloween snacks. They are a lifesaver when you need something fast.
How to Make The Cookie Spiders
Okay, the spiders. You can make them as simple or as detailed as you want. I have done both, depending on my energy level and whether my kitchen is already a disaster.
Option 1: Super easy spider using candy melts
Melt black candy melts, pipe little blobs on parchment, and use a toothpick to pull out eight legs. Let them set, then peel them off and place them on the cookies using a dot of icing like glue.
Option 2: Royal icing spider
Use thick black royal icing, pipe a small circle for the head and a larger oval for the body. Pipe legs directly on the cookie or make them on parchment like the candy melt version.
Option 3: Candy body shortcut
Stick a chocolate candy or a big chocolate chip in the center and pipe legs around it. This is honestly adorable and it covers a lot of imperfections.
I like adding tiny white dots for eyes. Not because spiders need eyes, but because it makes them look cartoonish instead of too realistic. If you have kids helping, this is the part they get excited about.
And if you are building a cookie tray for a party, it is fun to mix these with something more classic. These are always a hit: deliciously easy chocolate crinkle cookies. The powdered sugar cracks look kind of wintery, but chocolate is welcome all year.
I brought these spiderweb cookies to my office potluck and people thought I bought them from a bakery. The web effect is so cool in person, and the spiders made everyone laugh. I am not a fancy baker at all, so that felt like a win.
How to Dry Your Decorated Spiderweb Cookies
This is where patience comes in. Royal icing needs time to set so the tops do not get dents, fingerprints, or that weird shiny smear that happens when you stack cookies too soon.
My basic drying routine:
Let the cookies sit at room temp, uncovered, on parchment. If your kitchen is humid, it will take longer. If it is dry, you will be surprised how quickly they crust over.
What I look for:
After about 1 hour, the surface usually feels dry if you lightly touch an edge. You can move them carefully.
After 6 to 12 hours, they are much safer to package.
After 18 to 24 hours, they are fully set and stackable for gifting.
Avoid the fridge for drying. It can cause color bleed and sticky tops. Also avoid covering them with plastic wrap while they are still wet, since condensation can ruin that clean web look.
If you want to ship them or bag them, I like placing a piece of parchment between layers. Even when icing feels dry, a little pressure can still mark it if you are not careful.
For more cookie fun when you are in the decorating mood, you might also like these buttery holiday classics for later in the year: deliciously easy buttery Christmas spritz cookies recipe. Totally different vibe, but the same satisfying cookie project energy.
Spooky Spiderweb Cookies with Fuzzy Black Spiders
This part is optional, but it is the look that makes people do a double take. The idea is to give the spider a fuzzy texture so it looks like a tiny Halloween creature crawling across your web.
Here is how to do it without stressing:
Pipe or place your spider body on the cookie first. Then, while the black icing is still tacky, sprinkle on black sanding sugar or black nonpareils. Shake off the extra. It gives that fuzzy effect immediately.
If you cannot find black sprinkles, you can use chocolate sprinkles too. It will look more like a brownish spider, but honestly, still cute and creepy.
One small warning from my own experience: do not sprinkle black sugar over the whole cookie unless you want a speckled web. It gets everywhere. I like to hold the cookie over a small bowl and sprinkle only right over the spider.
And if you are someone who loves sandwich cookies as much as I do, put these on your next baking list: deliciously easy Biscoff sandwich cookies. They are not spooky, but they are dangerously snackable.
Common Questions
Can I make Easy Halloween Spider Web Cookies Royal Icing ahead of time?
Yes. I usually make them 1 to 3 days ahead. Let the icing fully dry overnight, then store in an airtight container with parchment between layers.
What if my web lines disappear into the flood icing?
Your flood icing is probably too thin or you waited too long. Thicken your detail icing a bit and pipe the circles right after flooding, then drag immediately.
Do I need a projector steady hand for the web?
Nope. The toothpick drag does most of the work. Slightly uneven lines actually look more like a real web.
How do I keep the spiders from falling off?
Attach them with a dot of thick royal icing and let them set. If you are transporting cookies, pack them snug so they do not slide around.
Can I use store bought icing?
For the web effect, royal icing works best because it sets firm. Some store bought icings stay soft and will smear. If you do use it, do a test cookie first.
A little pep talk before you bake
If you are craving a Halloween cookie project that looks impressive but still feels doable, Easy Halloween Spider Web Cookies Royal Icing are such a fun one to try. Once you get the icing consistency right, the web design becomes weirdly relaxing, like doodling but edible. If you want extra guidance, I found this tutorial super helpful for visuals: How to Make A Spider Web Decorated Cookie – Sweetopia. And if you learn better by watching, this one is great too: How to Make Spiderweb Cookies (Video) – Baking A Moment. Make a small batch first, have fun with it, and do not overthink the lines. 
Easy Halloween Spider Web Cookies
Ingredients
Method
- Outline the cookie with flood icing, then fill it in. Use a toothpick to nudge icing into any gaps.
- While the flood layer is still wet, pipe a spiral or several circles on top using thicker icing.
- Use a clean toothpick to drag lines from the center to the edge of the cookie.
- Lightly tap the cookie on the counter to help the icing settle smoothly.
- For candy melt spiders, melt the candy, pipe blobs, and pull out legs using a toothpick.
- For royal icing spiders, pipe a circle for the head, an oval for the body, and add legs.
- For a shortcut, use a chocolate candy body with piped legs around it.
- Add tiny white dots for eyes if desired.
- Let the cookies sit at room temperature, uncovered on parchment.
- After an hour, check if the surface feels dry to the touch.
- Allow cookies to dry for 6 to 12 hours for better packaging safety.
- For stacking, ensure they dry fully for 18 to 24 hours.
- Pipe or place spider bodies on cookies, then sprinkle black sanding sugar or nonpareils on the legs.
- Avoid sprinkling over the entire cookie to prevent a speckled web.
