
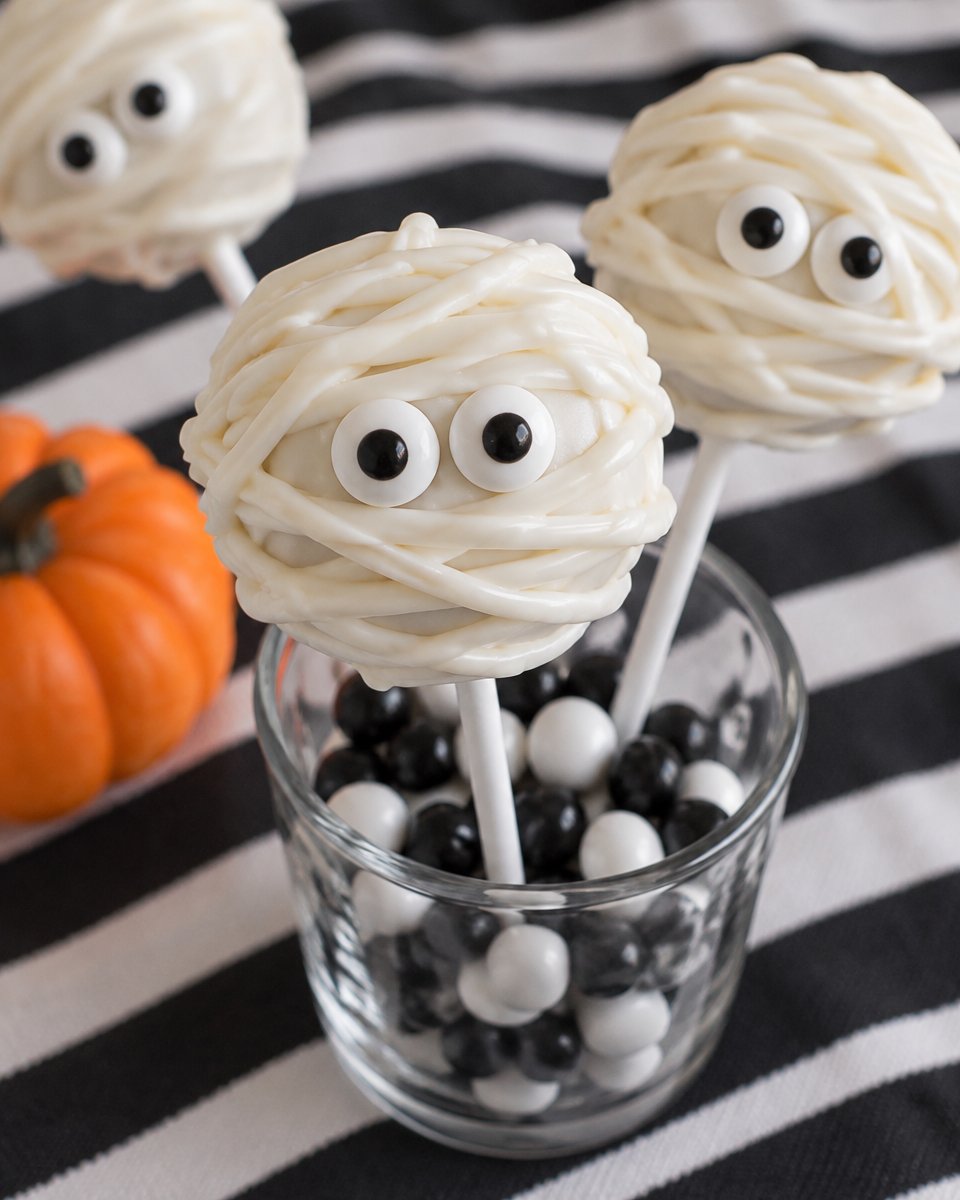
halloween cake pops are my go to treat when I want something cute for a party but I do not want to spend all day baking and cleaning. You know that feeling when you promised to bring dessert, then suddenly it is the night before and you are tired. Yep, this recipe is for that moment. These little pops look fancy, but they are actually super forgiving, even if you are not a perfectionist. I have made them for classroom treats, movie nights, and last minute Halloween hangouts.
Why These Halloween Cake Pops Are a Must-Make
If you have ever tried to frost cupcakes in a rush, you already understand why cake pops feel like a lifesaver. They are handheld, easy to serve, and nobody needs a plate and fork. Plus, they are naturally portioned, which is nice when you have lots of sweets around.
What I love most is that you can keep the base simple and let the decorations do all the Halloween work. A little drizzle and some candy eyes and suddenly your kitchen looks like you tried really hard.
Also, if you are already planning a Halloween dessert table, cake pops fill in the gaps beautifully between cookies and cupcakes. I usually pair them with something like easy Halloween ghost cupcakes with white frosting because the colors pop together and kids go crazy for the faces.
Ingredients You’ll Need
You can make these with almost any cake flavor, but chocolate and vanilla are the easiest to decorate for Halloween. I typically use a boxed cake mix when I am short on time, and honestly nobody complains.
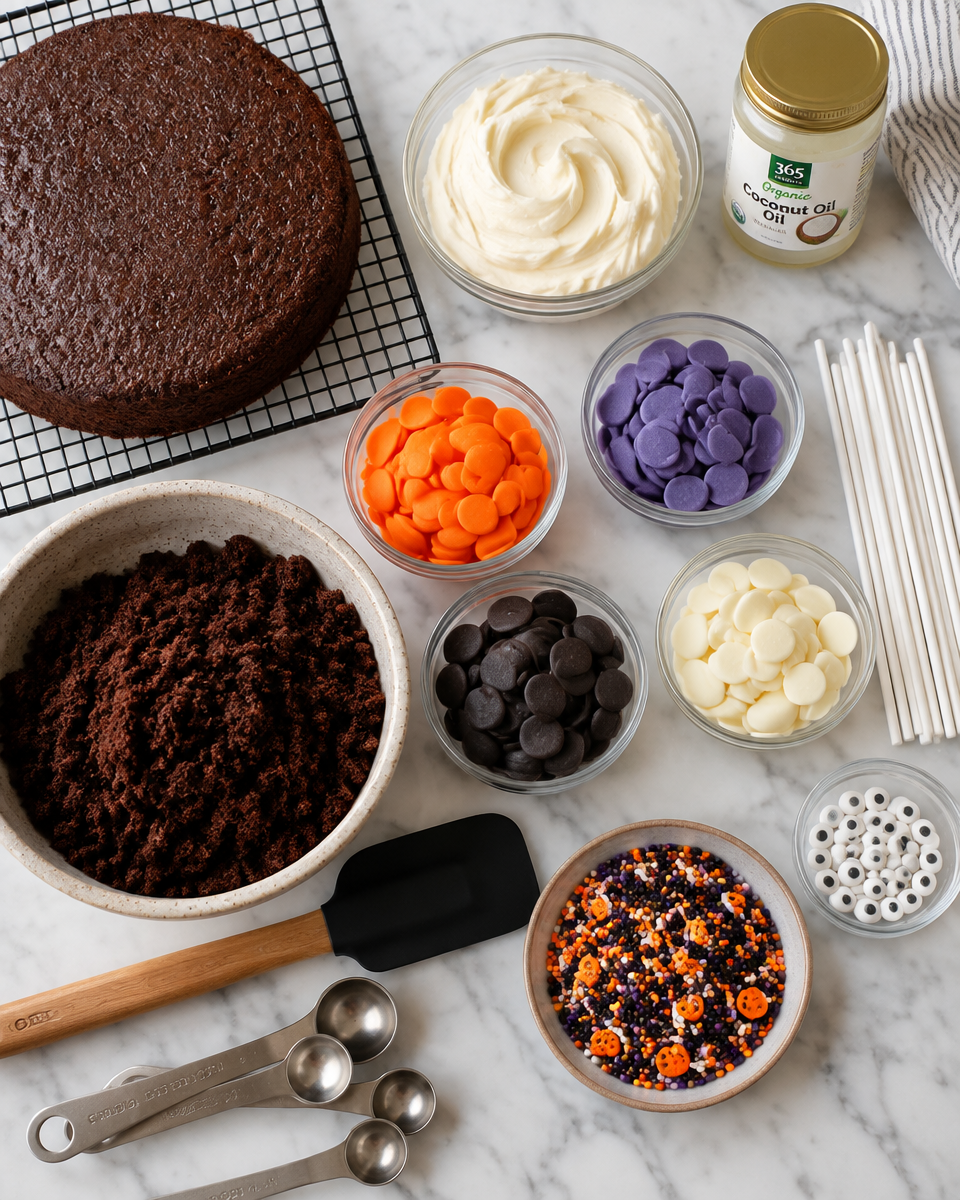
- Cake: baked and cooled completely (boxed or homemade)
- Frosting: about 1 third to 1 half cup, store bought or homemade
- Candy melts: orange, black, white, or purple (about 20 to 24 ounces total)
- Cake pop sticks: 20 to 30
- Sprinkles: Halloween mix, black sanding sugar, or orange jimmies
- Candy eyes or mini chocolate chips for faces
- Optional: a spoonful of coconut oil or shortening to thin candy melts
If you want a super quick cake option on another day, I am also a big fan of simple cakes like this 7UP bundt cake. Different vibe, but the same low stress energy.
How to Make Halloween Cake Pops (Step by Step)
This is the part that sounds complicated until you do it once. After that, it is just muscle memory.
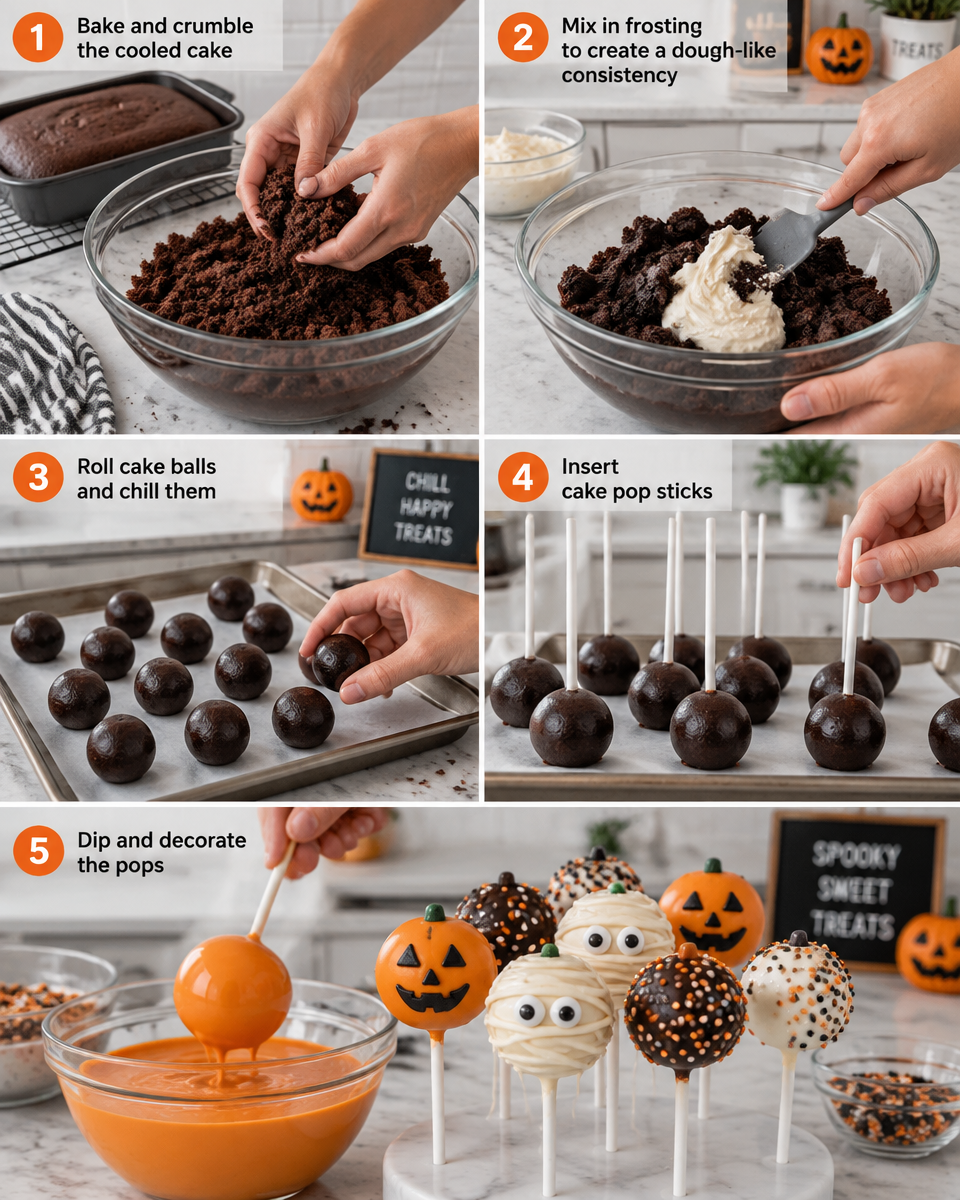
Step 1: Bake and cool your cake
Bake your cake, then let it cool fully. If it is even a little warm, it will turn gummy when you crumble it. I usually bake the cake in the morning or the night before so it is ready when I am.
Step 2: Crumble and mix
Crumble the cake into a big bowl with clean hands or a fork. Add frosting a little at a time and mix until it feels like soft play dough. It should hold together when you squeeze it, but it should not feel wet or greasy. Too much frosting makes cake pops sink off the stick later, so go slow.
Step 3: Roll into balls and chill
Roll the mixture into balls, about 1 to 1.5 tablespoons each. Place them on a baking sheet lined with parchment. Chill in the fridge for at least 1 hour, or in the freezer for about 20 minutes. You want them firm, not frozen solid.
Step 4: Add sticks
Melt a small amount of candy melts. Dip the tip of each stick into the melted coating, then push it about halfway into a chilled cake ball. This little dip acts like glue. Chill again for 10 to 15 minutes so the stick sets.
Step 5: Dip and tap
Melt your main candy melts in a deep cup or glass. Dip each pop straight down, cover it fully, then lift and gently tap your wrist on the edge of the cup to let extra coating drip off. Work one at a time and decorate right away before the coating sets.
How to Decorate Halloween Cake Pops
This is where halloween cake pops get all their personality. If you are making these with kids, set up a little decorating station with bowls of sprinkles and candies and let them go wild. Just accept ahead of time that your kitchen will look like a sprinkle storm happened.
Here are my easiest go to looks:
Classic pumpkin: dip in orange candy melts, then add a tiny green sprinkle on top or draw a little stem with green icing.
Ghost: dip in white, then add two candy eyes. If you want a mouth, use a mini chocolate chip or a dot of black gel icing.
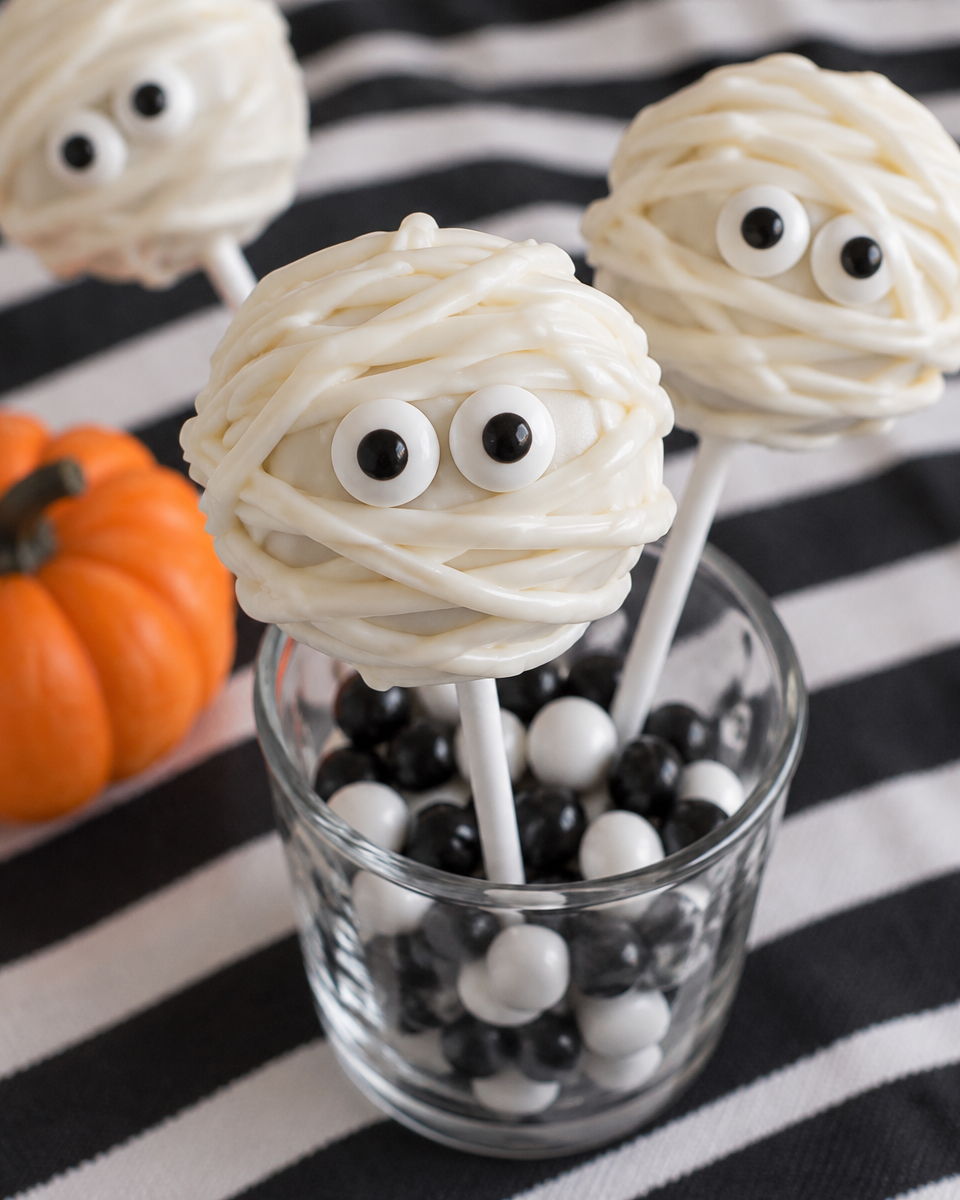
Mummy: dip in white, then drizzle more white in thin lines back and forth. Add candy eyes before the drizzle sets.
Black cat: dip in black, then add candy eyes and little triangle sprinkles for ears if you have them.
For extra smooth coating, make sure your melts are fully melted and stir often. If they feel thick, add a tiny bit of coconut oil and stir again. Tiny is the key word.
Tips for Perfect Cake Pops Every Time
I learned most of these tips the hard way, usually right before guests arrived. Here is what actually helps:
Do not overdo the frosting. If the mixture is too soft, the balls can slide off the sticks once dipped.
Chill in stages. Chill after rolling, and chill again after inserting sticks. It makes dipping so much easier.
Keep coating warm, not hot. If it is too hot, it can crack later when it cools. Warm and smooth is what you want.
Use a tall cup. It makes dipping cleaner and uses less coating.
Let them set upright. A cake pop stand is great, but you can also poke holes in a cardboard box and stand them up. If you lay them down, you will get a flat spot.
“I made these for my daughter’s school party and they were the first dessert to disappear. The ghost ones were adorable, and your frosting tip saved me because I usually add way too much.”
Fun Spooky Decoration Ideas
Once you nail the basic dip, you can get really creative. This is also the section where you can turn “oops” moments into “I meant to do that” designs.
Try these:
Spiderweb drizzle: dip in black, then drizzle white in circles and drag a toothpick from the center outward to make a web.
Monster eye: dip in green, add one big candy eye, then dot around it with little sprinkles.
Bloody bite: dip in white, then add a red gel drip near the top. It is silly and fun in a Halloween way.
Graveyard dirt: dip in chocolate, then roll in crushed cookies. Add a little candy tombstone if you can find them.
And if you are into super simple recipes in general, this 2 ingredient Japanese cheesecake yogurt cookie cheesecake is one of those desserts that feels like a magic trick. Totally different texture, but still easy and cute for a fall spread.
Make-Ahead and Storage Tips
halloween cake pops are amazing for planning ahead, which is basically the only way I survive busy weeks in October.
You can make the cake balls up to 2 days ahead and keep them covered in the fridge. Then dip and decorate the day you need them.
Fully finished cake pops can be stored:
At room temperature: 1 day, in a cool spot away from sunlight.
In the fridge: up to 1 week, in an airtight container. Let them sit out for 15 minutes before serving so the coating is not too cold.
In the freezer: up to 6 weeks, but freeze them before decorating if you can. Thaw in the fridge overnight.
One little warning from experience, if you move them from freezer to warm room too fast, you can get condensation that messes up the shine. Slow thaw is your friend.
Variations and Flavor Options
If you want to switch things up, you have options. I have made halloween cake pops with all kinds of cake scraps and leftover frosting.
Flavor combos that work really well:
Chocolate cake + chocolate frosting: rich and classic, great with orange drizzle.
Vanilla cake + cream cheese frosting: tastes like a bakery treat and pairs well with spooky colors.
Spice cake + vanilla frosting: cozy fall flavor, especially good with white ghosts and cinnamon sugar sprinkles.
Red velvet + cream cheese frosting: dramatic color inside, very Halloween in a fun way.
You can also add mix ins like mini chocolate chips or crushed cookies, but keep it light so the balls still roll smooth.
And yes, I will link it again because it is that easy, this 2 ingredient Japanese cheesecake yogurt cookie cheesecake is a good backup plan when you want something sweet without a lot of measuring.
Frequently Asked Questions About Halloween Cake Pops
Why are my cake pops cracking?
Usually it is temperature shock. If the balls are very cold and the coating is very hot, cracks can happen. Let the balls sit out 5 minutes before dipping, and do not overheat the candy melts.
Why are they falling off the stick?
This almost always means too much frosting or the balls were not chilled enough. Next time, use less frosting and chill longer after inserting the sticks.
Can I use chocolate chips instead of candy melts?
You can, but it is a little trickier. Chocolate chips need a bit of coconut oil or shortening to dip smoothly, and they can be thinner. Candy melts are the easiest for beginners.
How do I make them look smooth?
Make sure your cake balls are rolled tightly and chilled. Dip in a tall cup of smooth melted coating, then tap gently to remove excess. Do not swirl too much.
Do I need a cake pop stand?
Nope. A cardboard box with small holes poked in the top works great, or you can use a piece of foam. I have even used an upside down colander in a pinch.
More Easy Halloween Dessert Recipes
If you are building a full Halloween spread, I like mixing one “wow” treat with a few easy ones. Cake pops cover the cute factor, then you can add cupcakes, cookies, or a simple cake for slicing.
Here are a few ideas I have made alongside these:
Those sweet and simple easy Halloween ghost cupcakes with white frosting are great if you need something fast for a school event.
If you want a no fuss cake that still feels special, the 7UP bundt cake is a crowd pleaser, especially with a little glaze and some Halloween sprinkles on top.
A Sweet Little Send Off
If you try these halloween cake pops, I really think you will be surprised by how doable they are, even on a busy weeknight. Keep the cake to frosting ratio reasonable, chill in stages, and do not stress about perfect shapes because the decorations hide a lot. If you want even more inspiration, I bookmarked The Easiest Halloween Cake Pops | Lemons & Zest for extra decorating ideas and color combos. Make a batch, put on a spooky movie, and have fun with it.
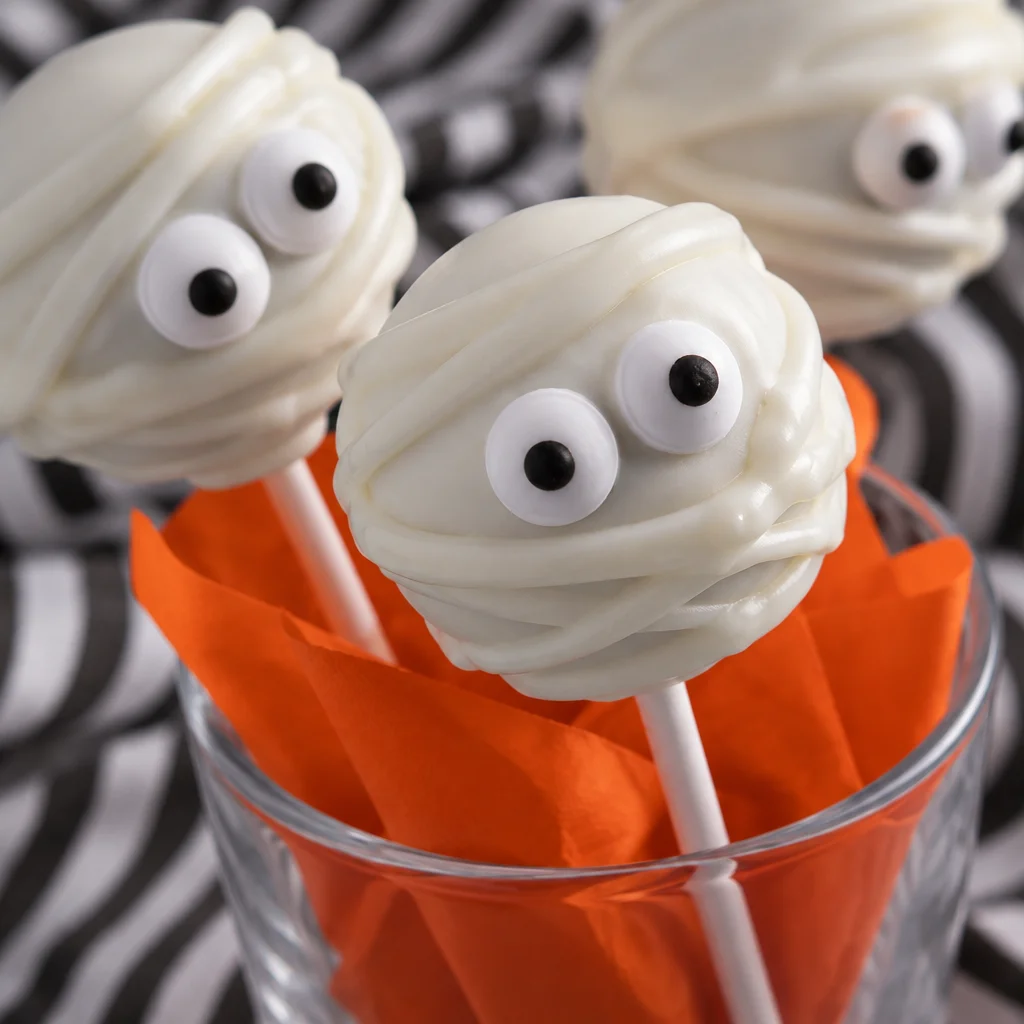
Halloween Cake Pops
Ingredients
Method
- Bake your cake according to package instructions, then let it cool completely.
- Crumble the cooled cake in a large bowl using clean hands or a fork. Gradually mix in frosting until the mixture feels like soft play dough.
- Roll the mixture into balls, about 1 to 1.5 tablespoons each, and place them on a baking sheet lined with parchment paper. Chill in the fridge for at least 1 hour or in the freezer for about 20 minutes.
- Melt a small amount of candy melts. Dip the tip of each cake pop stick into the melted coating, then insert it halfway into a chilled cake ball. Chill again for 10 to 15 minutes to set the stick.
- Melt your main candy melts in a deep cup or glass. Dip each cake pop straight down into the candy melts, ensuring they are fully covered. Lift and gently tap the wrist to let excess coating drip off.
- Immediately decorate the pops before the coating sets.
