
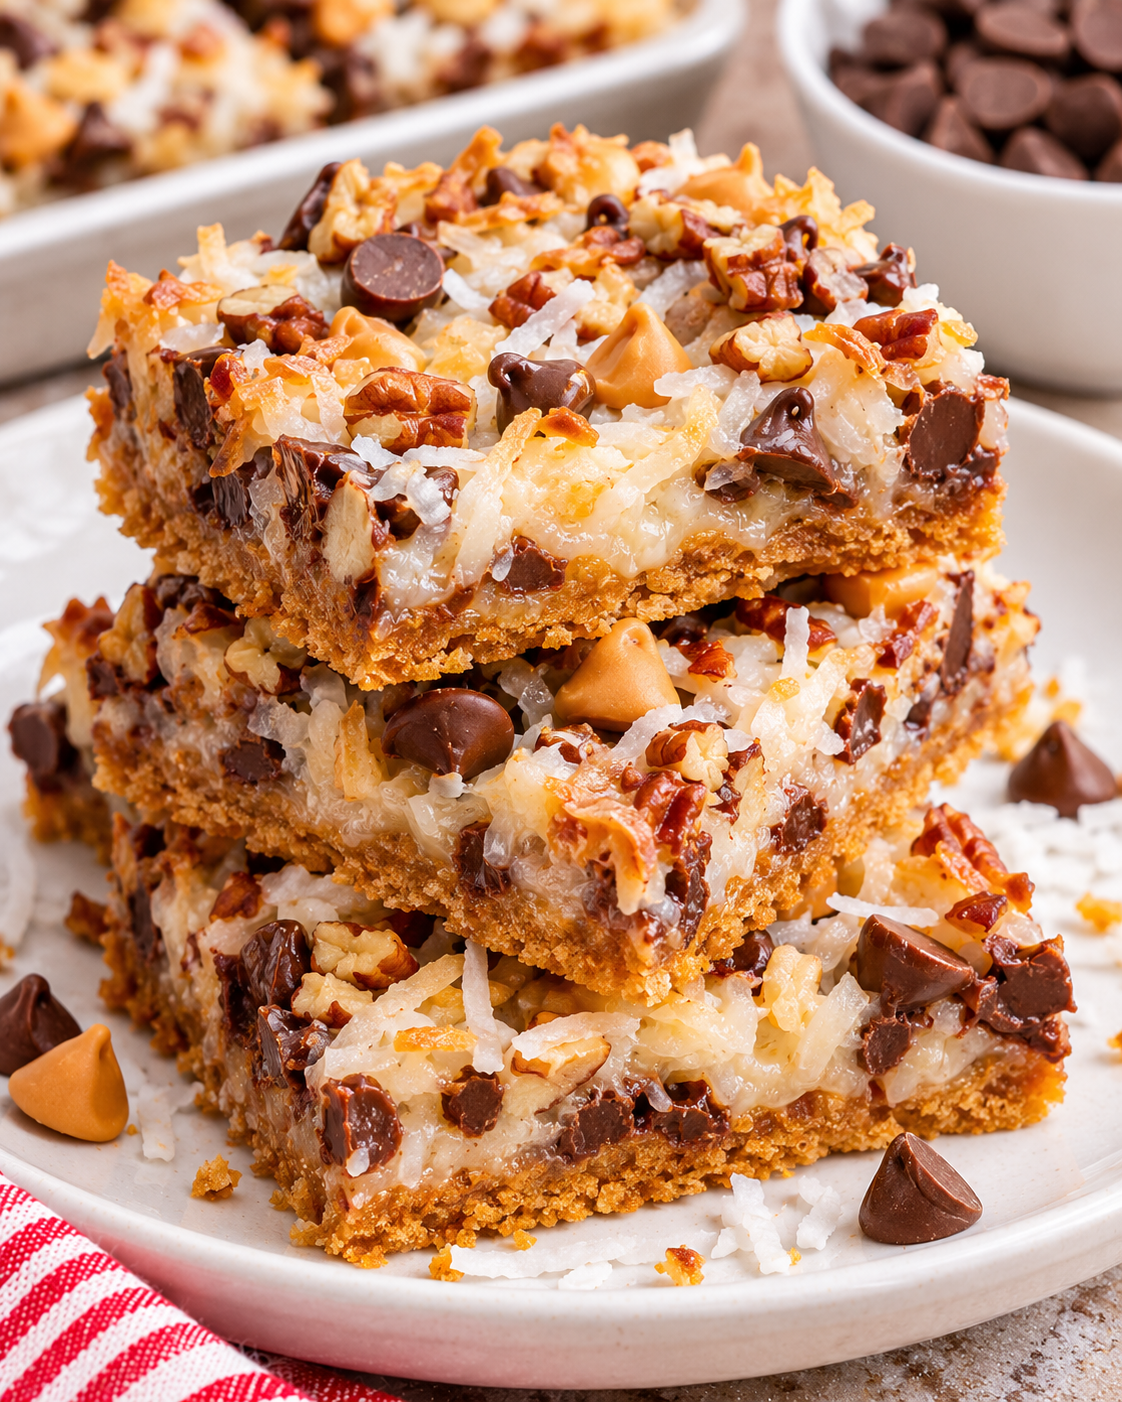
Magic Cookie Bars are my go to treat when I want something sweet but I do not want to babysit a mixer, chill dough, or fuss with frosting. You probably know the feeling, you need a dessert that looks like you tried, but your day is already full. These bars are rich, chewy, and a little crunchy in the best way, and they cut into tidy little squares that disappear fast. The fun part is how the layers do most of the work for you, so you just build and bake. If you are bringing something to a party, adding to a cookie tray, or just stashing a treat for later, this is a solid answer.
What Are Magic Cookie Bars?
Magic cookie bars are those classic layered dessert bars that bake into a single sliceable slab of goodness. People love them because the flavors stack up quickly, and once they cool you get that perfect mix of chewy, creamy, and crisp. The bottom is usually a crumb crust, the middle turns gooey and sweet as it bakes, and the top gets toasty and a little caramelized around the edges.
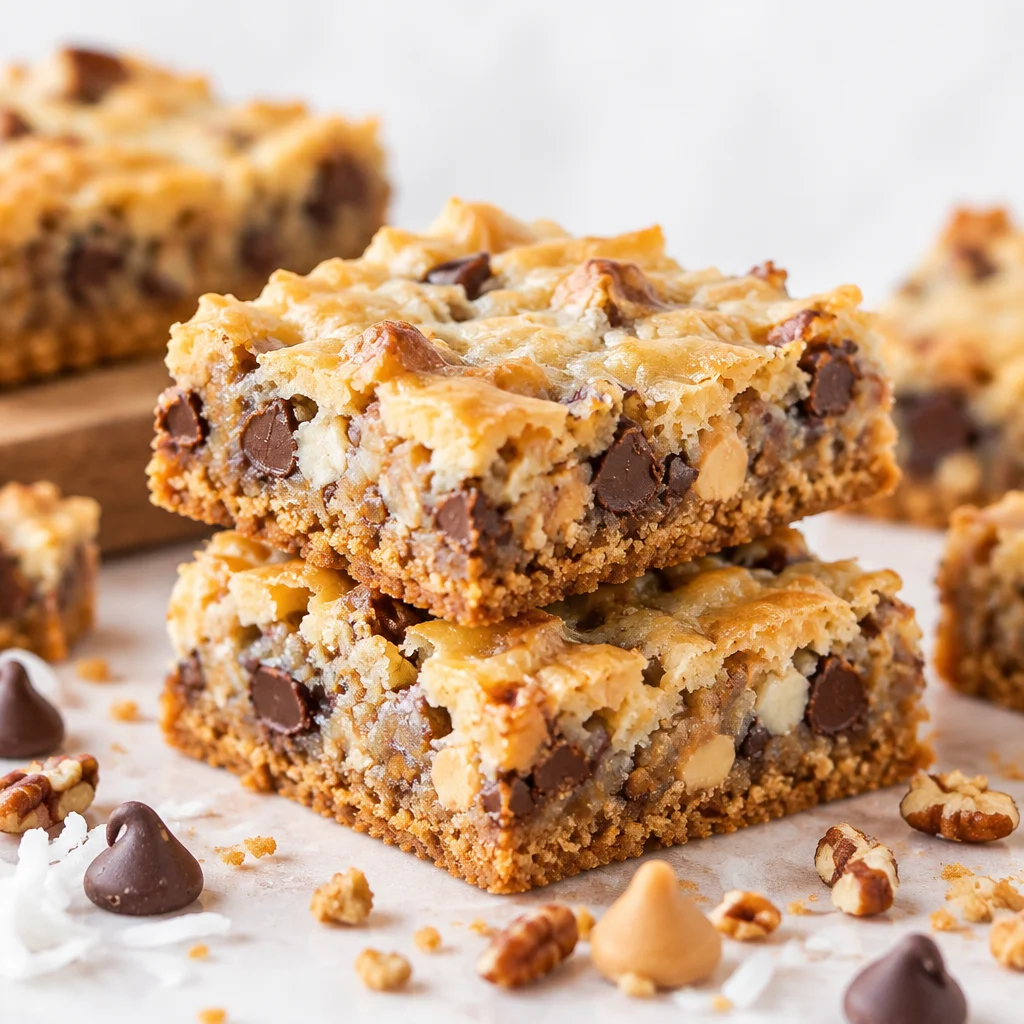
What makes this version feel distinctive is the balance. You want a crust that stays firm, a center that sets without turning dry, and toppings that toast without burning. When it works, each bite has little pops of chocolate and a mellow sweetness that is not flat. If you are the kind of person who likes a dessert that tastes even better the next day, this one is for you.
If you like having a quick visual guide, I keep this related page bookmarked because it is handy when I am explaining the layers to a friend: easy magic cookie bars and 7 layer bars recipe.
Magic bars vs seven-layer bars and Hello Dolly bars
You will hear different names tossed around, and it can get confusing. Magic bars is the umbrella name most people use. Seven layer bars is often used when the recipe clearly has seven distinct components layered in. Hello Dolly bars is another old school name you might see on handwritten recipe cards.
In real life, the vibe is similar across all three. Layer, bake, cool, slice. The exact toppings can change depending on the recipe card you are following, and that is totally fine. I always tell people to follow the ingredient list they trust, and do not force an extra layer just to match a name.
The Layers That Give Magic Bars Their Texture
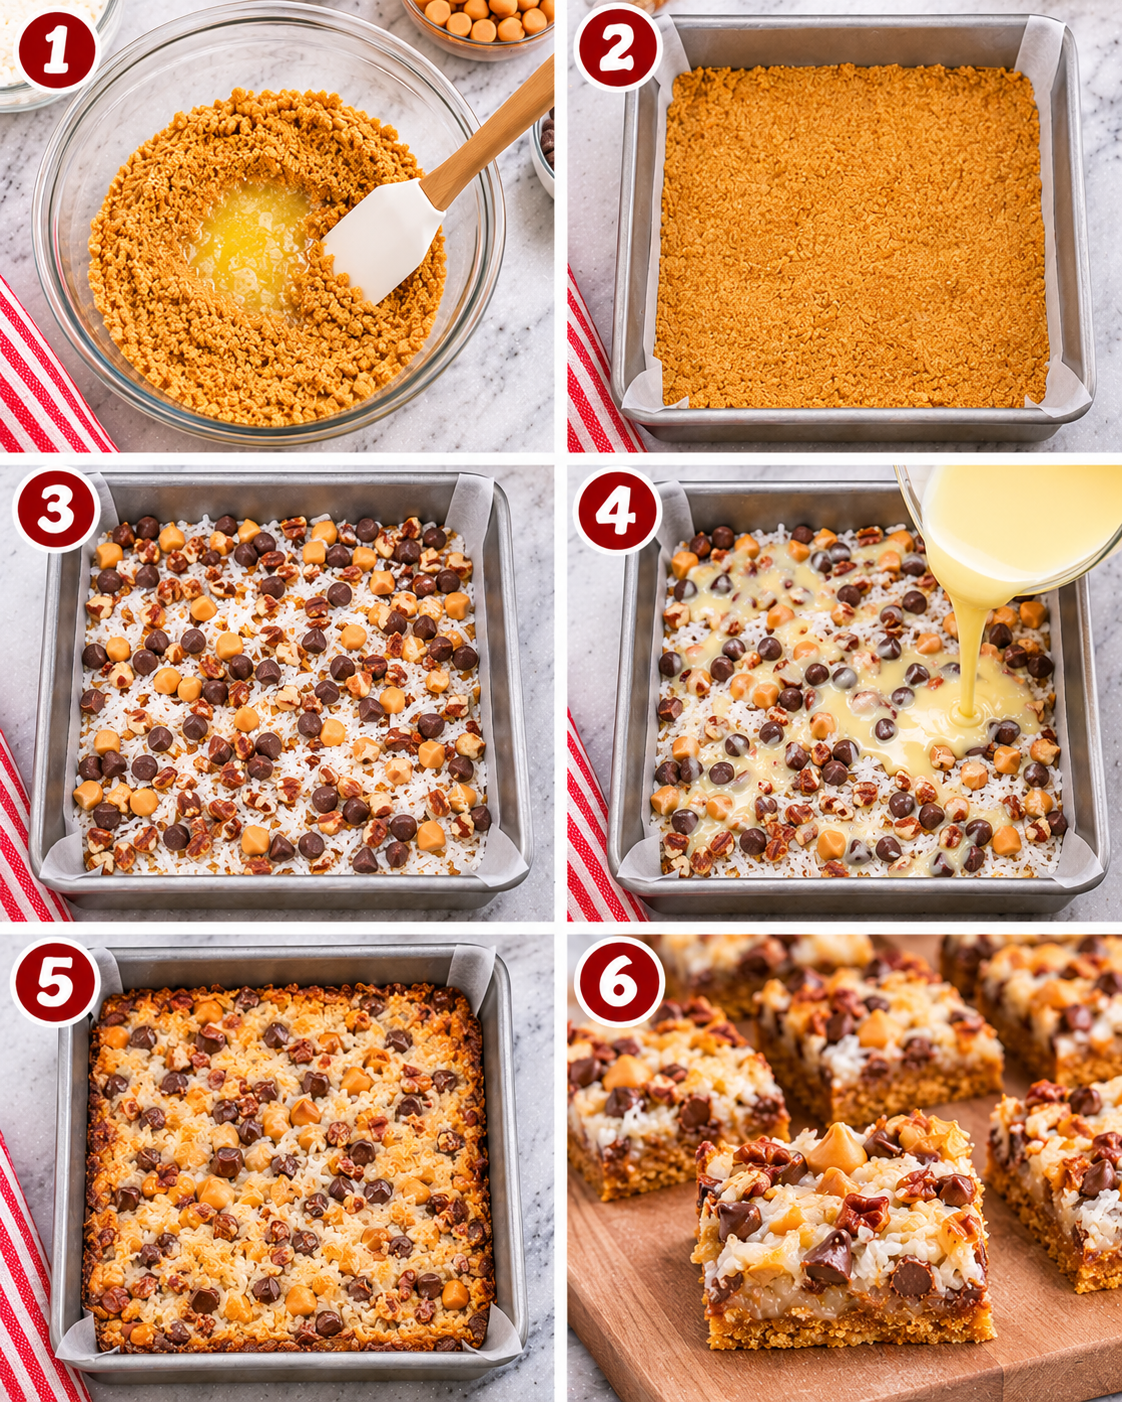
This dessert is basically a texture party. You have a firm base, then a sticky sweet layer that helps everything hold together, then toppings that melt and toast. The reason it feels so satisfying is that you get contrast in every bite.
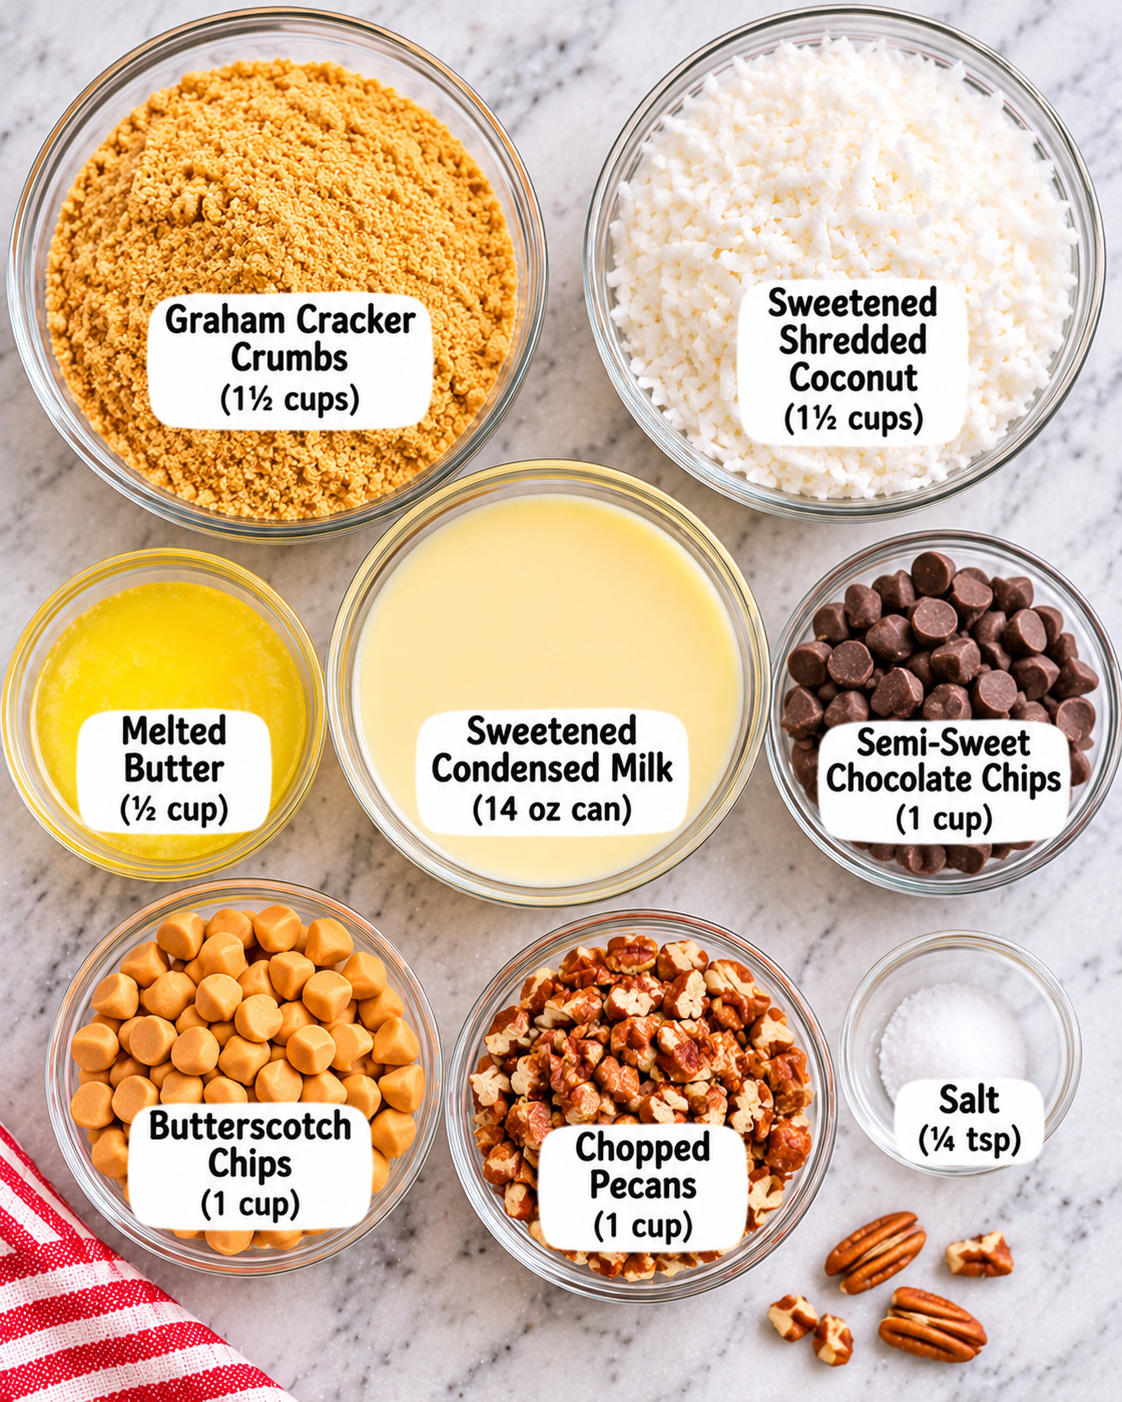
Here is what I pay attention to when I am building the layers, without repeating the exact ingredient amounts from the recipe card:
- Crust layer: press it down evenly so it bakes into a sturdy foundation.
- Sweet binder: this is what turns gooey and helps the toppings set into the bar.
- Chocolate and mix ins: spread them out so you do not get empty corners.
- Nutty or chewy toppings: these add crunch and keep the sweetness from feeling one note.
If you want another reference that stays close to this style, this link is a good one to browse before you bake: classic style magic cookie bars guide.
Tips for Neat Layers and Clean Slices
If you have ever cut bars too early and ended up with a gooey mess, you are not alone. The number one tip is simple: let them cool fully. Warm bars are delicious, but they are not ready to slice neatly.
A few more practical things that help a lot:
Line the pan if your recipe setup allows it. That little bit of overhang makes lifting and slicing so much easier. Also, press layers gently and evenly instead of packing them down like concrete. You want the bars to hold together, but you still want a pleasant bite.
When it is slicing time, use a sharp knife and wipe it between cuts. If you want super clean edges, chill the bars for a bit first. Not forever, just enough to firm them up so the knife glides through.
Avoiding Overbaked Edges and Underset Centers
This is the most common magic cookie bars issue I see: the edges get too dark while the middle is still too soft. A couple small tweaks usually fix it.
First, bake in the center of your oven, not too high or too low. Second, keep an eye on color more than time. You are looking for a light golden top, not deep brown. The topping should look set and toasty, and the center should not look wet or jiggly.
If your pan is dark metal, it can bake faster and brown more aggressively. In that case, check a few minutes early. If the top is browning too quickly, you can loosely lay foil over the top near the end so it finishes baking without scorching.
Making Ahead for Parties and Cookie Trays
These bars are a dream for parties because they travel well and they actually like a little rest time. If I am hosting, I bake them the day before and slice the day of. That gives the layers time to settle, and the flavor feels more blended.
I also like to cut them smaller than brownies. They are rich, so bite size squares make people happy and keep the tray looking full. If you are adding them to a cookie box, tuck them in paper liners so they do not stick to everything else.
If you are the kind of person who likes a quick scrollable format to share, this is a fun one: magic cookie bars web story.
Storing and Freezing Magic Cookie Bars
Once they are fully cooled, you can store magic cookie bars tightly covered at room temperature for a short stretch, or in the fridge if your kitchen runs warm. I personally like them slightly chilled because they cut cleaner and the texture gets extra fudgy.
For freezing, slice them first, then wrap individual squares. After that, stash them in a freezer bag or container. Pull one out when you want a treat, and let it sit on the counter for a bit. It is such an easy way to have dessert on standby.
“I made these for a school bake sale and they were the first thing gone. I froze a few for later and they tasted just as good a week after. Definitely keeping this in my regular rotation.”
Variations That Match the Recipe Card
I am a big fan of small swaps that do not mess with the basic structure. Think of it like keeping the same cozy sweater, just changing the accessories. If your recipe card includes specific mix ins, stick to that base, then adjust within the same general category.
Easy variation ideas that usually play nicely:
Chocolate: swap semi sweet for dark if you like a less sweet bar. You can also mix two types for a layered flavor.
Nuts: if your card calls for one kind, another similar nut usually works. Just keep the chop size close so everything bakes evenly.
Extra texture: a small handful of something crunchy on top can be great, as long as it is not so heavy that it blocks heat from reaching the center.
If you love that magical sweet and bready vibe in general, you might also like this quick read: 10 minute no oven bread magic. It is different, but it scratches that same easy comfort itch.
And if you want to compare another closely related version before you commit, here is another spot I send people to: simple layered magic cookie bars walkthrough.
Frequently Asked Questions
Are magic cookie bars the same as seven-layer bars?
They are very close. People often use the names interchangeably, but seven-layer bars usually implies a specific count of layers. If your recipe card has a different number, it is still totally fine to call them magic cookie bars.
Can magic cookie bars be frozen?
Yes, they freeze really well. Slice first, wrap tightly, and freeze. Thaw on the counter for a bit, or eat them slightly chilled if you like a firmer bite.
Why are my magic bars falling apart?
The two big reasons are not pressing the crust enough, or cutting before the bars are fully cool. Let them cool completely, and consider chilling before slicing for cleaner squares.
Do I have to refrigerate them?
Not always. If your kitchen is cool, room temp storage is fine for a short period. If it is warm or humid, the fridge helps them stay firm and neat.
How do I know they are done baking?
Look for a lightly golden top and a center that looks set, not wet. They will firm up more as they cool, so do not wait for them to feel hard in the oven.
A sweet, simple bake you will actually make again
When you need a reliable dessert that feels classic, magic cookie bars really deliver. You get big flavor with a low effort layering situation, and they are perfect for sharing. Let them cool, slice them neatly, and watch how fast they vanish from the plate. If you have been needing a bake sale winner or an easy weekend treat, give this one a try and keep it in your back pocket.
Magic Cookie Bars
Ingredients
Method
- Preheat the oven to 350°F (175°C).
- In a bowl, combine the graham cracker crumbs and melted butter.
- Press the mixture evenly into the bottom of a greased 9×13 inch baking pan.
- Evenly pour the sweetened condensed milk over the crust.
- Sprinkle the chocolate chips, shredded coconut, and chopped nuts on top.
- Bake in the preheated oven for 25-30 minutes or until the topping is golden brown.
- Let the bars cool completely before slicing to achieve neat edges.
- For best slicing results, refrigerate for an hour before cutting.