
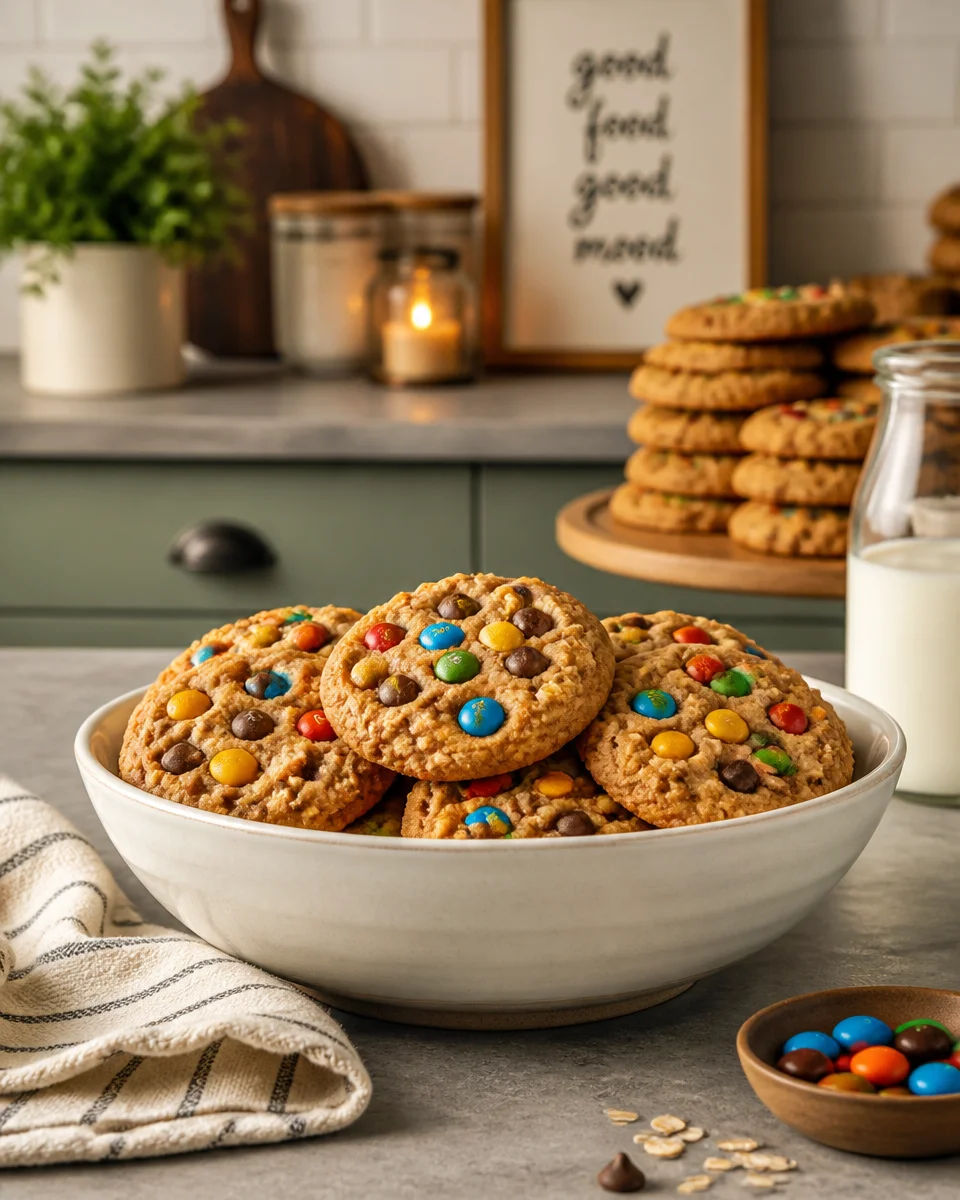
Easy Monster Cookies No Flour Peanut Butter is my answer for those nights when you want something sweet, chewy, and a little nostalgic, but you do not want to deal with flour all over the counter. I started making these when I realized I was constantly out of flour, yet I always had peanut butter sitting in the pantry. They come together fast, they smell amazing, and they hit that perfect balance of salty and sweet. If you are feeding kids, friends, or just yourself in cozy sweatpants, these cookies totally understand the assignment. Let me walk you through the version I make on repeat at home.
What Are Monster Cookies?
Monster cookies are basically the fun, everything-goes cookie. Think peanut butter cookie meets oatmeal cookie, then add chocolate and colorful candy pieces. They are called “monster” because they are packed with mix ins, and they tend to be big, chunky, and extra satisfying.
What makes this version special is that it is flourless. The peanut butter and oats do the heavy lifting, so you still get a sturdy cookie that is chewy in the center. If you like a cookie that feels like a treat and a snack at the same time, you are in the right place.
Also, if peanut butter desserts are your thing, you will probably like these too: easy no bake peanut butter bars. I make those when I want a dessert that feels like it took effort, but did not.
Here’s What You’ll Love About These Flourless Monster Cookies
I am not going to overpromise, but these cookies solve a lot of common cookie problems. No flour to measure, no chilling time required if you are in a hurry, and they bake up with that classic chewy bite.
Here is why I keep coming back to them:
- No flour needed, so they are naturally gluten free if you use certified gluten free oats.
- One bowl energy if you mix smart and do not overthink it.
- Customizable with whatever you have: chocolate chips, peanut butter chips, chopped nuts, or extra candy.
- Kid friendly because the colors and the chocolate make everyone smile.
- Perfect texture when you want chewy edges and a soft middle.
Little personal note: I have served these at casual get togethers and people always ask for the recipe. One friend literally texted me the next morning asking if I had any left, which is the highest compliment in my book.
“I made these for a school bake sale and they were the first cookies to disappear. Everyone thought they had flour, and no one believed me when I said they were flourless.”
If you are building a holiday cookie box later in the year, you could pair these with something buttery and crisp like buttery Christmas spritz cookies. Totally different vibe, but they look so good together.
How to Make Monster Cookies
This is the part where I remind you that cookies do not need to be complicated. You are basically mixing, scooping, and baking. The big thing is using a peanut butter you actually like, because the flavor really shines here.
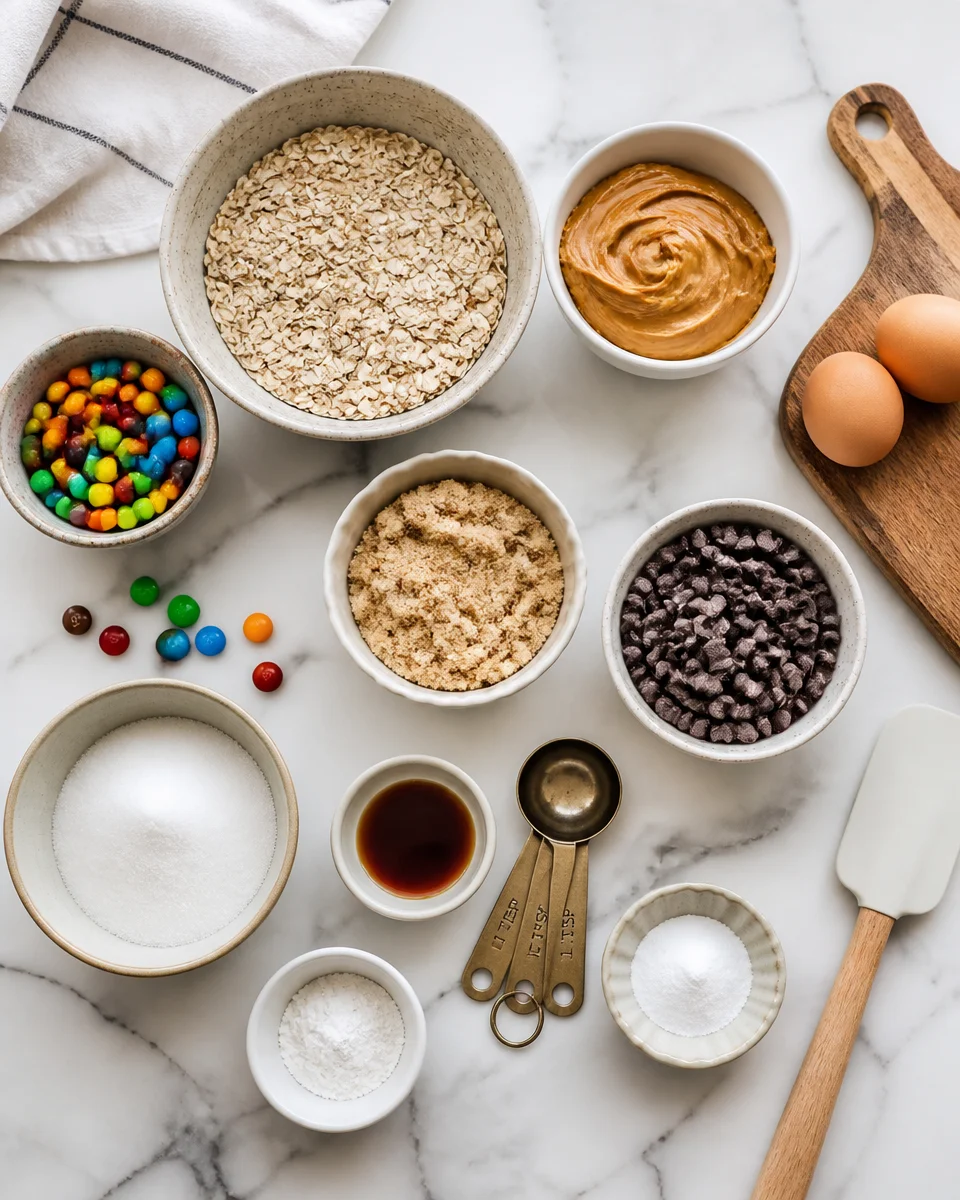
Ingredients you will need
- 1 cup creamy peanut butter
- 1 cup packed brown sugar
- 2 large eggs
- 1 teaspoon vanilla extract
- 1 teaspoon baking soda
- 2 cups old fashioned oats
- 1 cup chocolate chips
- 1 cup candy coated chocolate pieces
- Optional: pinch of salt if your peanut butter is unsalted
Step by step directions
1) Preheat and prep. Heat your oven to 350 F. Line a baking sheet with parchment paper. You can use a silicone mat too, but parchment is my go to.
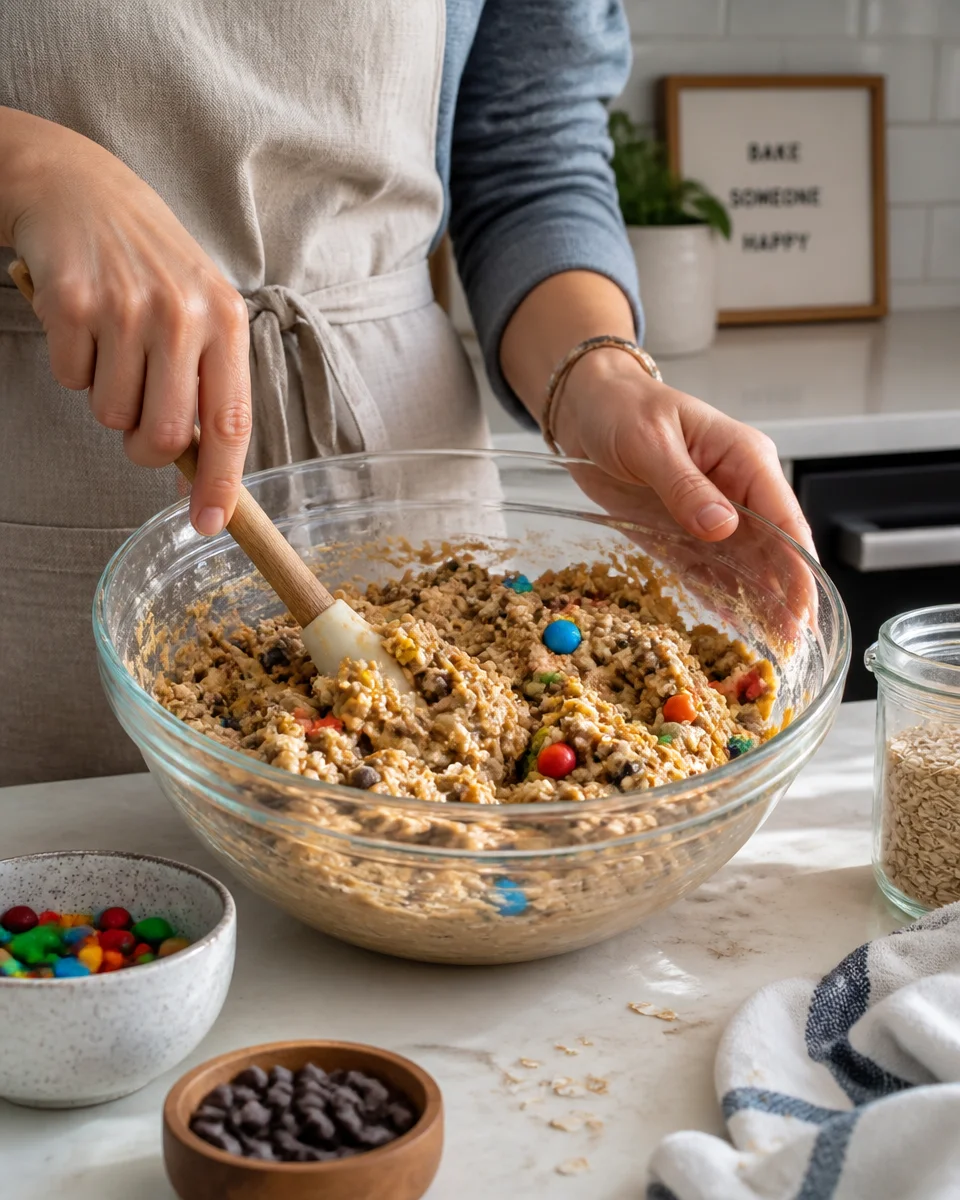
2) Mix the wet base. In a large bowl, stir together peanut butter and brown sugar until it looks smooth and thick. Add eggs and vanilla and stir again until it comes together. It will look glossy and a little sticky.
3) Add baking soda, then oats. Sprinkle in the baking soda and mix. Then add the oats and stir until the dough looks evenly combined. It should be scoopable, not runny.
4) Fold in the good stuff. Add chocolate chips and candy pieces. Mix gently so the candy does not crack too much.
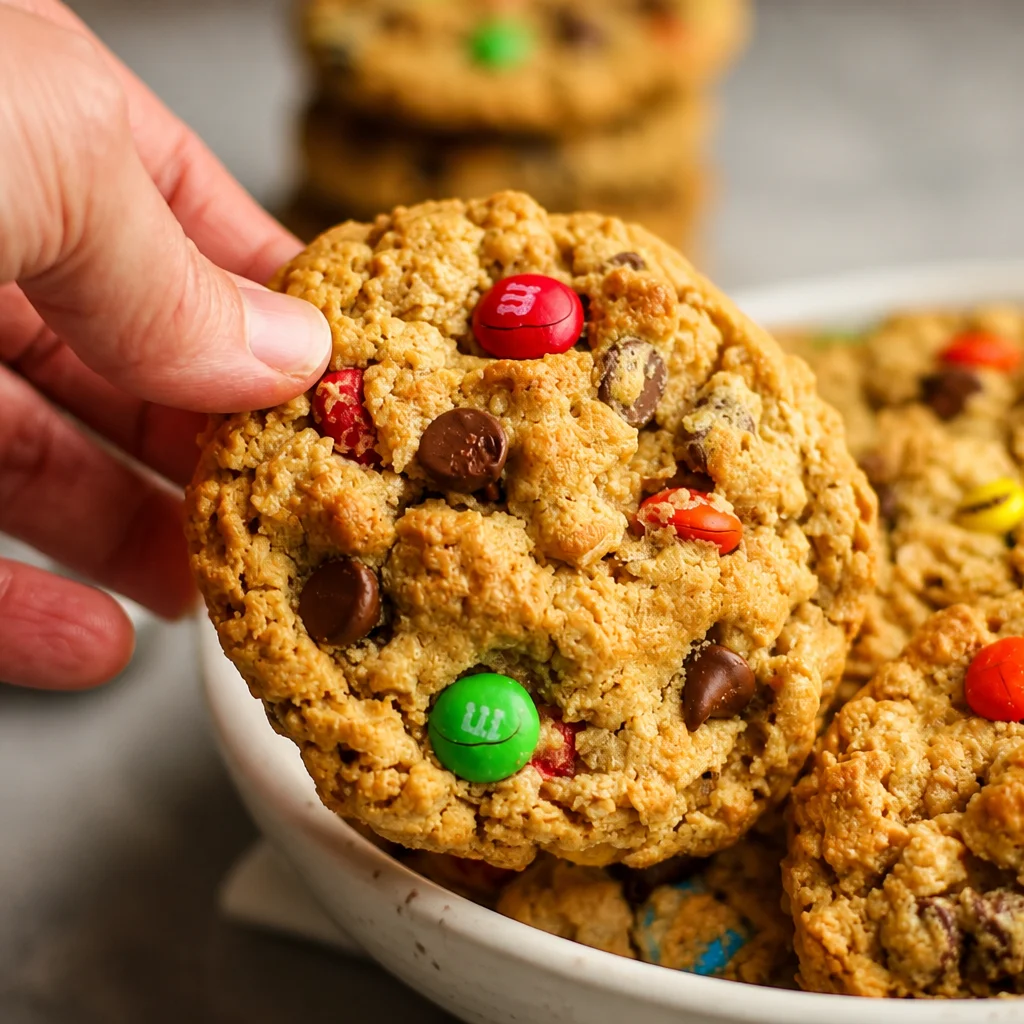
5) Scoop and bake. Scoop dough into balls, about 2 tablespoons each, and place on the baking sheet with space between. Bake for about 9 to 11 minutes. They should look set around the edges but still soft in the center.
6) Cool. Let them cool on the baking sheet for 5 minutes, then move to a rack if you have one. They firm up as they cool, so try not to overbake them.
If you love peanut butter cookies in general, you might also want to save this one for later: soft cake mix peanut butter cookies. That recipe is a lifesaver when you want something even more low effort.
3 Success Tips
These are simple cookies, but a few small details make them really good instead of just fine.
My no stress tips
1) Do not overbake. This is the biggest one. Pull them when the edges look set. The centers should still look a bit soft. If you wait for the tops to look totally dry, you might end up with a tougher cookie.
2) Use old fashioned oats if you can. Quick oats work, but old fashioned oats give that hearty chew that makes monster cookies feel special.
3) Watch your peanut butter type. Super oily natural peanut butter can work, but the dough may feel looser. If your peanut butter is very runny, stir it well first and consider chilling the dough for 20 minutes so scooping is easier.
And if you are in a cookie mood and want something totally different but still fun, I have a soft spot for chocolate chip cannoli cookies. They are not flourless, but they are a great “try something new” bake.
Storage and Freezing Instructions
These cookies store surprisingly well, which is great because sometimes you want just one cookie after lunch for the next few days. Or two. No judgment.
Room temperature: Store in an airtight container for about 4 to 5 days. If your kitchen is warm, keep them out of direct sunlight so the chocolate does not get weird and melty.
Fridge: You can refrigerate them, but they get a bit firmer. I usually just let one sit on the counter for 10 minutes before eating.
Freezer: Freeze baked cookies in a freezer bag or container for up to 2 months. I like to separate layers with parchment so they do not stick together. You can also freeze dough balls and bake from frozen, just add 1 to 2 minutes to the bake time.
If you are freezing a mix of cookies for gifting, these pair nicely with something crumbly like snowball cookies. The contrast is so good.
Common Questions
Can I make Easy Monster Cookies No Flour Peanut Butter without oats?
Oats are a big part of the structure here, so I do not recommend skipping them completely. If you need an oat free cookie, it is better to use a different recipe designed for that.
Are these cookies actually gluten free?
They can be. Use certified gluten free oats and double check your candy and chocolate labels.
Why did my cookies spread too much?
Usually it is from very oily peanut butter or warm dough. Stir your peanut butter well, and if the dough feels loose, chill it for 20 to 30 minutes before baking.
Can I use crunchy peanut butter?
Yes. It gives extra texture and I honestly love it. Just know the cookies will look a bit more rustic.
How do I know when they are done?
Look for set edges and a soft center. They should not look raw, but they also should not look dry all over.
A Sweet Little Wrap Up
If you need a treat that feels cozy and fun, Easy Monster Cookies No Flour Peanut Butter is a solid go to. You get the peanut butter flavor, the chewy oats, and those pops of chocolate in every bite, with zero flour stress. If you want to compare methods or see another trusted take, I have also enjoyed reading Flourless Monster Cookies (Peanut Butter) – Sally’s Baking Addiction because it is always helpful to see how different kitchens do it. Bake a batch, stash a few in the freezer, and tell me what mix ins you used because that is the best part. 
Monster Cookies
Ingredients
Method
- Preheat your oven to 350°F (175°C) and line a baking sheet with parchment paper.
- In a large bowl, mix together the creamy peanut butter and packed brown sugar until smooth.
- Add the eggs and vanilla extract, mixing until well combined.
- Add in the baking soda and old fashioned oats, stirring until the mixture is evenly combined.
- Fold in the chocolate chips and candy coated chocolate pieces gently.
- Scoop the dough into balls (about 2 tablespoons each) and place them on the lined baking sheet with space between each.
- Bake for 9 to 11 minutes, until the edges are set but the centers are still soft.
- Let the cookies cool on the baking sheet for 5 minutes before transferring them to a wire rack to cool completely.