
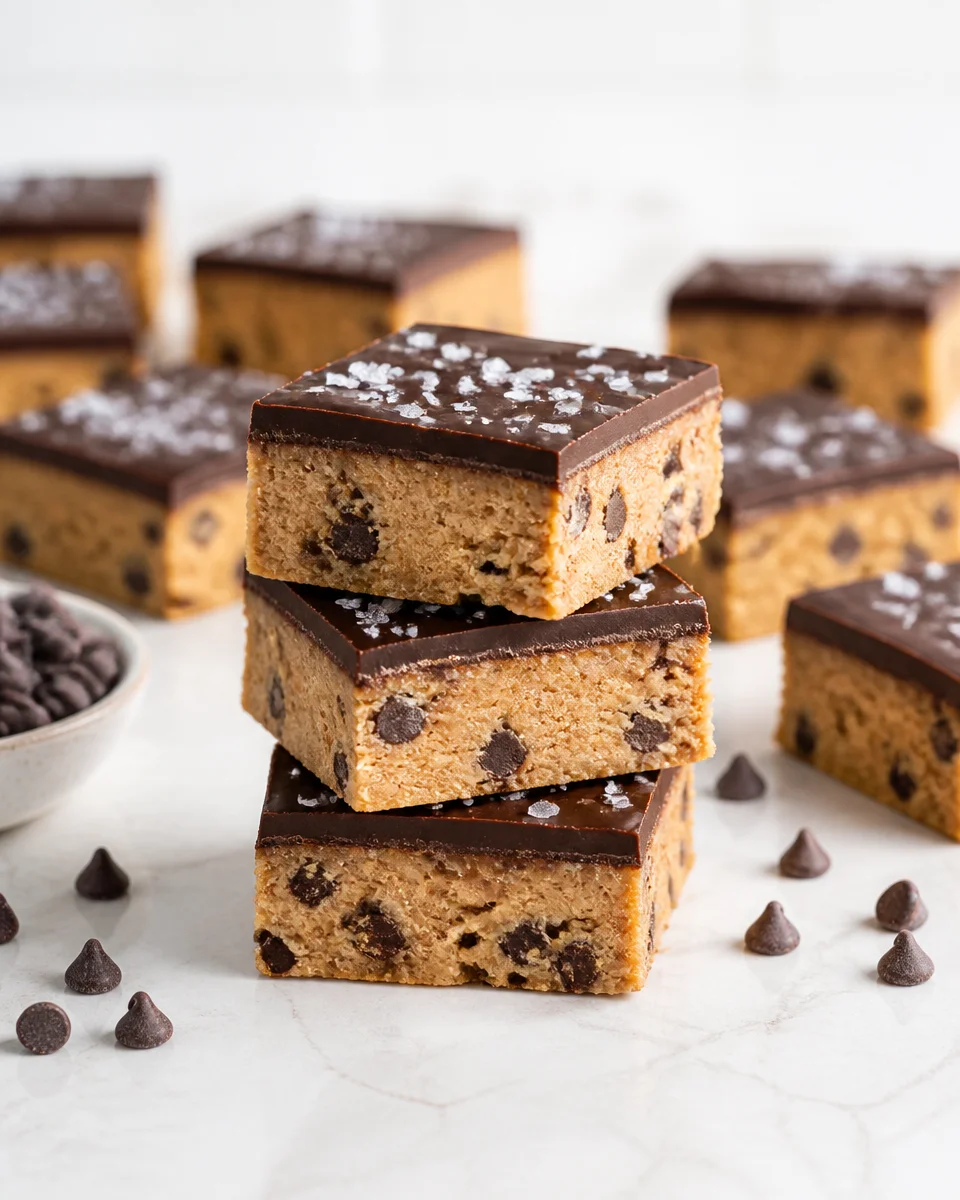
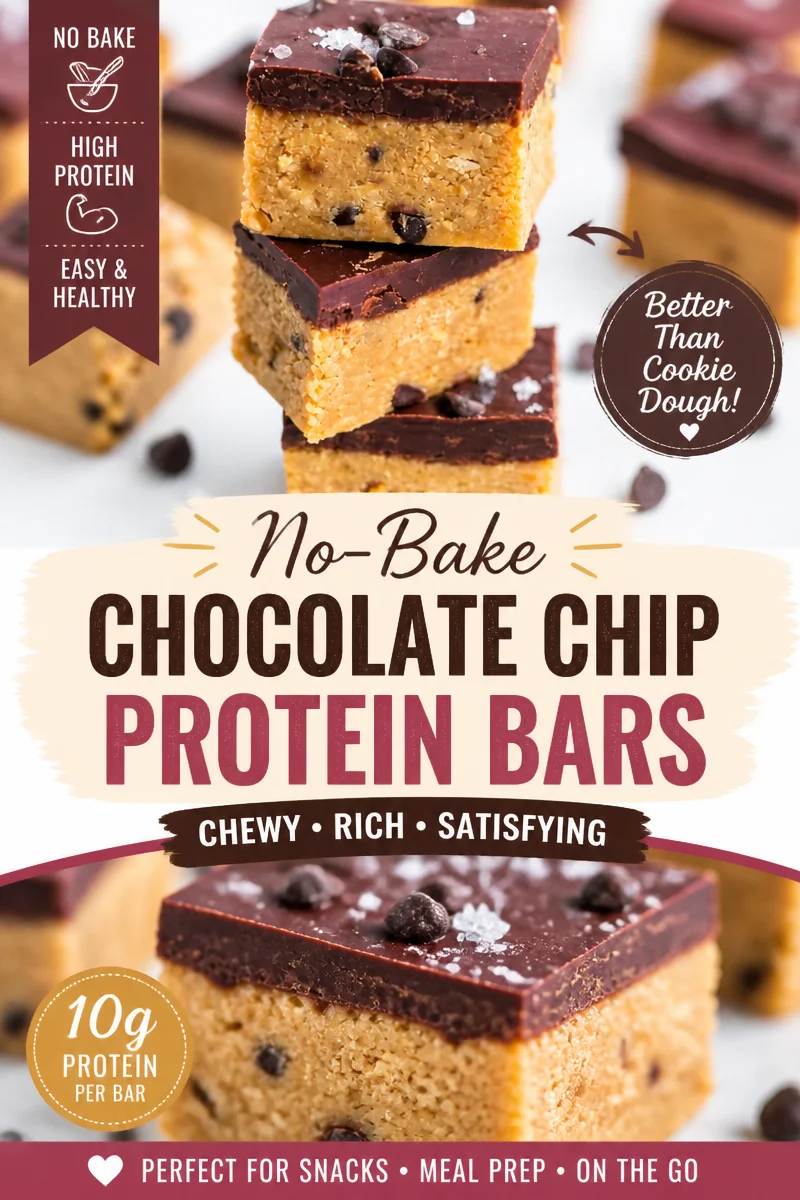
Easy No Bake Peanut Butter Bars — 3 Ingredient Dessert is my go to move when I need something sweet fast and I do not want to turn on the oven. You know those days when dinner runs long, the sink is full, and someone still asks, “Do we have dessert?” Yeah, this is for that moment. These bars taste like a peanut butter cup met an oat bar and decided to be best friends. They are rich, a little salty, and honestly kind of addictive. If you can stir and press a mixture into a pan, you can make these.
The Four Ingredients
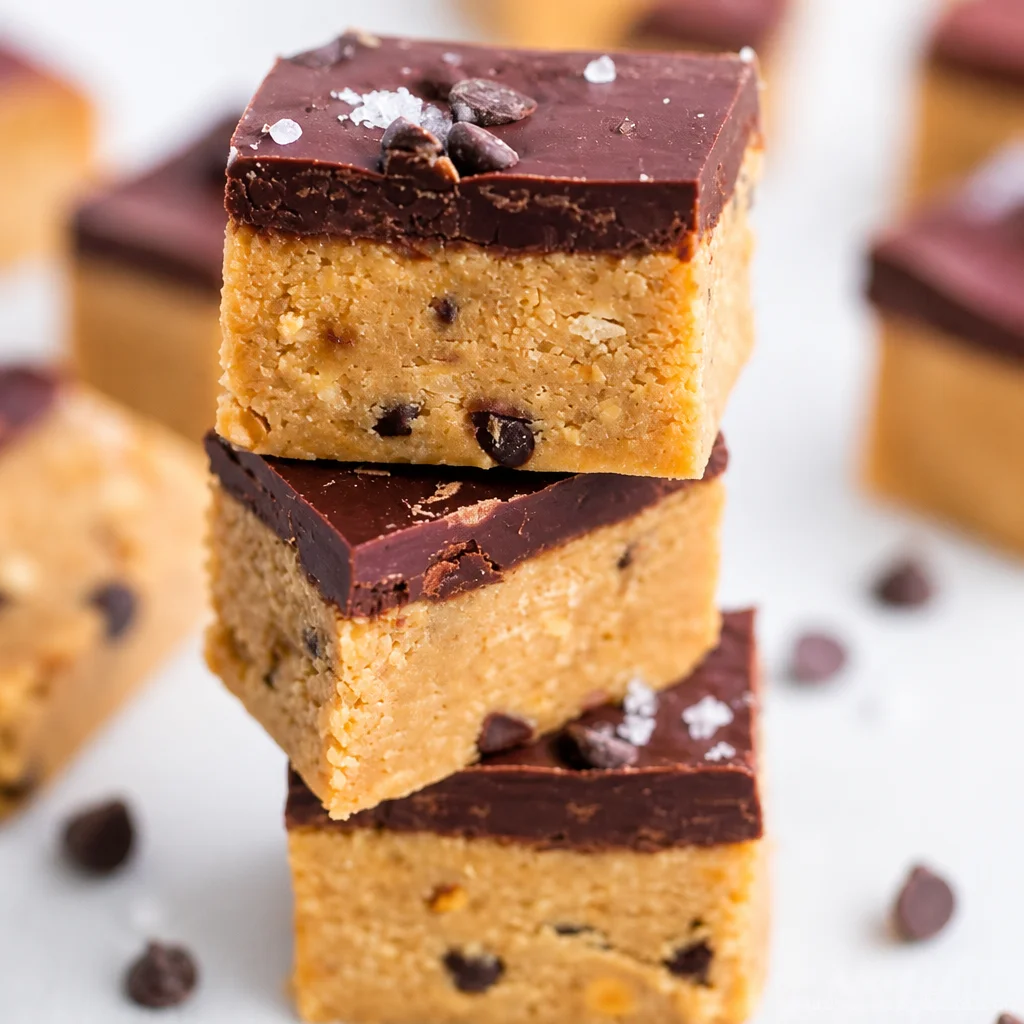
I know the title says 3 ingredients, and that is totally true for the base. But I am adding one optional ingredient that makes the bars feel extra finished: chocolate on top. If you want to keep it strictly 3, you can skip the topping and they are still delicious.
Main keyword: Easy No Bake Peanut Butter Bars — 3 Ingredient Dessert
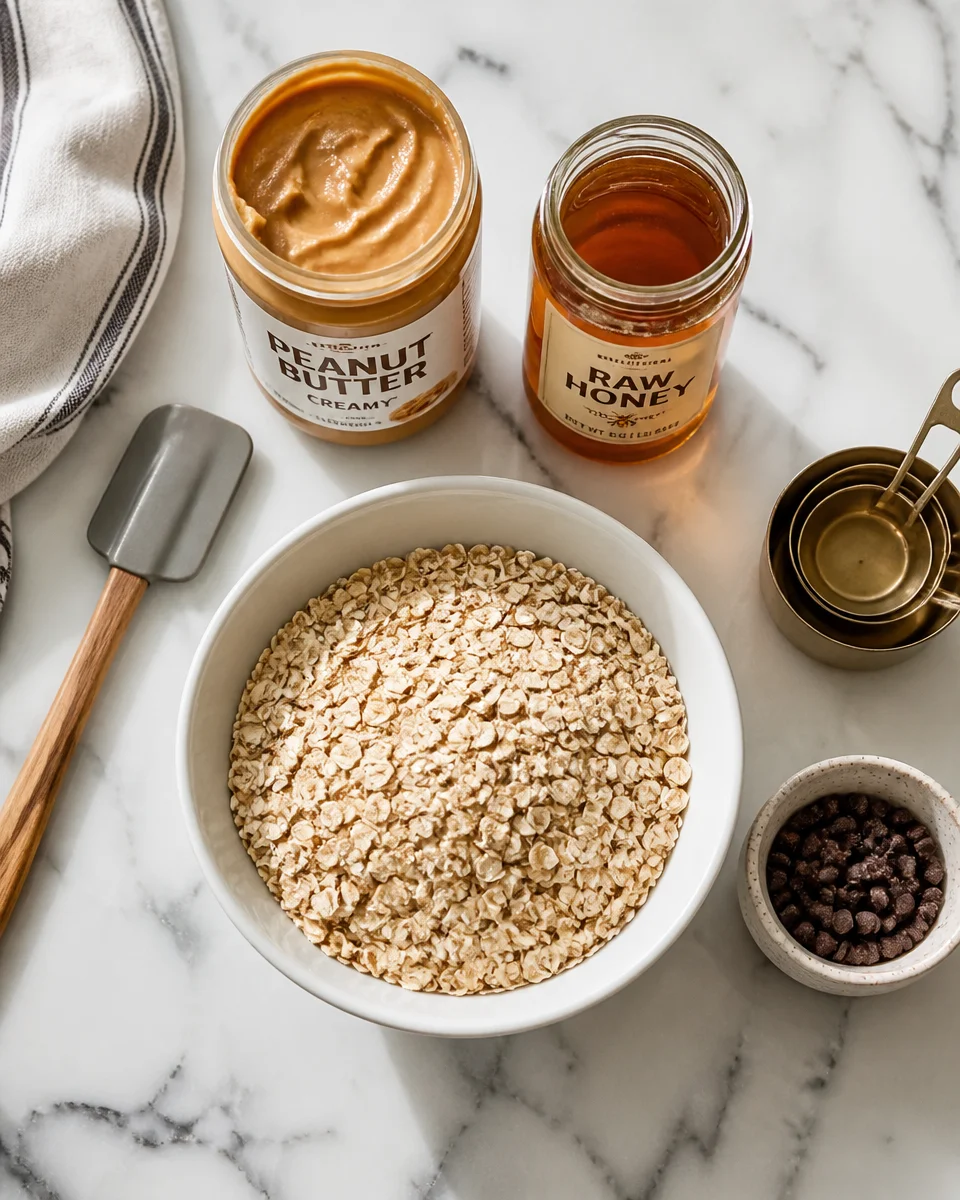
- Peanut butter: Creamy works best for that smooth, candy bar texture. Natural peanut butter can work, but it tends to be looser and a bit oily, so the bars may set softer.
- Honey: This is your sweetener and the glue that helps everything hold together.
- Quick oats: These soften up nicely without baking and make the bars feel hearty without being dry.
- Optional chocolate chips: Melted and spread on top for that classic peanut butter and chocolate combo.
If you are on a big peanut butter kick, you might also like these cafeteria style classics. I have a soft spot for easy lunch lady peanut butter bars when I want something thicker and super nostalgic.
How to Make Peanut Butter Bars
This is the part I love, because it is basically mix, press, chill, done. I usually make these while my coffee is brewing and then I feel like I have my life together for at least ten minutes.
What you will need
- Mixing bowl
- Measuring cups
- 8×8 inch pan or similar
- Parchment paper (makes lifting out way easier)
- Spoon or spatula
Simple directions
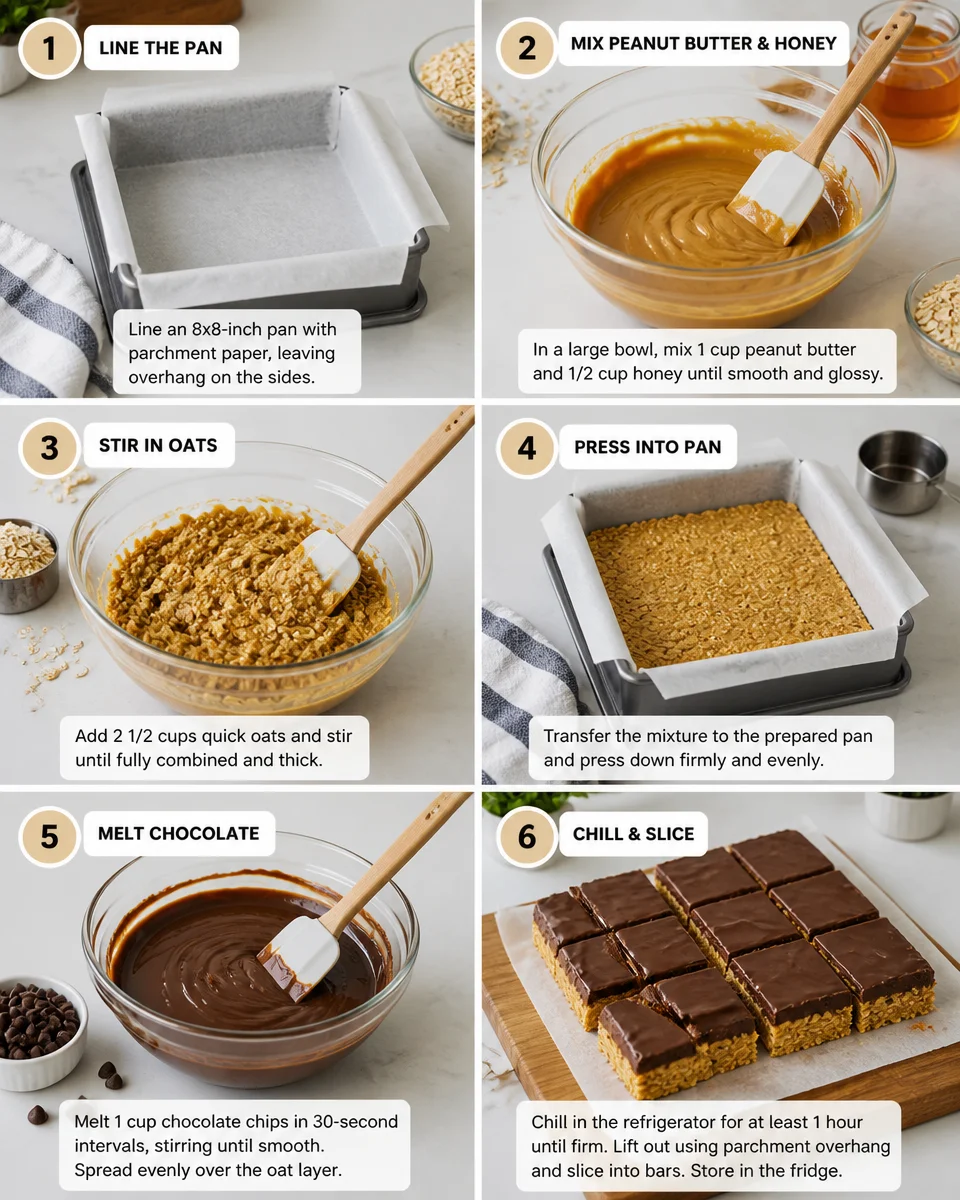
1) Line your pan with parchment paper. I leave a little overhang so I can lift the bars out later.
2) In a bowl, stir together peanut butter and honey until it looks smooth and glossy.
3) Add the quick oats and stir until everything is evenly coated. It will look thick, like cookie dough that wants to stick to your spoon.
4) Press the mixture firmly into the pan. This part matters. Pressing hard helps the bars hold together when you slice them.
5) Optional chocolate top: melt chocolate chips in short bursts in the microwave, stir until smooth, then spread over the top.
6) Chill for at least 1 to 2 hours, then slice into bars.
That is it. And if you are into no bake desserts in general, you should absolutely peek at this easy icebox cake no bake graham cracker dessert. It is another low effort, high reward situation.
Tips for Making No Bake Peanut Butter Oat Squares
I have made these enough times to know the little things that can make or break the texture. Nothing complicated, just a few real life tips.
Press firmly: I know I already said it, but it is the big one. If the mixture is loosely packed, the bars can crumble when you cut them.
Use quick oats: Old fashioned oats are a bit too chewy here and do not soften as evenly without baking. Quick oats give you that tidy, sliceable bite.
Adjust if your peanut butter is runny: Some brands are thinner. If your mixture feels too soft to press, add a couple extra tablespoons of oats and stir again.
Salt helps: If your peanut butter is unsalted, a tiny pinch of salt makes the flavor pop. It keeps the sweetness from feeling flat.
Cut after chilling: I have tried to rush this. I always regret it. Let the fridge do its job so you get clean slices.
When I want to change things up but still keep it simple, I make a quick batch of 2 ingredient peanut butter fudge too. It is great for gifting or sneaking from the fridge when nobody is looking.
“I made these for a school potluck and they were the first dessert gone. Three people asked me for the recipe, and my kid now requests them weekly.”
How to Freeze Peanut Butter Bars
Freezing is honestly the secret weapon with this recipe. I like making a batch on Sunday, freezing half, and then pulling a few pieces out during the week when the sweet cravings hit.
Here is how I do it so they do not turn into one giant frozen slab:
1) Chill the bars in the fridge first until set, then slice them.
2) Lay the slices on a plate or small tray in a single layer and freeze for about 30 to 60 minutes.
3) Once firm, transfer to a freezer bag or container. I put parchment between layers so they do not stick.
4) Label them. Future you will be grateful.
They keep well in the freezer for about 2 months. To eat, I usually let one sit at room temp for 10 to 15 minutes. They are also weirdly good slightly frozen, kind of like a chewy candy bar.
Also, if you are building a whole no bake dessert table, this easy chocolate lasagna no bake layered dessert is a total crowd pleaser and looks like you worked way harder than you did.
Add-In Ideas
This is where you can make the recipe feel like your own without messing up the basic method. The base is solid, so small add ins are easy.
Some favorites from my kitchen:
Mini chocolate chips mixed into the oat layer for little bursts of chocolate.
Chopped peanuts for extra crunch and a more peanutty bite.
Shredded coconut if you like that toasted coconut vibe. Even a couple tablespoons changes the whole mood.
Vanilla extract just a splash makes the bars smell amazing.
Cinnamon a pinch makes them taste a little cozy, especially in fall.
If you are serving these with coffee, try topping your drink with homemade foam. This cold foam recipe easy 3 ingredient coffee topping is such a fun little add on and makes an afternoon snack feel like a treat.
Common Questions
Can I really make these with only 3 ingredients?
Yes. Peanut butter, honey, and quick oats are the full base. The chocolate topping is optional, but it does make them feel extra dessert like.
Why are my bars crumbly?
Usually it is because the mixture was not pressed firmly enough, or because there are too many oats. Next time, press harder and reduce oats slightly, or add a bit more peanut butter.
Can I use maple syrup instead of honey?
You can, but the bars may set a little softer. Honey is thicker and helps bind better. If you use maple syrup, add a spoonful or two more oats if the mixture seems loose.
Do I have to refrigerate them?
I recommend it. They slice cleaner and hold their shape better. You can leave them out for a bit for serving, but store them in the fridge for best texture.
Are these good for lunchboxes?
Yes, especially if they are kept cool. I wrap individual bars and keep them in the fridge overnight so they are firm for the morning.
A sweet little wrap up
If you need a fast treat that tastes like you planned ahead, Easy No Bake Peanut Butter Bars — 3 Ingredient Dessert is the answer. You get that rich peanut butter flavor, a chewy oat bite, and the option to add chocolate if you are feeling it. I love that you can chill them, freeze them, and snack on them all week. For more inspiration, check out No Bake Peanut Butter Bars (Naturally Gluten Free) and this similar idea for 3 Ingredient No Bake Peanut Butter Oat Squares | Cookies and Cups. Go make a batch, slice them up, and do not be surprised if they disappear faster than you expected.
Easy No Bake Peanut Butter Bars
Ingredients
Method
- Line an 8×8 inch pan with parchment paper, leaving an overhang for easy removal later.
- In a mixing bowl, stir together peanut butter and honey until smooth and glossy.
- Add the quick oats and stir until everything is evenly coated, resembling thick cookie dough.
- Press the mixture firmly into the prepared pan, ensuring it is compact to prevent crumbling.
- In a microwave-safe bowl, melt chocolate chips in short bursts, stirring until smooth. Spread over the pressed mixture.
- Chill in the refrigerator for at least 1 to 2 hours until set.
- Once set, lift the bars out using the parchment overhang and slice into squares.