
Easy Homemade Hot Pocket Cheese Ham Frozen is basically my answer to those nights when everyone is hungry, nobody wants a big production, and the freezer is looking a little too empty. I started making these after buying one too many boxed versions that tasted kind of flat and left me still hungry. These come out warm, cheesy, and actually filling, plus you can stash a bunch in the freezer for later. If you have kids, roommates, or just future hungry you to feed, this recipe is such a win. And honestly, it is the kind of snack that feels like a little comfort food hug. 
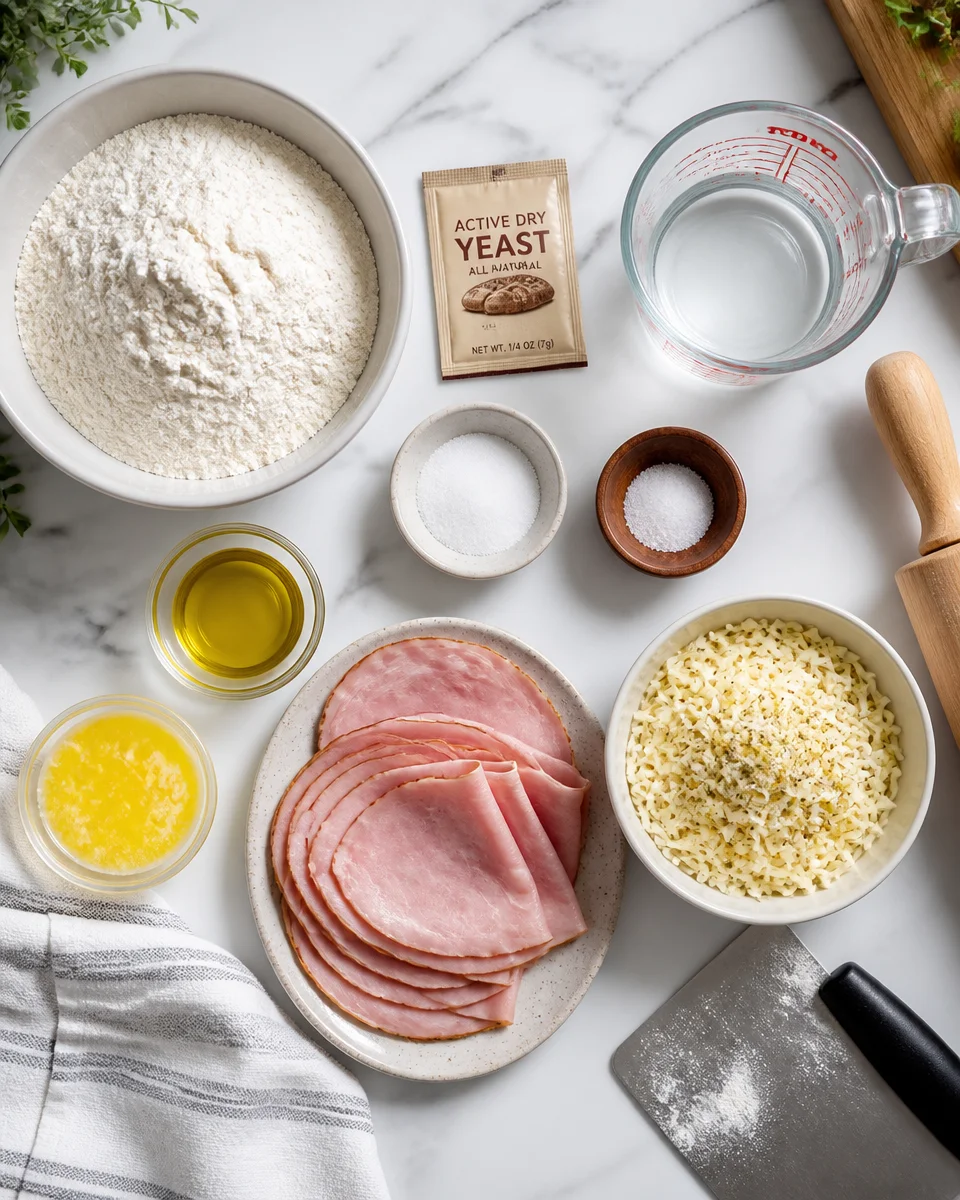
Homemade Dough Ingredients
I keep the dough simple and forgiving. You do not need fancy bread skills, and you definitely do not need special equipment. If you can stir and roll, you are good.
Here is what I use for my pocket dough. It makes a soft, sturdy crust that bakes up golden and holds the filling without splitting.
- All purpose flour (about 3 cups, plus extra for dusting)
- Active dry yeast (1 packet or 2 and 1/4 teaspoons)
- Warm water (about 1 cup, warm like bath water, not hot)
- Sugar (1 tablespoon, just to wake up the yeast)
- Salt (1 teaspoon)
- Olive oil or melted butter (2 tablespoons)
- Optional: garlic powder or Italian seasoning if you want a little extra flavor
If you are new to yeast, here is the quick tip: if the water is too hot, it can kill the yeast. I aim for warm and comfortable on my wrist. After 5 to 10 minutes, it should look foamy on top. If it does not foam, the yeast might be old.
While we are talking cheese and comfort food, if you like quick party style snacks, my other go to is this easy crack dip with hot sausage and cream cheese. Same cozy vibe, different format.
Overview: How to Make Homemade Ham & Cheese Pockets
This is the part where everything comes together. I make a batch on Sunday, freeze them, and then I feel like a genius on Wednesday when dinner is basically done.
Mix, rise, fill, bake (or freeze)
I will walk you through it like I would if you were standing in my kitchen.
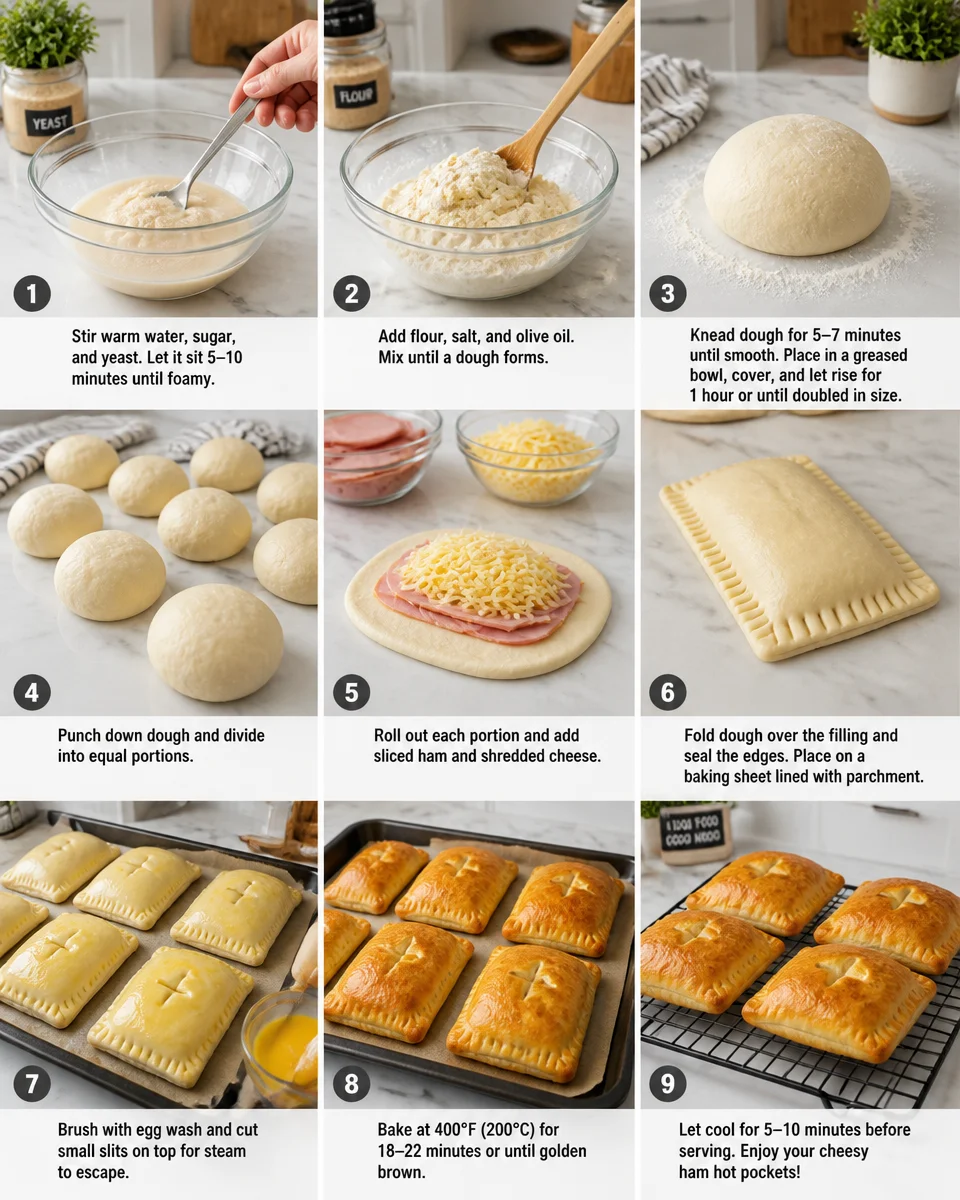
- Make the dough: Stir warm water, sugar, and yeast in a bowl. Let it get foamy. Add flour, salt, and oil, then mix until it comes together.
- Knead: About 5 minutes by hand. It should feel smooth and a little springy. Add a tiny bit of flour if it is super sticky, but do not overdo it.
- Let it rise: Put it back in the bowl with a little oil, cover, and let it rise until about doubled, usually 45 to 60 minutes.
- Prep the filling: I use sliced ham and shredded cheese. Swiss and cheddar are my favorites. You can also add a tiny swipe of mustard if you like that deli sandwich flavor.
- Shape: Divide dough into 8 pieces. Roll each into a rectangle, add ham and cheese on one side, fold, and pinch the edges closed.
- Seal well: This matters. I press with my fingers, then gently crimp with a fork if I have time.
- Bake: 400 F for about 15 to 18 minutes until golden. Let them cool a few minutes because the cheese is lava.
If you are going for the freezer version (my favorite plan), stop before baking and do this:
- Place the shaped pockets on a baking sheet lined with parchment.
- Freeze until solid, about 1 to 2 hours.
- Move to a freezer bag and label it with the date.
To cook from frozen, I bake at 375 F for around 22 to 28 minutes. Ovens vary, so I watch for a deep golden top. You can also microwave, but the crust will be softer. When I microwave, I do 1 to 2 minutes to warm it, then pop it in the toaster oven for a few minutes to crisp it.
Little personal note: the first time I made these, I did not pinch the edges enough, and I had a cheese leak situation. Still delicious, just messy. So now I really take 10 extra seconds to seal them like my life depends on it.
If you love ham and cheese in general, you would probably also be into this easy croque madame. It is a whole different meal, but the flavors are in the same happy family.
“I made a double batch and froze them. My teenager has been heating one up after practice and keeps saying they taste better than store bought. That is the highest compliment in my house.”
Two Other Filling Ideas
Once you get the hang of the basic Easy Homemade Hot Pocket Cheese Ham Frozen style, you can switch up the filling based on what you have. This is also how I avoid food waste. Random leftovers become future pockets.
1) Pizza pocket
Fill with mozzarella, a few pepperoni slices, and a spoon of thick pizza sauce. Thick matters so it does not leak. If your sauce is watery, just use less.
2) Breakfast pocket
Scramble an egg, add cooked crumbled sausage or bacon, and cheddar. Let the eggs cool before filling so the dough does not get weird and steamy.
And if you are in a sweet snack mood after your savory pockets, these cherry cheesecake shots are super fun for gatherings. Totally different, but they disappear fast.
Nutrition Facts (per serving)
I am not a dietitian, but I do like to have a realistic idea of what I am eating, especially if I am making these often. The numbers below are a general estimate for 1 pocket if you make 8 pockets total, using standard dough, about 2 ounces ham, and about 1 ounce cheese per pocket.
Estimated nutrition per pocket:
Calories: 330 to 420
Protein: 16 to 22g
Carbs: 35 to 45g
Fat: 12 to 18g
Sodium: depends heavily on the ham and cheese, usually 700 to 1000mg
If you want to lighten them up a bit, here are easy swaps that still taste good:
Use reduced fat cheese, choose lower sodium ham, or make them smaller and pair with a simple side salad. I also like adding a handful of baby spinach inside, but only a little, and I pat it dry first.
For holidays when ham is everywhere, I like planning ahead so leftover slices do not get sad in the fridge. This Christmas maple glazed ham recipe is amazing, and leftovers from it make seriously good pockets.
More Surprisingly Simple Homemade Breads
If making dough for pockets feels doable, you might be surprised how many other homemade bread things you can pull off without stress. I am not trying to turn you into a full time baker. I just want you to know you have options beyond store bread.
Some easy ones to try next:
Sheet pan focaccia for sandwiches and soups
Quick dinner rolls when you want something warm on the table
Flatbreads for wraps and easy pizzas
Also, do not underestimate the power of a good dessert when you are doing meal prep. If you are already in the kitchen, you might as well treat yourself. This decadent chocolate cheesecake trifle is one of those low effort, big reward desserts.
For storing your Easy Homemade Hot Pocket Cheese Ham Frozen stash, I recommend freezing them in a single layer first, then bagging. It prevents them from sticking together, and you can grab one at a time without wrestling a frozen brick.
Common Questions
Can I use store bought dough instead of homemade?
Yes. Pizza dough works well. Just aim for a dough that is not too wet, and seal the edges firmly.
How do I keep the cheese from leaking out?
Do not overfill, keep the cheese away from the edge, and pinch the seam really well. A fork crimp helps too.
What is the best cheese for these pockets?
Cheddar and Swiss are my top picks. Mozzarella is great too, especially for a milder, stretchy filling.
How long do they last in the freezer?
They are best within 2 months for taste and texture, but they are safe longer if stored well. Label the bag so you do not forget.
Can I air fry them?
Yes, but watch closely. Try 350 F and start checking around 8 to 10 minutes for refrigerated pockets. Frozen ones will take longer.
A freezer snack you will actually be excited about
Once you make a batch of Easy Homemade Hot Pocket Cheese Ham Frozen, you will see why I keep them on repeat. They are warm, filling, and way more satisfying than the boxed version, plus you control what goes inside. If you want another reference point for shaping and baking, I found Homemade Ham & Cheese Pockets – Sally’s Baking Addiction helpful when I was fine tuning my method. Make a few, freeze the rest, and future you will be so grateful on a busy day.


Homemade Ham & Cheese Pockets
Ingredients
Method
- Stir warm water, sugar, and yeast in a bowl. Let it get foamy.
- Add flour, salt, and olive oil, then mix until it comes together.
- Knead the dough for about 5 minutes by hand until smooth and a little springy.
- Let it rise in an oiled bowl, covered, until doubled (about 45 to 60 minutes).
- Slice ham and shred cheese, mixing them together. Optionally, add a tiny swipe of mustard if desired.
- Divide the dough into 8 pieces and roll each into a rectangle.
- Add ham and cheese on one side of the rectangle, fold over, and pinch the edges closed.
- Seal the edges well, pressing with fingers and crimping with a fork if desired.
- Preheat oven to 400°F (200°C). Bake for 15 to 18 minutes until golden.
- For freezing, place shaped pockets on a baking sheet lined with parchment and freeze until solid (about 1 to 2 hours). Then transfer to a freezer bag.
