
Easy Crepe Cake — Stacked French Mille Crepe is what I make when I want a dessert that feels fancy, but I do not want to fuss with layers of sponge cake and scary frosting tricks. Maybe you have had that moment too, when guests are coming and you want something that looks like you tried really hard. This is the answer. It is basically a stack of soft, thin crepes with a simple filling, and somehow it turns into this dreamy sliceable cake. The best part is you can build it slowly and calmly, even while chatting in the kitchen. 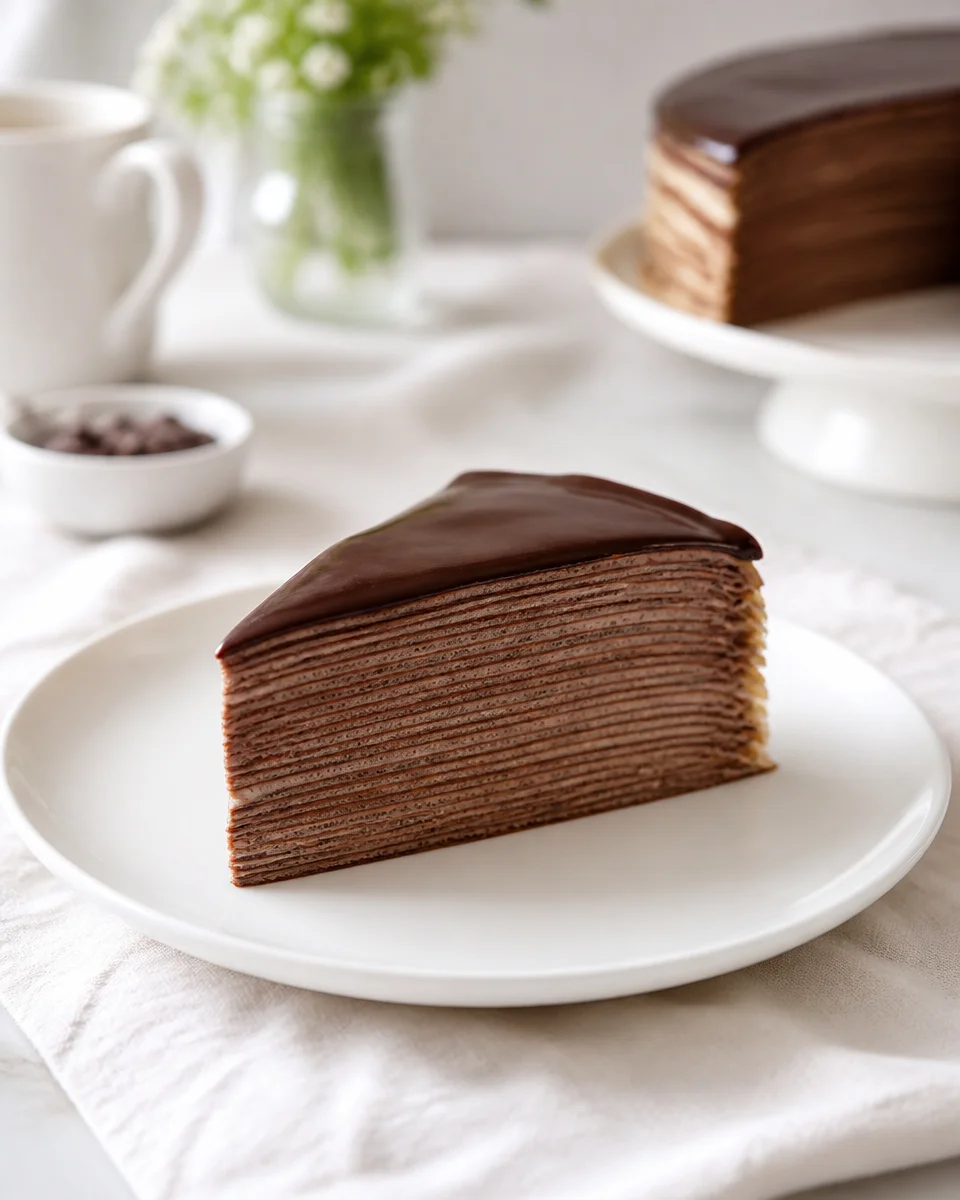
Tips on making perfect crepes
I used to think crepes were one of those things only restaurant people could pull off. Then I realized crepes are actually forgiving, you just need a couple small habits that keep them thin and tender. If you want a good base recipe, my go to is this one for easy French crepes, because it works for both sweet and savory and it does not make a huge mess.
My simple crepe rules that actually help
Here is what makes the biggest difference in real life, not just in theory:
- Rest the batter for at least 20 to 30 minutes if you can. It helps the crepes cook smoother and tear less.
- Use a hot pan, then lower the heat a touch once you get your rhythm. Too cool and they stick. Too hot and they get crispy fast.
- Less batter than you think. For an 8 inch pan, I use roughly 1 quarter cup, sometimes a little less.
- Swirl quickly. Pour, lift the pan, and circle your wrist so the batter runs out thin.
- Do not stress the first crepe. The first one is always the practice crepe in my kitchen.
If your crepes are coming out thick, it is usually too much batter or the pan is not being swirled fast enough. If they tear, your batter might be too thin, or you are flipping too early. Let the edges look set, then gently slide a thin spatula under and flip.
Also, a tiny note on flavor: a little pinch of salt matters, even in sweet crepes. It keeps the whole cake from tasting flat.
The cake assembly
This is the part that makes people say wow. And honestly it is kind of relaxing. You are just stacking, spreading, stacking, spreading. For an Easy Crepe Cake — Stacked French Mille Crepe, I usually aim for 18 to 25 crepes, depending on how much time I have and how tall I want it.
Filling ideas and a basic method
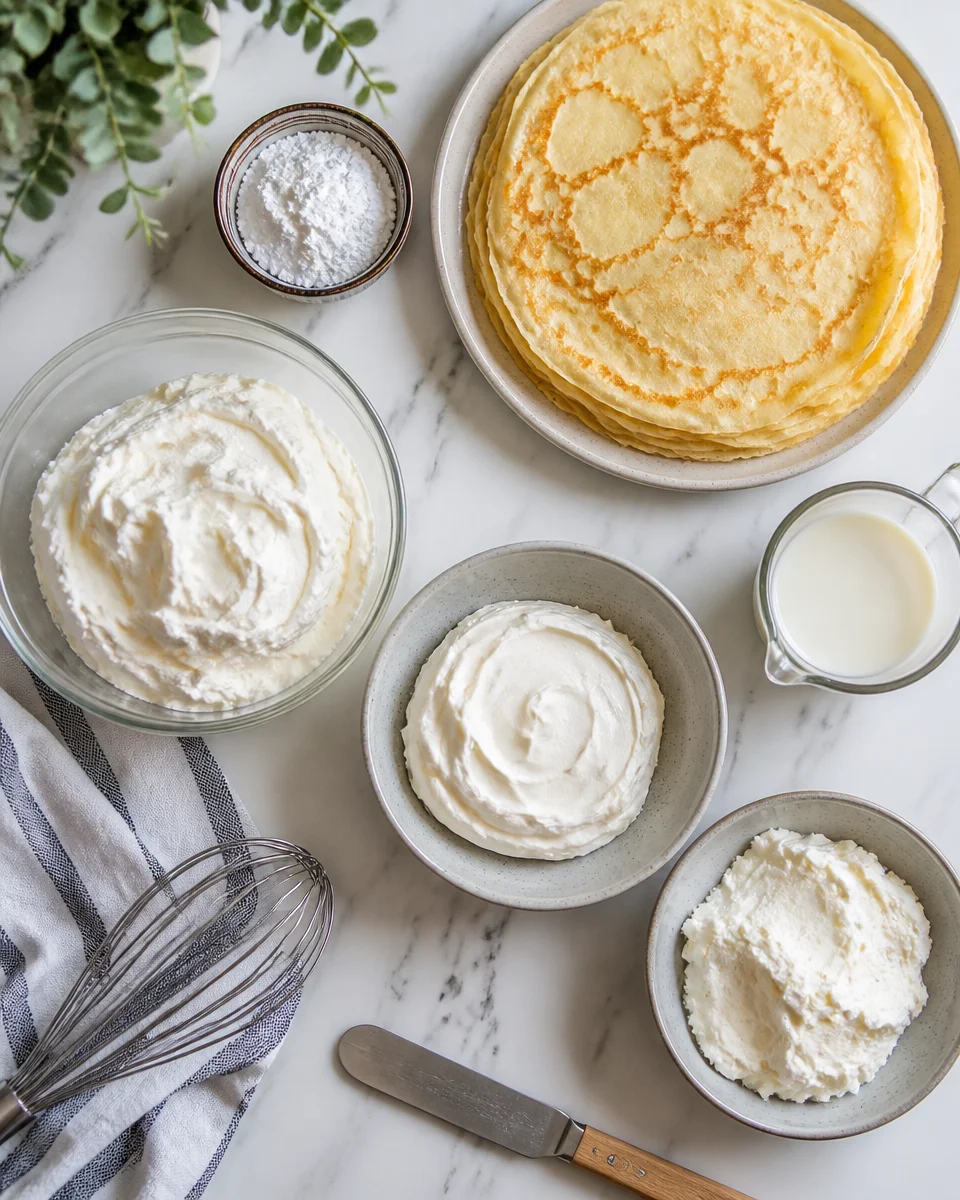
I keep the filling simple so the crepes stay the star. My usual filling is lightly sweetened whipped cream, sometimes with a spoon of mascarpone or cream cheese to give it a little structure.
Basic assembly flow:
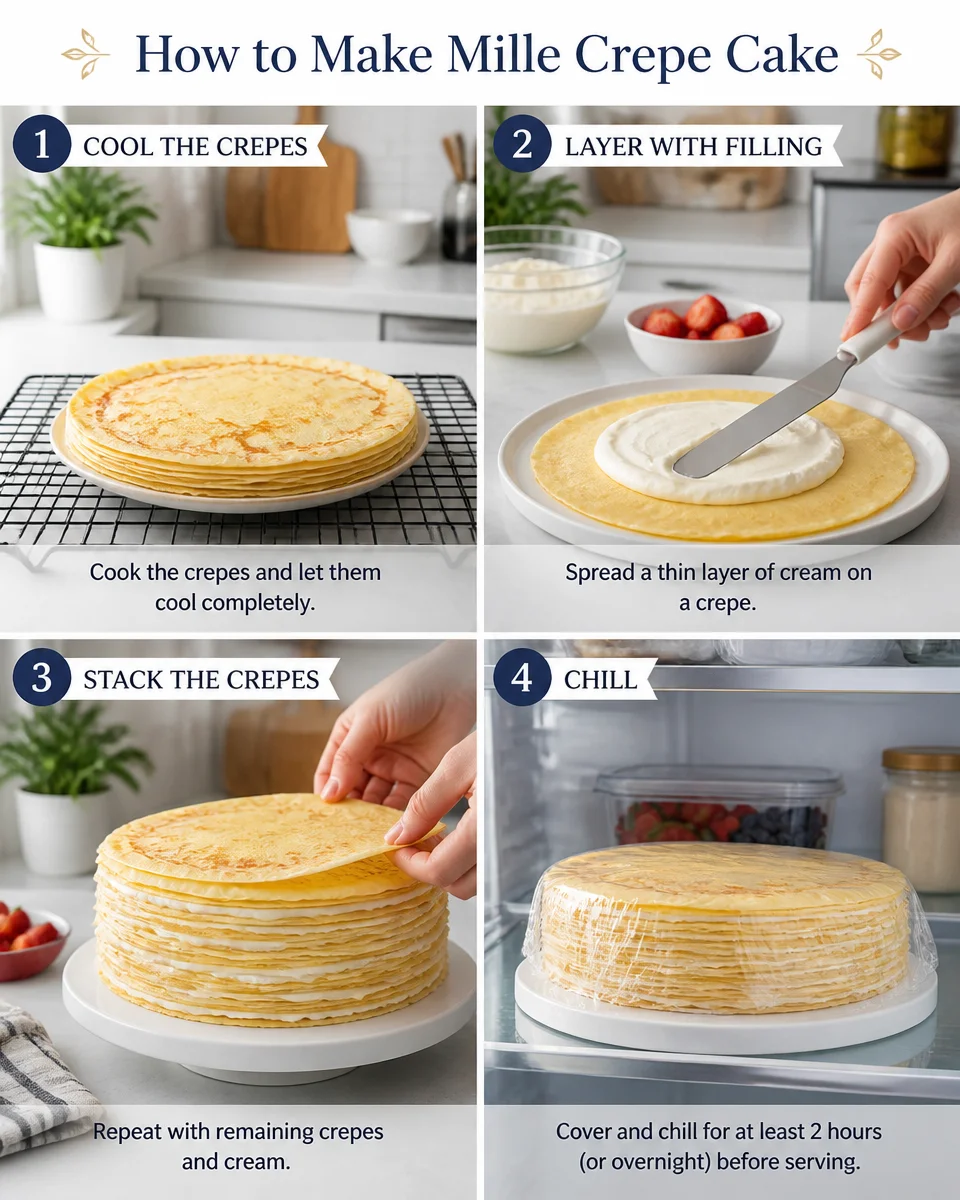
Step 1: Let your crepes cool completely. Warm crepes melt the filling and you will get a slippery cake.
Step 2: Put one crepe on a plate or cake stand. Add a thin layer of filling. Think of it like you are buttering toast, not frosting a birthday cake.
Step 3: Repeat until you have a tall stack. Every 5 crepes or so, I press down very gently with my palm to keep it even.
Step 4: Chill the whole cake for at least 2 to 4 hours. Overnight is even better, because it slices cleaner.
When it is time to serve, I like a simple top. A dusting of powdered sugar is classic. If I want something richer, I drizzle chocolate sauce and add berries. And if you are a brownie person, this is the same vibe of rich and satisfying that I get from French silk brownies, just in a lighter, layered form.
“I made this for my sister’s birthday and everyone thought it came from a bakery. The tips about chilling before slicing saved me. The layers looked so clean.”
One more thing: if you get a little uneven edge situation, do not panic. Once chilled, you can trim the sides with a sharp knife for that neat bakery look, or you can keep it rustic. Both are valid.
Substitutions
This recipe is flexible, which is one reason I keep coming back to it. If you are missing an ingredient or feeding someone with preferences, you have options without wrecking the final cake. The goal is still the same: soft crepes plus a creamy layer that holds.
Here are some easy swaps I have tried or seen work well:
Milk: Dairy milk is classic, but you can use oat milk or almond milk. Oat milk gives a nice soft texture. If using a very thin plant milk, you may need a touch less liquid overall.
Butter: Melted butter adds flavor, but neutral oil works in a pinch. If you want an actually buttery dessert night, pair your crepe cake day with easy French butter cake another time, because that one is pure comfort.
Flour: All purpose is easiest. A gluten free cup for cup blend usually works, but the batter may need a longer rest and you might need to adjust thickness with a spoon of milk.
Sugar: You can reduce it in the crepes if your filling is sweet. I do this when I plan to add sweet toppings like caramel or jam.
Filling: Whipped cream is the go to. You can also use pastry cream, vanilla pudding thickened well, or a mix of whipped cream and Greek yogurt for a tangier vibe. For chocolate lovers, I sometimes take inspiration from a layered dessert like this chocolate cheesecake trifle and add cocoa to the filling for a cookies and cream kind of mood.
Just keep in mind: very watery fillings can slide. If your filling feels loose, chill it for 20 minutes before assembling.
Tools for Making Ultra-Thin Crepes
You do not need fancy gear, but the right tools make you feel calmer, which honestly helps more than people admit. Here is what I actually use when I want ultra thin crepes without drama:
- Nonstick skillet (8 to 10 inch): This is the easiest route for beginners.
- Crepe pan (optional): Nice to have, not required.
- Blender or whisk: A blender makes the batter super smooth fast. A whisk works too, just give it a little effort.
- Measuring cup with a spout: Pouring neatly helps you swirl before the batter sets.
- Thin spatula: Helps with flipping, especially once you get confident.
- Cooling rack or plates: Stack crepes with parchment if you are worried about sticking, but usually they are fine stacked as is.
If you are missing a crepe spreader, do not buy one just for this. The swirl method works great with a little practice, and it feels kind of fun once you get it.
Can I Make Crepe Cakes In Advance?
Yes, and I actually think this dessert is better when you do. Easy Crepe Cake — Stacked French Mille Crepe needs chill time so the layers settle and slice nicely. If you are making it for a party, this is your secret weapon.
My make-ahead plan for zero stress
Option 1: Make crepes ahead. Make the crepes up to 2 days in advance. Stack them, wrap well, refrigerate. Let them sit at room temp for 15 minutes before assembling so they are flexible.
Option 2: Assemble the whole cake ahead. Assemble it the night before, cover, and chill. This gives you the cleanest slices.
Option 3: Freeze (not my first choice, but possible). You can freeze the assembled cake, but the texture can change a bit depending on the filling. If you freeze it, thaw overnight in the fridge and expect slightly softer layers.
For toppings, I wait until right before serving. Powdered sugar disappears in the fridge, and fruit can weep. If I am doing a fruity topping and need a super easy backup dessert idea, I keep this one saved: 4 ingredient blueberry dump cake. Different vibe, same crowd pleasing energy.
Common Questions
How many crepes do I need for a crepe cake?
Most of the time, 18 to 25 crepes makes a great height. If you only have 12 to 15, it will still look pretty, just shorter.
Why is my crepe cake sliding?
Usually the filling is too loose or the crepes were still warm. Chill the filling a bit and make sure crepes are fully cool before stacking.
Can I use store bought crepes?
Yes. Homemade tastes better, but store bought works when time is tight. Just choose thin, flexible ones, and keep your filling on the thicker side.
What is the easiest filling for beginners?
Lightly sweetened whipped cream with a splash of vanilla. If you want more stability, add a couple spoonfuls of mascarpone or cream cheese.
How do I get clean slices?
Chill the cake well, use a sharp knife, and wipe the blade between cuts. It sounds fussy, but it takes 10 seconds and makes a big difference.
A sweet little pep talk before you start
If you make this once, you will see why Easy Crepe Cake — Stacked French Mille Crepe is such a good trick to have in your back pocket. It is calm cooking, not chaotic baking, and the fridge does half the work for you. If you want more inspiration after this, I love browsing versions like Chocolate Crepe Cake – Anna Banana when I am in a chocolate mood, or the more grown up flavor combo from Chocolate Chestnut Mille Crepe Cake | Olive & Mango when I want something different. Make your stack, chill it, slice it, and enjoy that moment when everyone thinks you bought it from a bakery.
More Recipes to Try
If you are planning another homemade meal, these recipes are worth exploring next: Easy Crepe Cake — Mille Crepe French Stack, Easy Oreo Dirt Cake — No Bake Layered Dessert, Easy Fig and Honey Tart — Simple French Dessert and Easy French Butter Cake — Classic Gâteau Breton Recipe.
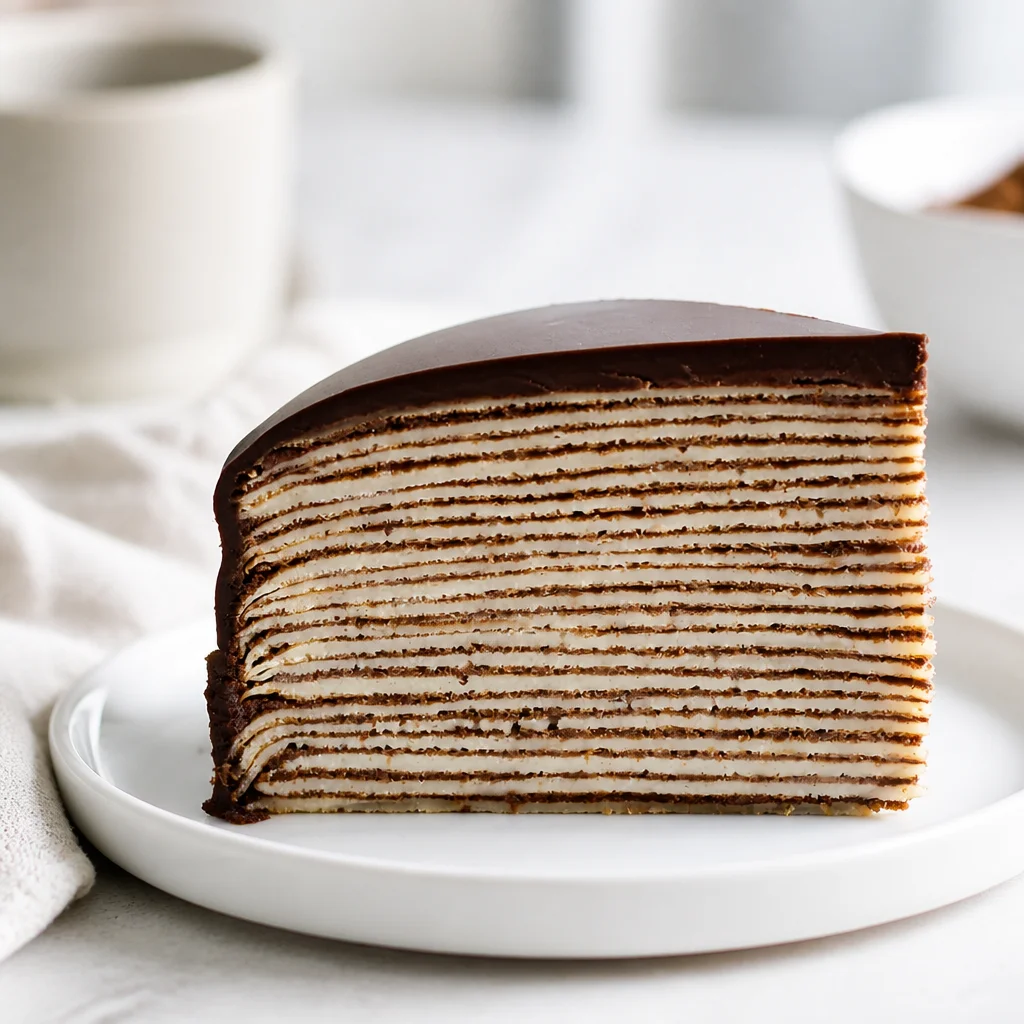
Stacked French Mille Crepe
Ingredients
Method
- In a mixing bowl, whisk together the flour, milk, eggs, melted butter, sugar, and salt until smooth.
- Let the batter rest for 20-30 minutes.
- Heat a nonstick skillet over medium heat and ladle a small amount of batter into the pan, swirling to coat the bottom evenly.
- Cook until the edges lift slightly, about 1-2 minutes, then flip and cook for another minute.
- Transfer cooked crepes to a cooling rack and repeat until all the batter is used.
- Once crepes are completely cooled, place one crepe on a plate or cake stand.
- Spread a thin layer of whipped cream filling on top, similar to buttering toast.
- Layer another crepe on top and repeat the process until a tall stack is formed.
- Gently press down every few layers to keep the cake even.
- Chill the assembled cake in the fridge for 2-4 hours, ideally overnight.
- Before serving, dust the top with powdered sugar or drizzle with chocolate sauce. Add fresh berries if desired.
- Slice with a sharp knife, wiping the blade between cuts for clean edges.
