

Okay, so let’s get real for a second. You ever try to bake something cute for a Halloween party, and by the time you’re done your kitchen looks like a haunted house itself? Yeah, me too. But once I started making Spooky and Fun Halloween Cake Pops, things just… clicked. They’re adorable, hands-on, and kids (honestly, adults too) lose their minds over ‘em. And here’s the best part—no cake decorating degree required. Trust me, your haunted bash needs these things.
What You Need to Make Halloween Cake Pops
First things first: don’t panic when you see the supply list. Most stuff you actually already have—promise! Get a box of cake mix (cake from scratch? Not today, Satan). Next, pick up frosting, candy melts or white chocolate, and pop sticks. I use lollipop sticks from the craft store, but you could go old school with toothpicks if desperation strikes.
You’ll also wanna grab food coloring, because nothing screams “Halloween” like orange and purple popping out of your treats. Sprinkles? Absolutely. Crushed cookies, mini candies, edible eyes—you get my drift. If ya have leftovers from other holidays, honestly, throw ‘em on top. Nobody’s judging.
Oh, and you need a little bit of patience. The balls can get sticky. The candy melts can get finicky. But, you know, half the fun is licking your fingers (or, um, arms if you’re me) afterward.
“I tried making these last year with my niece, and it was a total mess—but also a total blast. She still talks about the mummies we made!” – Shelby M., reader from Indiana
How to Make Halloween Cake Pops at Home: A Simple Recipe
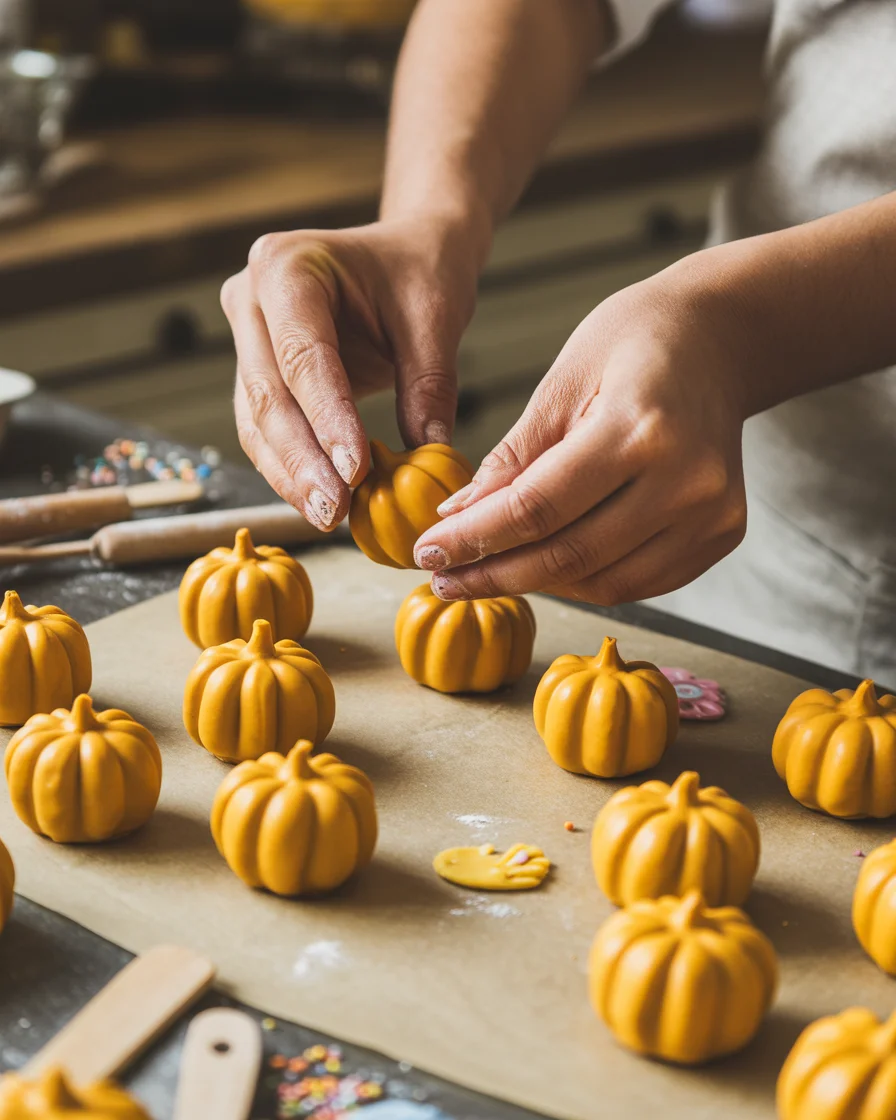
Here’s how I do it. Start by baking your cake in a regular ol’ pan, letting it cool (don’t rush this, or you’ll have glop). Once it’s cooled, crumble that cake in a big ol’ bowl. Now for my favorite part—mix in some frosting. Not too much, or you’ll end up with goo. Just enough to make the cake stick together when you roll it into a ball.
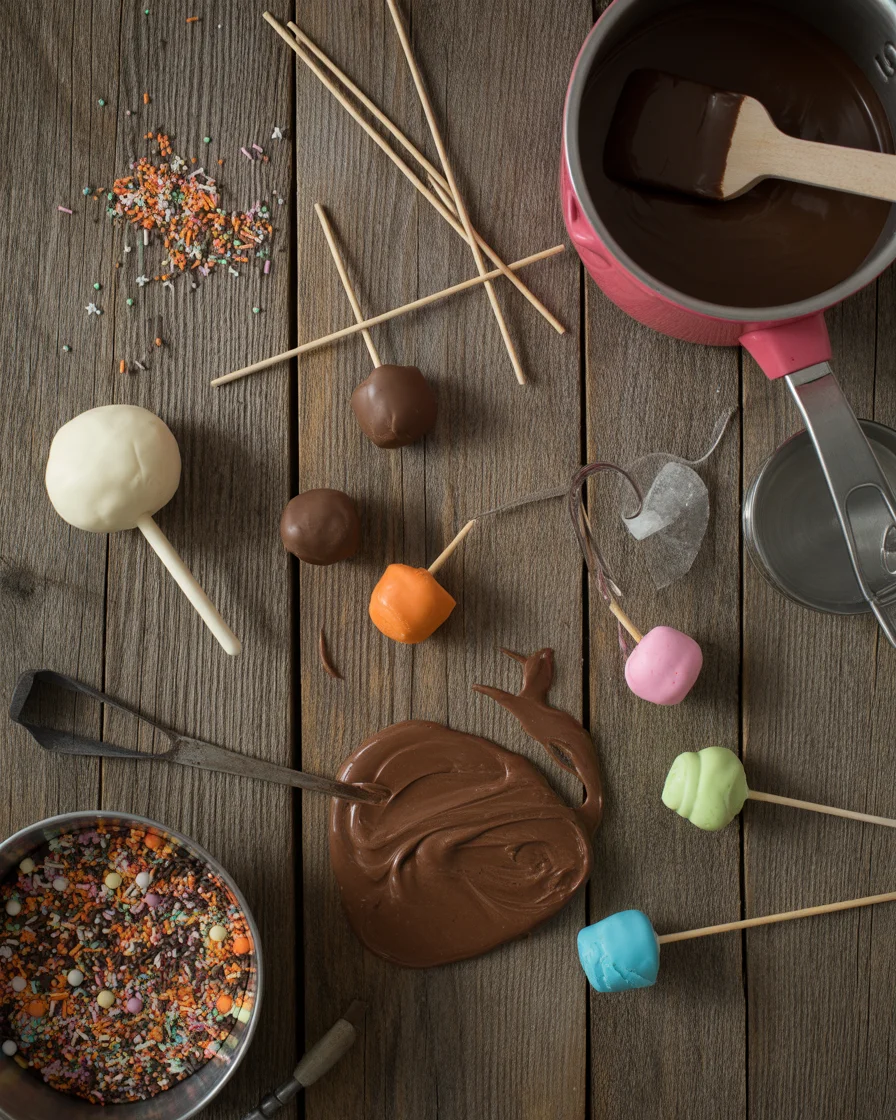
I scoop about a tablespoon and roll it between my palms. Place on a tray lined with parchment. After that, freeze those cake balls for 15 minutes. This keeps ‘em together when you dip ‘em. While freezing, melt your candy coating per the instructions on the bag—stir, stir, stir.
Stick your pop stick into each ball. Dip, twirl, and tap off any drippy stuff.
Now, decorate with whatever your spooky little heart desires. Candy eyes, orange sprinkles, edible glitter—the works.
Let ‘em set fully before moving (hardest part: waiting). That’s it. You did it. It’s weirdly satisfying to see a tray of cake pops lined up like little ghosts.
Scary Ideas for Halloween Cake Pops
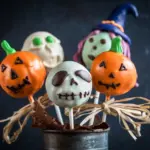
Here’s where you get to shine. Maybe you’re Team Classic Ghost, or maybe you’re more “creepy monster eyeballs” kinda person. Me? I like variety, so my tray always looks like a Halloween costume party exploded.
Do ghosts with white candy coating and black gel dots for eyes. Try Frankenstein: green dipping chocolate, candy eyeballs, and a mess of chocolate “hair.” Mummies? Drizzle white chocolate and poke candy eyes in before it sets.
Oddly, spider cake pops seem to scare even my dog. (Pro tip: licorice legs, but cut them short so they don’t flop everywhere.) Want pumpkins? Orange candy coating and a green sprinkle stem. Get weird, get wild. There’s really no wrong way. Even “fails” are fun—one misshapen pop became my “creature from the black lagoon,” accidental but legendary.
“These bats looked so silly but everybody devoured them first. Kids are obsessed with chocolate-frosted monsters!” – Erik L., party dad
Tips for Making Halloween Cake Pops
The best tip? Freeze your cake balls. If you skip this, you’ll end up with wonky, sliding pops. Trust me, I’ve been there.
Also, don’t rush when dipping. If the candy melts are too thick, add a little coconut oil or vegetable shortening. Not water! That’s a recipe for disaster. If decorations are sliding, wait a few seconds after dipping so the coating is tacky, not wet.
Another thing—have a block of styrofoam ready to stick your pops in for drying. Laying them on a tray makes a flat “backside.” If that’s your vibe, cool. If you want ‘em round, stand ‘em up.
And, if you’re making these with kids, expect chaos. Embrace it. It’s more fun that way.
Delicious and Perfect Halloween Cake Pop Flavors
So listen, the cake flavor genuinely matters. I’m crazy about red velvet because, well, it’s red (creepy blood red, you know?), and it tastes like it cost five bucks a bite. But chocolate? Can’t go wrong there. Classic vanilla is a winner with picky eaters, especially when jazzed up with orange food coloring.
Lately, I’ve been obsessed with pumpkin spice cake pops. Yes, it’s basic. Yes, people love it. Lemon cake is also underrated for Halloween—unexpected, tangy punch, and works surprisingly well with white chocolate coating.
Try mixing up the frosting too: cream cheese or chocolate are no-brainers. I once tried maple frosting in a chocolate pop and wow, let’s just say it disappeared faster than Halloween candy after bedtime. Basically, get creative. If you love it, go for it.
Common Questions
Do I have to use box cake mix?
Nope! Homemade works, I just find cake mix’s way less stressful (and tastes great).
Can I freeze these ahead of time?
Absolutely. Freeze the undipped balls for up to two weeks. Dip them fresh for best results.
Why are my cake pops cracking?
Usually your cake ball is too cold or the coating too hot. Let things sit at room temp for a few minutes before dipping.
What do I do if my candy melts seize up?
Don’t panic! Add a splash of coconut oil and stir. Never add water.
How long do cake pops last?
Up to a week in the fridge, if you can keep hands off them that long.
Give Your Halloween Treat Table an Upgrade
So, that’s the rundown, friend. Cake pops are where easy + fun + spooky all hang out. They’re a real Halloween showstopper and nobody needs to know you didn’t spend hours hand-painting each one (unless you want to brag, who am I to stop you?). Give ‘em a go, and you might just wow yourself. Need even more ideas? Check out The Easiest Halloween Cake Pops | Lemons & Zest and 9 Halloween Cake Pops In Different Categories + 3 Tips – Tartelette for extra inspo and tricks.
And hey, don’t be surprised when people ask you to bring Spooky and Fun Halloween Cake Pops to every party from now on. Tag me in your creations. Seriously. I live for this stuff.
Halloween Cake Pops
Ingredients
Method
- Bake the cake according to the package instructions and let it cool completely.
- Once cooled, crumble the cake into a large bowl.
- Mix in a small amount of frosting until the mixture holds together when rolled into balls.
- Scoop about a tablespoon of the mixture and roll it into a ball, then place it on a tray lined with parchment paper.
- Freeze the cake balls for 15 minutes.
- While the cake balls are freezing, melt the candy coating according to the package instructions.
- Insert a pop stick into each ball, then dip it into the melted coating, twirling to remove excess.
- Decorate with sprinkles, edible eyes, and any other desired toppings.
- Allow the cake pops to set fully before moving them to a serving tray.