
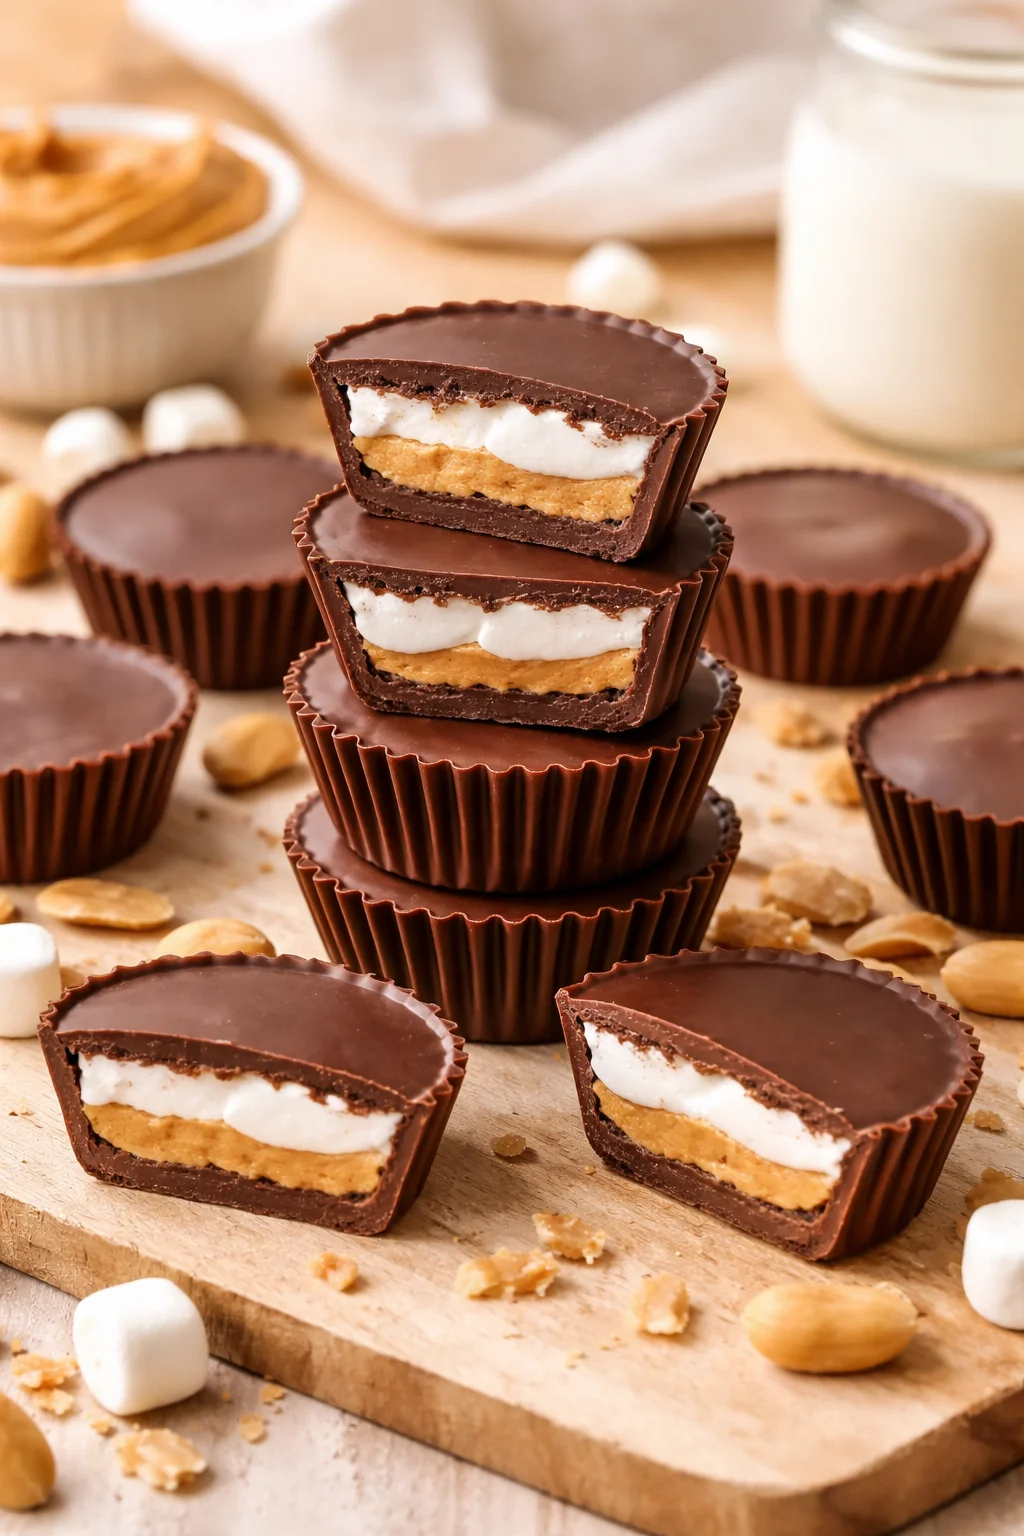
PEANUT BUTTER MARSHMALLOW CUPS are my go to fix for those nights when you want something sweet but you do not want to bake a whole cake or wash a million dishes. You know the feeling, you open the pantry, stare at random snacks, and somehow nothing sounds right. That is exactly when these little cups save the day. They taste like a peanut butter cup and a fluffernutter sandwich had a baby. Plus they look fancy even though they are super low effort.
How to Make Fluffernutter Cups
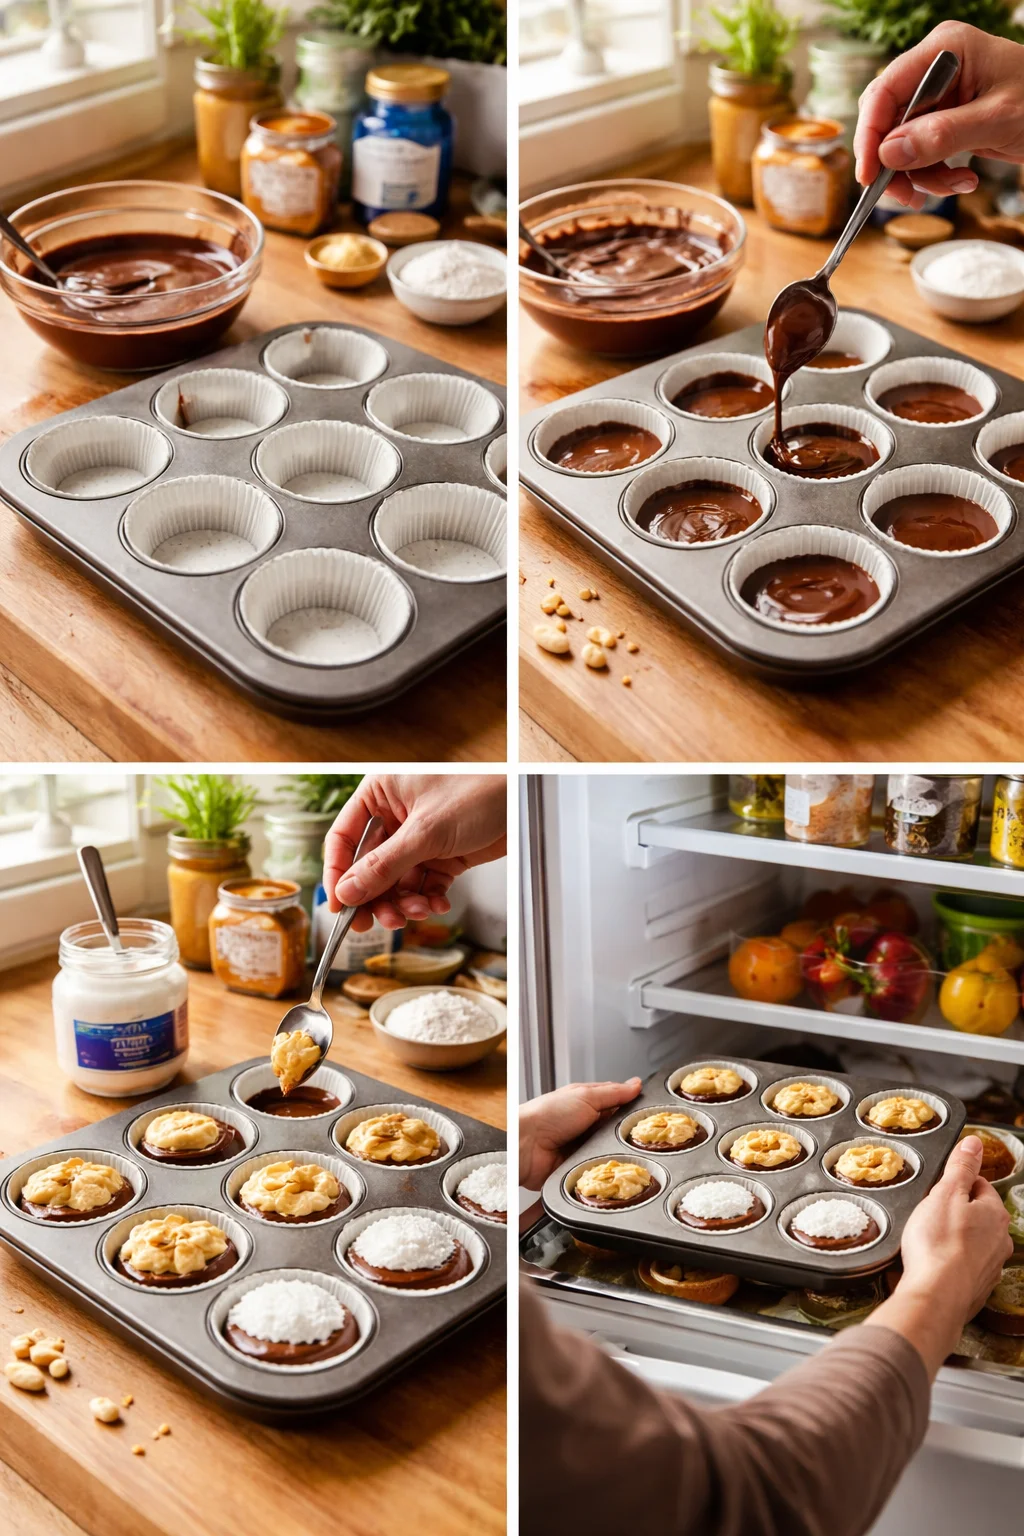
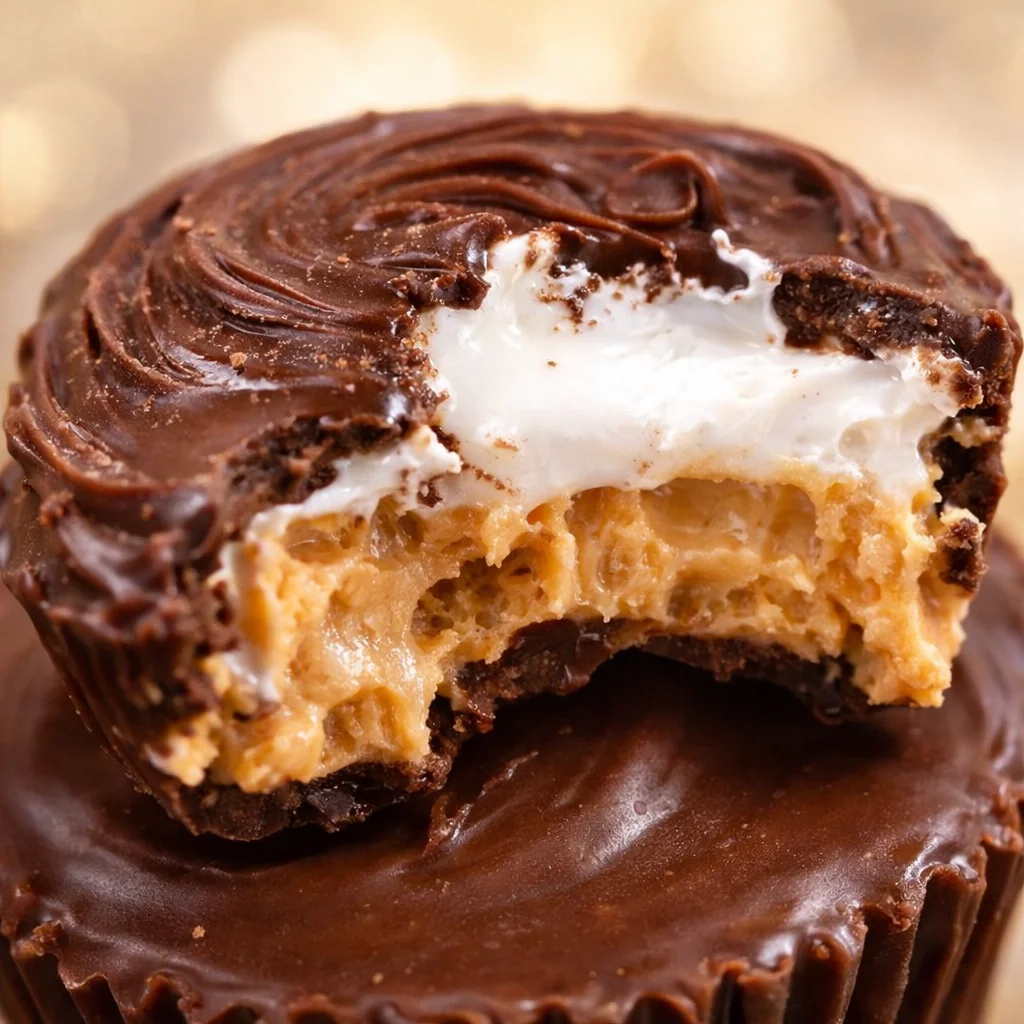
Let me walk you through how I make these at home, usually while the kitchen is already a little chaotic. The basic idea is simple: chocolate shell on the bottom, a creamy peanut butter layer, then marshmallow, then more chocolate to seal it in. The first time I made PEANUT BUTTER MARSHMALLOW CUPS I was shocked at how “store bought” they looked once they chilled.
Quick step by step
- Line a muffin tin with paper liners. Mini muffin liners work too if you want bite sized cups.
- Melt chocolate with a little coconut oil or butter so it spreads easily.
- Spoon a bit of chocolate into each liner and swirl it up the sides. Chill until set.
- Mix peanut butter with a pinch of salt and a little powdered sugar if you like it sweeter.
- Spoon peanut butter mixture into the chocolate shells and gently press it down.
- Add a small spoonful of marshmallow fluff on top of the peanut butter layer.
- Cover with more melted chocolate and tap the pan lightly to smooth the tops.
- Chill until firm, then peel and snack.
If you are in a serious peanut butter mood, you might also like this easy little treat I make when I need something even faster: 2 ingredient peanut butter fudge. It is the same cozy vibe with basically no effort.
Tips for Making Fluffernutter Cups
These are not fussy, but a few small tricks make them come out cleaner and prettier. Also, they help you avoid that moment where the chocolate cracks weirdly or the filling squishes out the sides.
Use liners. I tried going without once and regretted it. Liners make removal painless and keep the edges neat.
Do not overfill. It is tempting to stuff them like a burrito, but leaving a little space at the top makes sealing with chocolate way easier.
Chill between layers. You do not have to, but it makes a big difference. A quick 10 minutes in the fridge after the first chocolate layer helps the peanut butter sit nicely instead of sinking.
Warm spoon trick. If your marshmallow fluff is sticky and wild, dip your spoon in warm water, shake it off, then scoop. It slides off so much easier.
And hey, if you love the peanut butter and chocolate combo in general, you should try this dark chocolate peanut butter bark sometime. I make it when I want something snacky that I can break into pieces and “accidentally” keep walking back for.
“I made these for a movie night and they were gone before the previews ended. The marshmallow layer is the fun surprise. Even my kid who claims they do not like peanut butter ate two.”
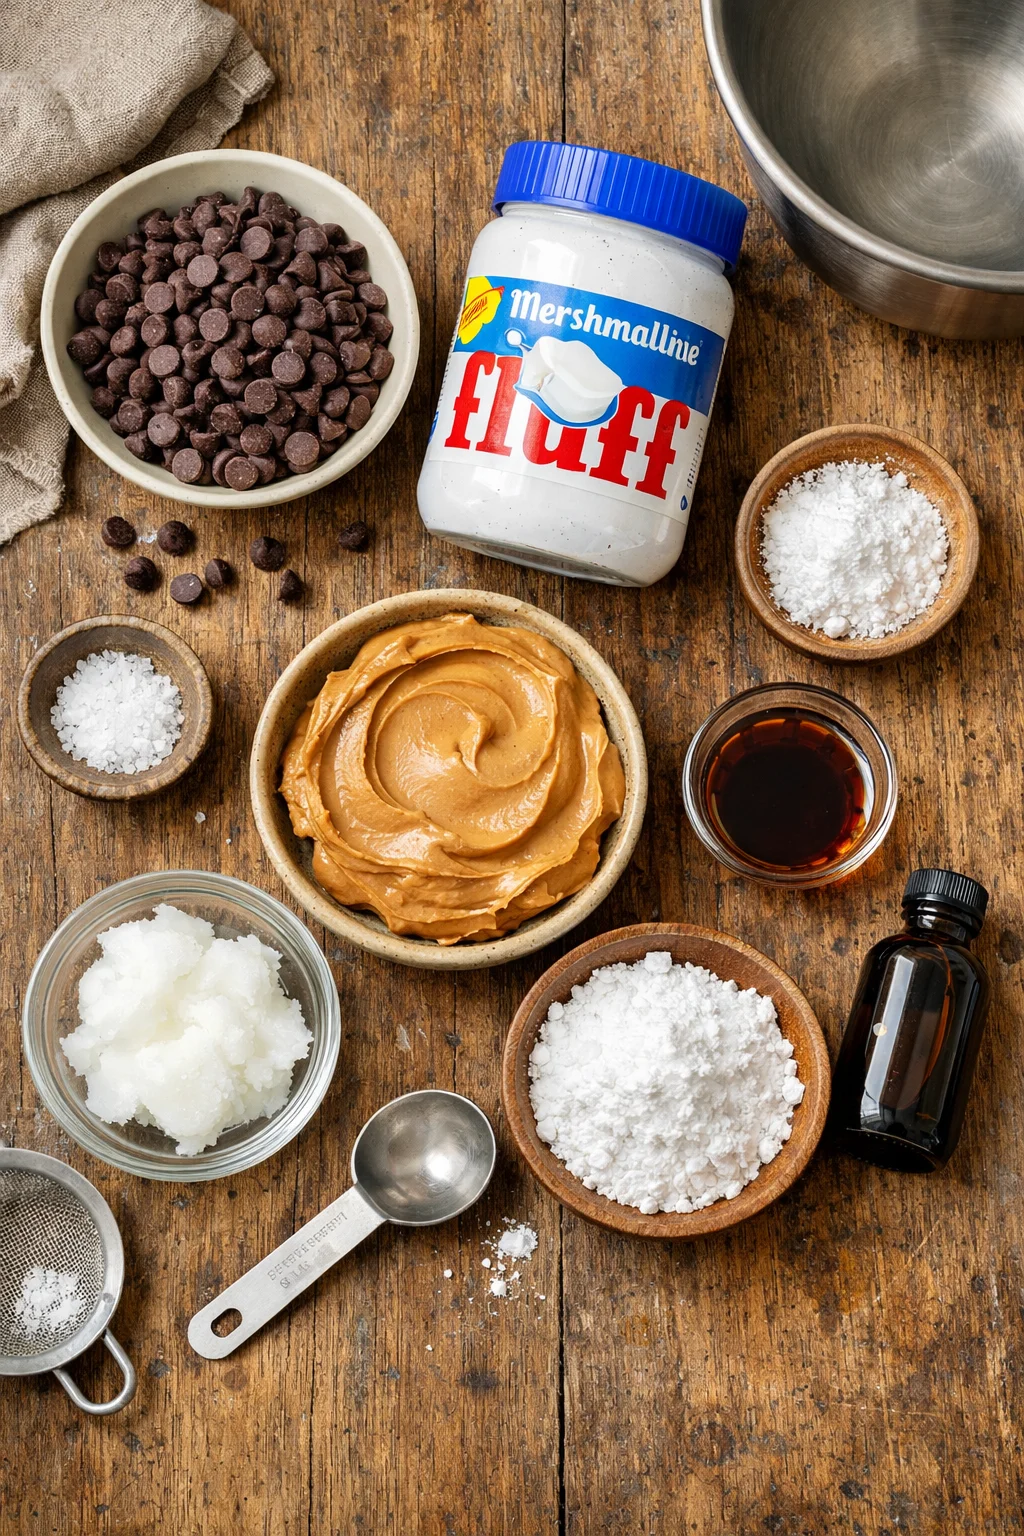
Peanut Butter Marshmallow Cups Ingredients
Here is what I typically use. Nothing fancy, and you can absolutely tweak it based on what is already in your kitchen. The only non negotiable for me is decent chocolate because it is a big part of the flavor.
- Chocolate: semi sweet chips, milk chocolate chips, or chopped chocolate bars
- Peanut butter: creamy is easiest, but crunchy works if you want texture
- Marshmallow fluff: the classic jar stuff, or you can use melted marshmallows
- Coconut oil or butter: just a little to help the chocolate melt smooth
- Pinch of salt: especially if your peanut butter is unsalted
- Optional powdered sugar: if you want the peanut butter layer sweeter and more “candy like”
- Optional vanilla: a tiny splash in the peanut butter layer is really nice
When I am planning a peanut butter dessert week (yes, that happens), I also rotate in these soft cake mix peanut butter cookies. They are great when you want something warm and chewy to balance out the cold, snappy bite of PEANUT BUTTER MARSHMALLOW CUPS.
Substitutions and Additions
This is where you can make the recipe feel like your own. I have made these a bunch of different ways depending on who is coming over or what I am craving.
Chocolate choices: Milk chocolate makes them taste like a candy bar. Dark chocolate makes them feel a little richer and less sweet. White chocolate is fun, but very sweet, so I add extra salt if I go that route.
Peanut butter swaps: You can use almond butter or cashew butter, but expect a softer filling. If you use natural peanut butter, stir it really well first so the oil is not separated, or the filling can get greasy.
Marshmallow options: If you do not have fluff, melt a cup of mini marshmallows with a teaspoon of butter in the microwave, then cool it slightly before using. It is a little stickier but still works.
Add ins: My favorite little upgrades are:
Crushed graham crackers mixed into the peanut butter layer for a fluffernutter meets pie crust vibe.
Sprinkles on top if these are for a party.
Chopped peanuts for crunch, especially if you use creamy peanut butter.
Flaky salt on top of the final chocolate layer if you like sweet and salty.
If you are into marshmallow and peanut butter together in other forms, you might want to check out these chewy peanut marshmallow clusters. They are more snacky, less “cup,” but the flavor family is basically cousins.
How to Store Peanut Butter Marshmallow Cups
PEANUT BUTTER MARSHMALLOW CUPS store really well, which is dangerous information if you live near your fridge. Here is what works best in my house.
In the fridge: Keep them in an airtight container for up to a week. The chocolate stays firm, and the peanut butter layer holds its shape nicely.
In the freezer: Freeze in a sealed container for up to 2 months. Let them sit at room temp for about 5 to 10 minutes before eating so you do not crack a tooth on super frozen chocolate.
Room temperature: If your kitchen is cool, they can sit out for a few hours for serving. If it is warm, the chocolate can get a little soft and fingerprints happen fast.
One more little practical tip: store them in single layers with parchment between layers if you have to stack. It prevents the tops from getting scuffed, and they stay pretty if you are gifting them.
Common Questions
Can I make PEANUT BUTTER MARSHMALLOW CUPS in mini muffin tins?
Yes, and they are honestly my favorite size for parties. Just use less filling and less chocolate, and chill time is usually a bit shorter.
Do I have to use marshmallow fluff?
Nope. Melted mini marshmallows work. The texture is a little more stretchy, but the flavor is still great.
Why did my chocolate crack when I bit into it?
Usually it is because the chocolate layer is too thick or the cups are super cold. Try making thinner shells and letting them sit out a few minutes before eating.
Can I use natural peanut butter?
Yes, just stir it very well. If it is too runny, mix in a spoonful of powdered sugar to help it thicken up.
How far ahead can I make them?
I like making them 1 to 3 days ahead. They taste even better once they are fully set and chilled.
A sweet little treat you will keep coming back to
If you want a dessert that is easy, fun, and hits that nostalgic peanut butter plus marshmallow craving, PEANUT BUTTER MARSHMALLOW CUPS are it. They are simple enough for a random Tuesday but cute enough to bring to a get together. If you want to compare methods or see other takes, I really like this Fluffernutter Cups Recipe | Girl Versus Dough and this cozy version from Peanut Butter Marshmallow Cups – Princess Pinky Girl. Make a batch, stash a few in the freezer, and thank yourself later. 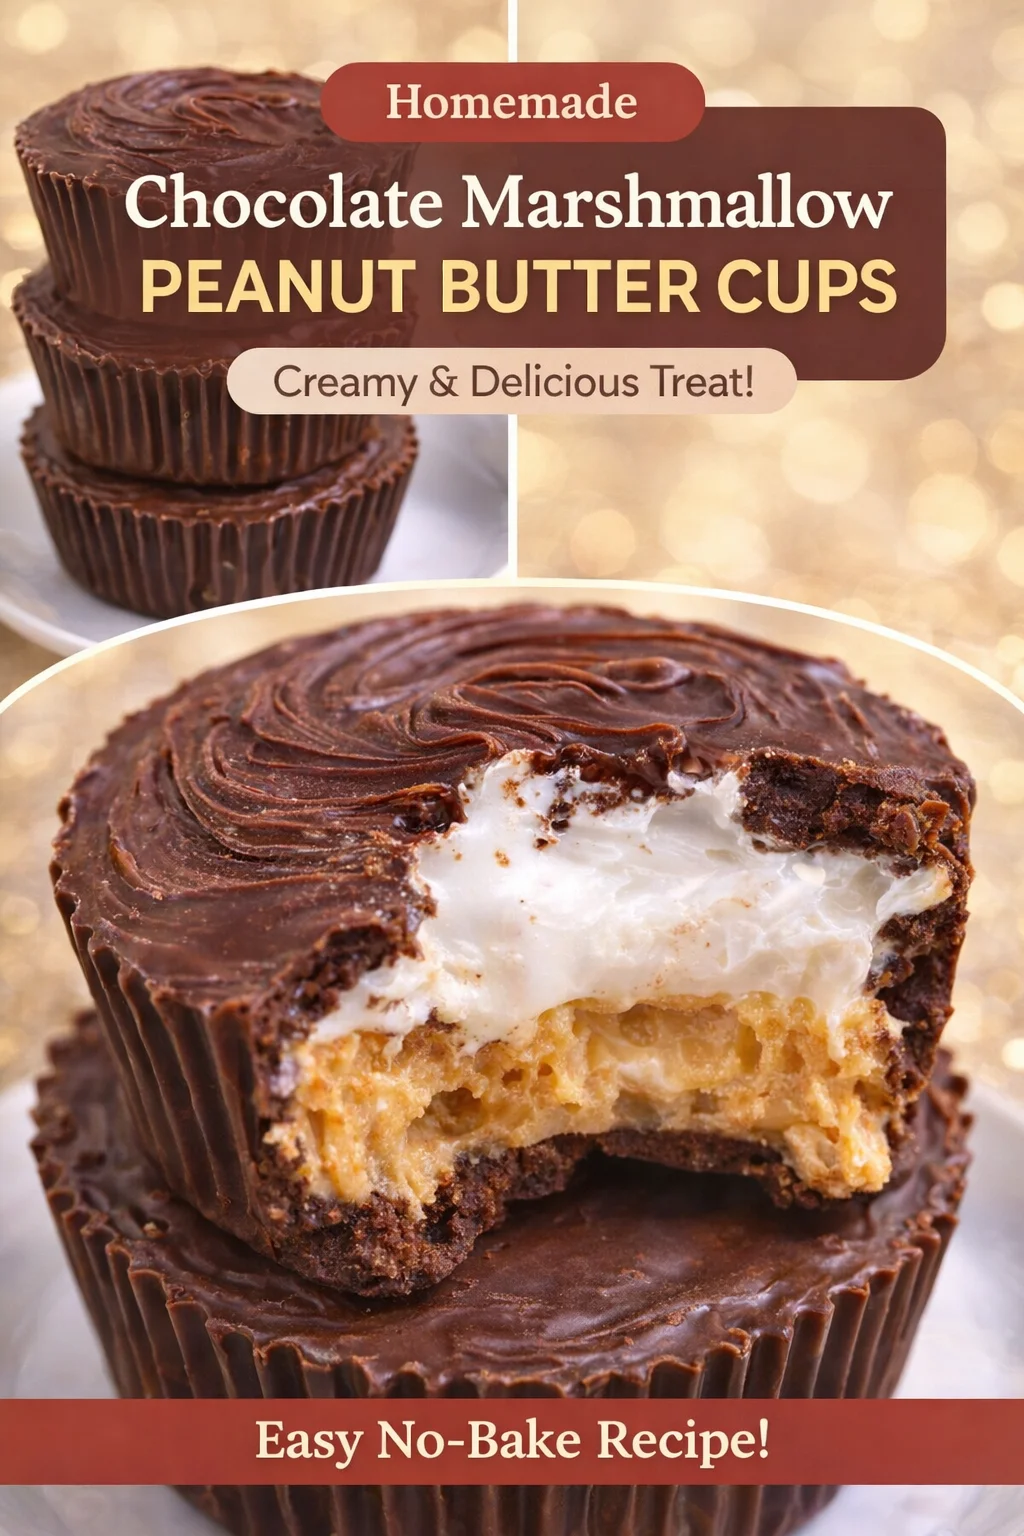
Peanut Butter Marshmallow Cups
Ingredients
Method
- Line a muffin tin with paper liners. Mini muffin liners work too for bite-sized cups.
- Melt chocolate with coconut oil or butter to allow easy spreading.
- Spoon some melted chocolate into each liner, swirling it up the sides, and chill until set.
- Mix peanut butter with a pinch of salt and optional powdered sugar, and spoon it into the chocolate shells, gently pressing it down.
- Add a small spoonful of marshmallow fluff on top of the peanut butter layer.
- Cover with more melted chocolate and tap the pan gently to smooth the tops.
- Chill until firm, then peel away the liners and enjoy.