

Chocolate Thumbprint Cookies are the cookies I bake when I want something that looks cute, tastes rich, and does not take all day. Maybe your week has been long, your sweet tooth is loud, and you want a little baking win without a mess. I hear you. I made these again last night and remembered why they never fail me. The dough mixes up fast, the centers turn glossy and fudgy, and they cool just in time for an evening snack. If you want a cozy, quick bake that makes the whole kitchen smell like a chocolate hug, this one is it.
What are chocolate thumbprint cookies?
Classic thumbprint cookies are small, tender shortbread-style cookies with a little well in the middle. For chocolate thumbprints, that well gets filled with a smooth, melty chocolate center that sets soft and silky. The base is buttery and slightly crisp on the edges, and the center is like a tiny truffle. It is simple, nostalgic, and it always disappears fast.
Quick ingredient overview
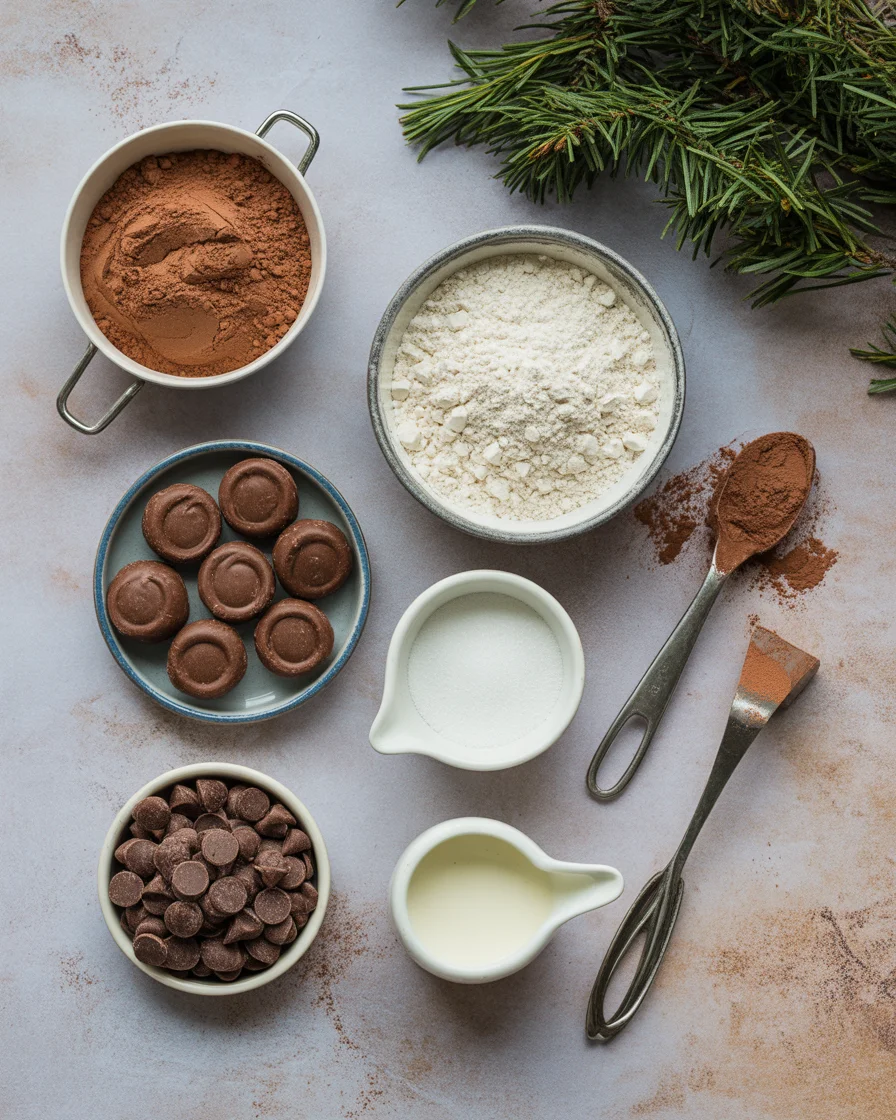
You will cream butter and sugar, add an egg yolk and vanilla, then fold in flour, cocoa, and a pinch of salt. The dough is soft but not sticky. After a quick chill, you roll portions into balls and press a gentle indent. The filling is usually melted chocolate chips or chopped chocolate with a splash of cream or a bit of butter for shine. Sprinkle with flaky salt if you like contrast.
What makes the center so good
The magic is the ratio. If you make the indent deep enough, you get a generous pool of chocolate that stays creamy even after it cools. Some folks bake the cookie base first and then fill it. I prefer to fill and bake together for a barely set middle that turns glossy as it cools.
When I want a guaranteed crowd-pleaser, I reach for my Deliciously Simple Chocolate Thumbprint Cookies. The method is easy to remember, the results are dependable, and the texture is the perfect mix of tender and fudgy.
Why Youll Love these Chocolate Thumbprint Cookies
These are the little cookies that make a big impression. They look bakery-fancy, but they are absolutely achievable on a weeknight. Here is why I think you will love them as much as I do.
They deliver on texture. Buttery edges. Soft center. Glossy chocolate pool. It is every bite you want in a small cookie.
They are quick to make. The dough chills just long enough for your oven to preheat. Then you are rolling and pressing, and the whole batch bakes in under 12 minutes per tray.
They are flexible. Dress them up with sprinkles or flaky salt, or keep them simple and classic. Use dark, milk, or semi-sweet chocolate. You can even add a hint of espresso powder for a bolder flavor.
They store well. These keep their shape and texture for several days, which means they are perfect for gifting or building a cookie platter. I love pairing them with festive treats like snowball cookies when I need a mix of textures and flavors.
When I am baking for friends, these Deliciously Simple Chocolate Thumbprint Cookies are the first to vanish. Something about the glossy center just pulls everyone in.
“I made these for a small get-together, and people hovered by the tray. The cookies looked polished, but the steps were easy. The chocolate center stayed creamy, which everyone loved.”
Tips to perfect this recipe
The dough
- Use room temperature butter. It should be soft to the touch but not greasy. This helps your dough come together without overmixing.
- Cream butter and sugar until light and fluffy. About 2 minutes with a hand mixer is plenty. This gives you that tender cookie bite.
- Chill for 20 to 30 minutes. A short chill keeps the cookies from spreading and helps the indent hold its shape.
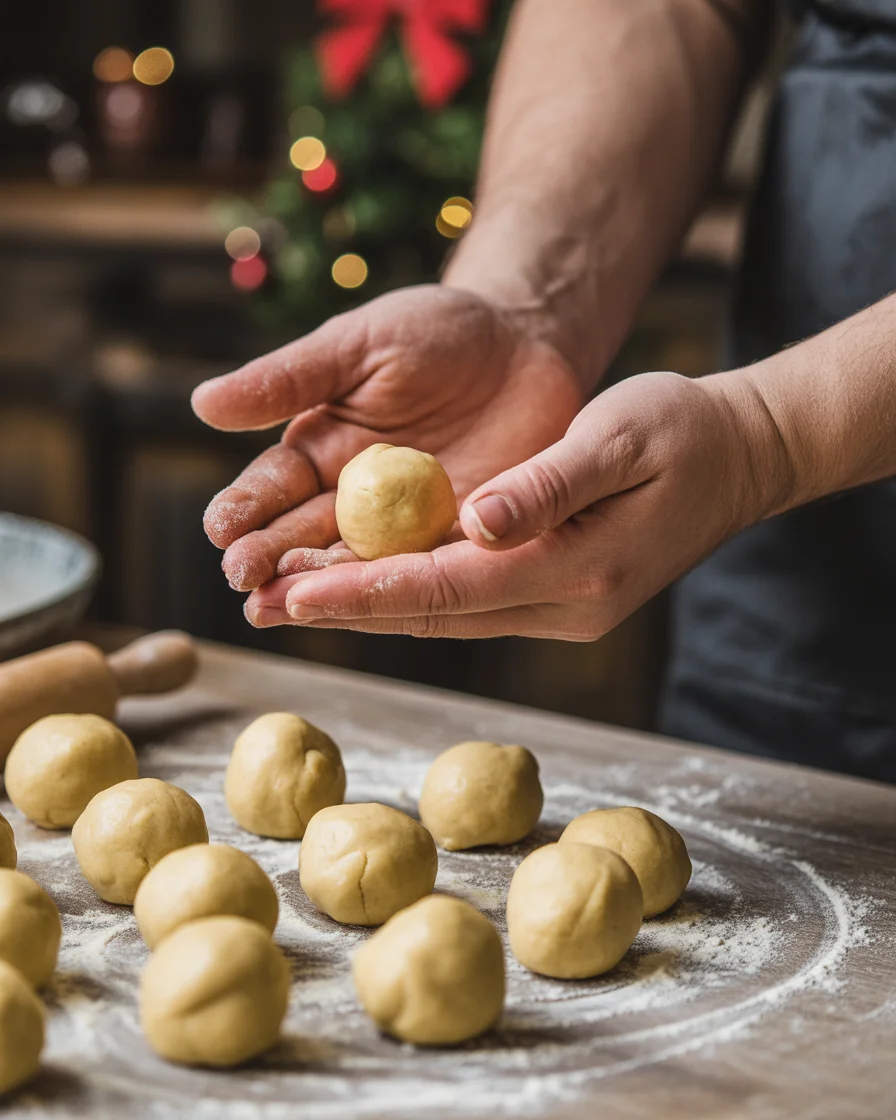
- Roll evenly. I aim for about 1 tablespoon of dough per cookie. Even sizes bake evenly and look neat on a plate.
- Press gently, then fix cracks. Use your thumb or a rounded measuring spoon to make a well. If the edges crack, just smooth them back together.
The chocolate pool
- Use good chocolate. Semi-sweet or dark works best for a rich, balanced center. Add a small pat of butter or a teaspoon of cream to keep it glossy.
- Fill before baking for a soft set. If you want a thicker center, bake the cookie 5 minutes first, add chocolate, then finish baking.
- Do not overbake. Pull them when the edges look set and the chocolate looks slightly soft. The centers will continue to settle as they cool.
- Top with a pinch of flaky salt while warm. It wakes up the flavor and makes the surface sparkle a little.
- Let them cool on the sheet for 5 minutes. Then transfer to a rack so the bottoms stay crisp, not steamy.
These small details make the difference between good cookies and truly great ones. I reach for these same habits when I make other simple favorites like chocolate spritz cookies because consistency is everything. If you follow these steps, your Deliciously Simple Chocolate Thumbprint Cookies will come out looking and tasting bakery-level.
Ideas to decorate chocolate thumbprint cookies
This is the fun part. You can keep them minimal or go all out. Either way, decorations can add crunch, color, and a little personality.
- Classic glossy finish: Smooth the chocolate center with the back of a spoon. Add a tiny pinch of flaky salt for contrast.
- Festive sprinkles: While the chocolate is still warm, scatter holiday sprinkles or colored sanding sugar. For a cute Valentine vibe, think pink and red sprinkles, and take inspiration from these adorable sparkle sweetheart cookies.
- Nutty crunch: Roll the dough balls in finely chopped pecans or hazelnuts before baking. It adds a toasty ring around the chocolate center.
- Double chocolate: Dust with cocoa powder or drizzle with a little white chocolate after cooling.
- Cookie tray harmony: Mix shapes and colors on your platter for a cozy look. Thumbprints pair nicely with crisp cookies and soft bars.
If you are baking with kids, give them small bowls of toppings and let them decorate a few each. It makes the whole experience feel relaxed and playful. I have found that friends love the mix of textures, and the cookies still look polished without any fuss. And yes, I still reach for these Deliciously Simple Chocolate Thumbprint Cookies when I need a guaranteed win.
Video tutorial
Sometimes it helps to see the dough and the indent in action. In the video, I show how soft the butter should be, how long to cream, and exactly how deep to press the center. You will also see the bake stage I aim for so the edges set without drying out. Watch for the moment the chocolate goes from matte to lightly glossy as it cools. That is your cue that the texture is right.
Grab a baking buddy, hit play, and bake along. When the cookies are in the oven, set out mugs and make something cozy to sip. I like serving these with rich hot chocolate, and this easy recipe for homemade drinking chocolate is a perfect match for the deep cocoa notes here. The combo makes any evening feel like a mini celebration.
Once you try the techniques on video, you will be able to make these Deliciously Simple Chocolate Thumbprint Cookies by heart.
Common Questions
Do I have to chill the dough? A short chill is the secret to keeping the thumbprint shape. Twenty to thirty minutes is enough to keep the edges neat and reduce spreading.
Can I fill the center after baking instead? Yes. Bake the cookies for 8 to 9 minutes, then fill and return to the oven for 2 minutes. This gives a firmer, slightly thicker chocolate center.
What chocolate works best? Use a bar or chips that you enjoy eating. Semi-sweet is a safe choice. If you like deeper flavor, go for 60 to 70 percent dark chocolate.
How do I store these? Keep in an airtight container at room temperature for up to 4 days. For longer storage, freeze the baked cookies without decorations, then thaw and add a fresh drizzle or sprinkle.
Can I make the dough ahead? Yes. Chill the dough up to 48 hours. Let it sit on the counter for 10 minutes before rolling so it is easier to scoop and shape.
Ready to bake and share
When you want something sweet, fast, and totally satisfying, these Deliciously Simple Chocolate Thumbprint Cookies have your back. They are buttery, chocolatey, and just fancy enough to feel special. If you want to browse more styles and techniques, this helpful guide to Chocolate Thumbprint Cookies – In Bloom Bakery walks through another delicious approach, and it pairs nicely with the tips here. Grab your butter, warm up the oven, and let me know how yours turn out. I am cheering you on from my kitchen counter.

Chocolate Thumbprint Cookies
Ingredients
Method
- Preheat the oven to 350°F (175°C) and line a baking sheet with parchment paper.
- In a mixing bowl, cream together the softened butter and granulated sugar until light and fluffy.
- Add the egg yolk and vanilla extract, mixing until combined.
- In a separate bowl, whisk together the flour, cocoa powder, and salt.
- Gradually fold the dry ingredients into the wet mixture until a soft dough forms.
- Chill the dough in the refrigerator for 20-30 minutes.
- Roll about 1 tablespoon of dough into a ball and place it on the prepared baking sheet.
- Use your thumb or a rounded measuring spoon to make a well in the center of each dough ball.
- Bake the cookies for 10-12 minutes, until the edges are set.
- Remove from the oven and immediately fill each well with chocolate chips and a pat of butter or teaspoon of cream for shine.
- Return to the oven for an additional 2-3 minutes to melt the chocolate.
- Sprinkle with flaky sea salt and let cool on the baking sheet for 5 minutes before transferring to a wire rack.