
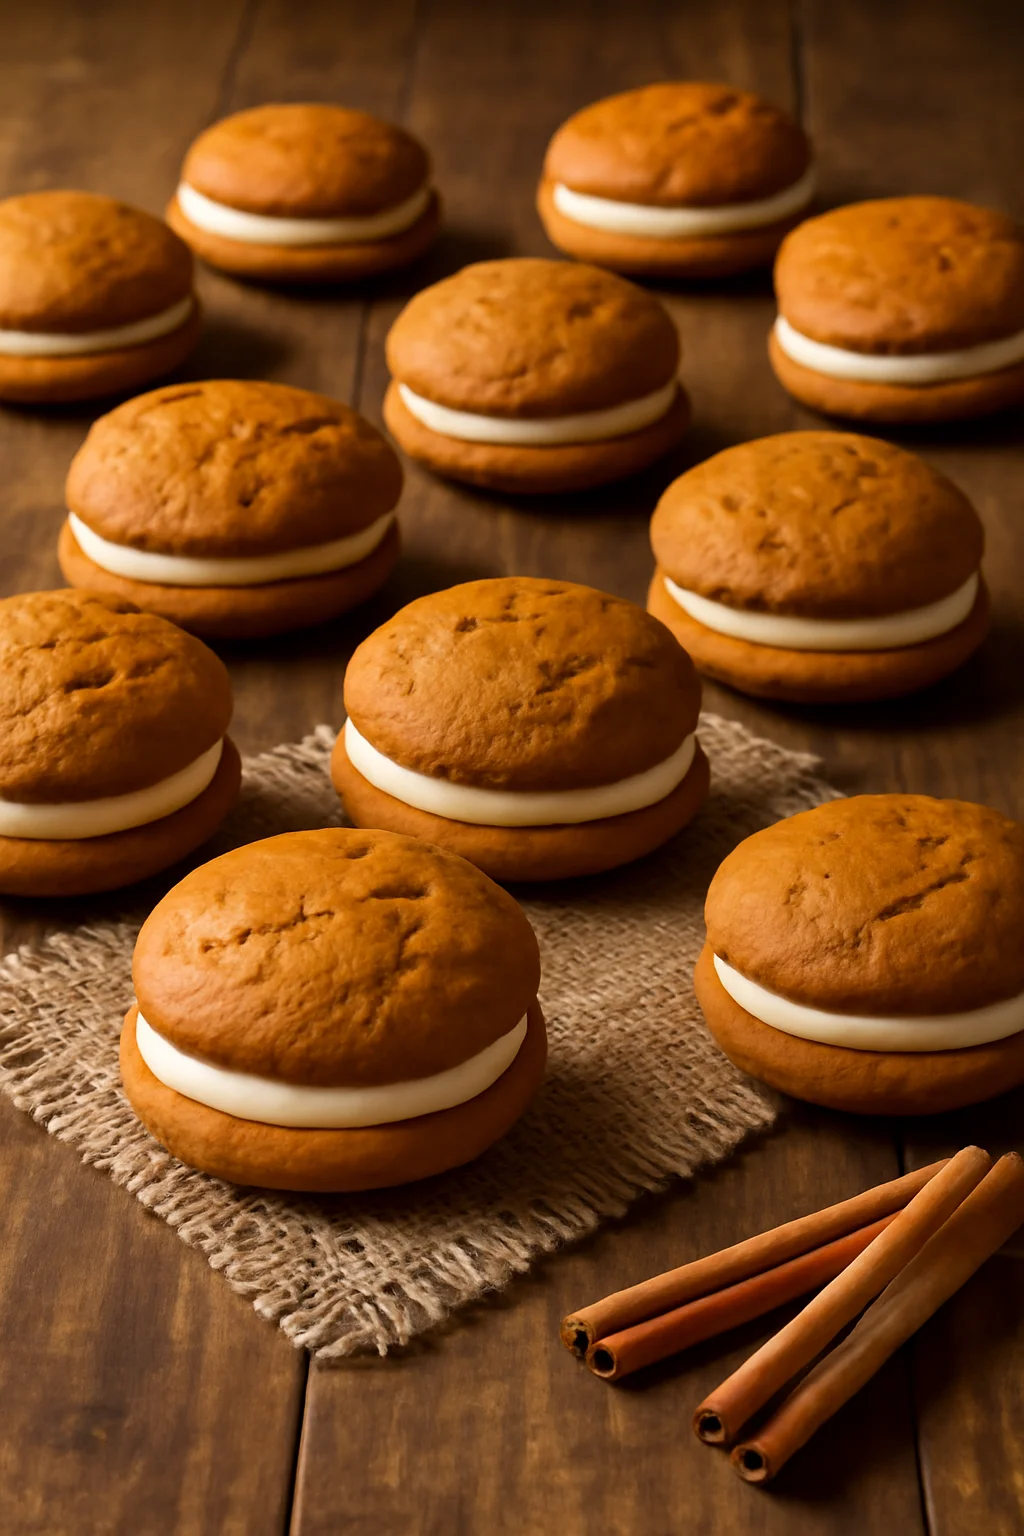
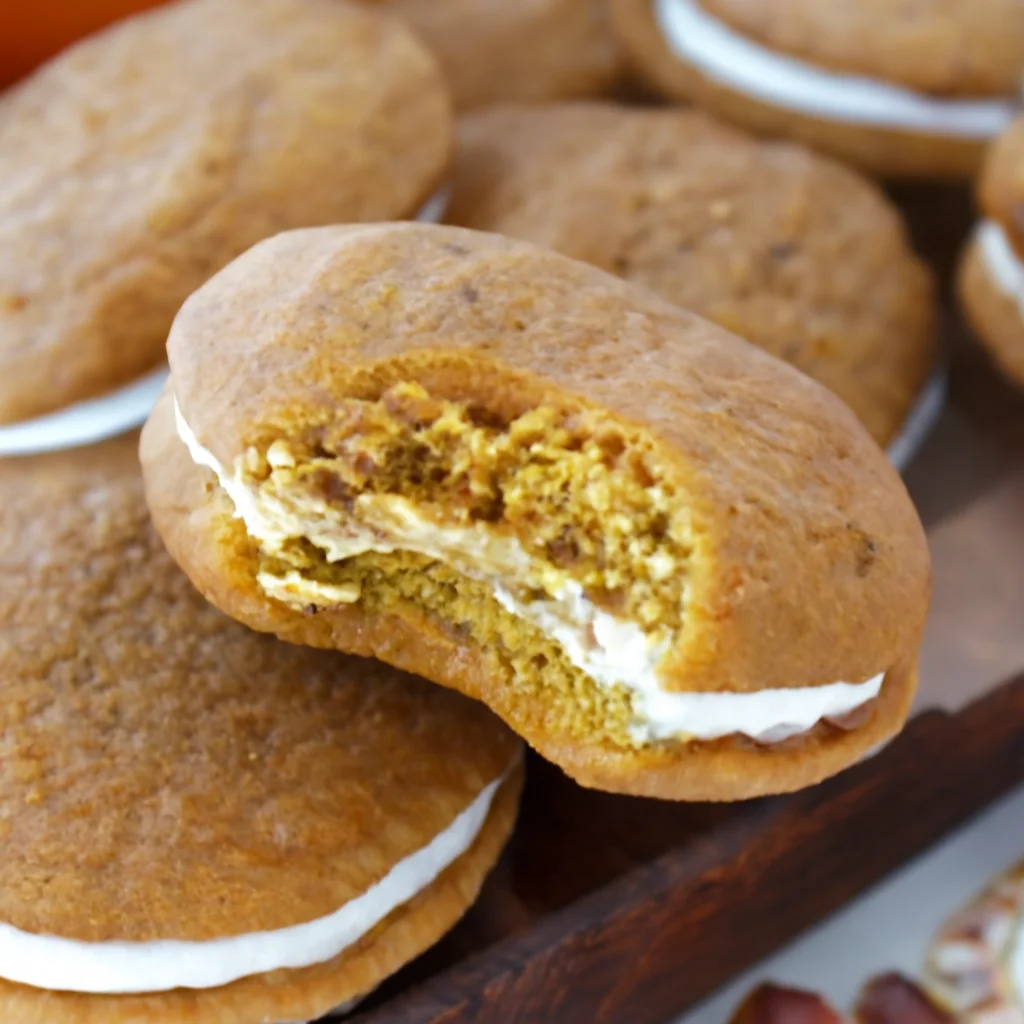
Pumpkin Whoopie Pies are my go to treat when I want something cozy but I do not want to fuss with a layer cake. You know those days when it is chilly, you are craving fall spices, and you want a dessert that feels special without turning your kitchen into a disaster zone. This recipe hits that sweet spot with soft cake like cookies and a creamy filling that smells like cinnamon heaven. I started making these after bringing a batch to a friend hangout and watching them disappear in minutes. If you have ever wanted a fall dessert that looks impressive but is actually very doable, you are in the right place.
Ingredients
I like to keep this recipe simple and pantry friendly. The key is using pumpkin puree (not pumpkin pie filling) and a warm spice mix that makes your kitchen smell like a candle store in the best way.
What you will need
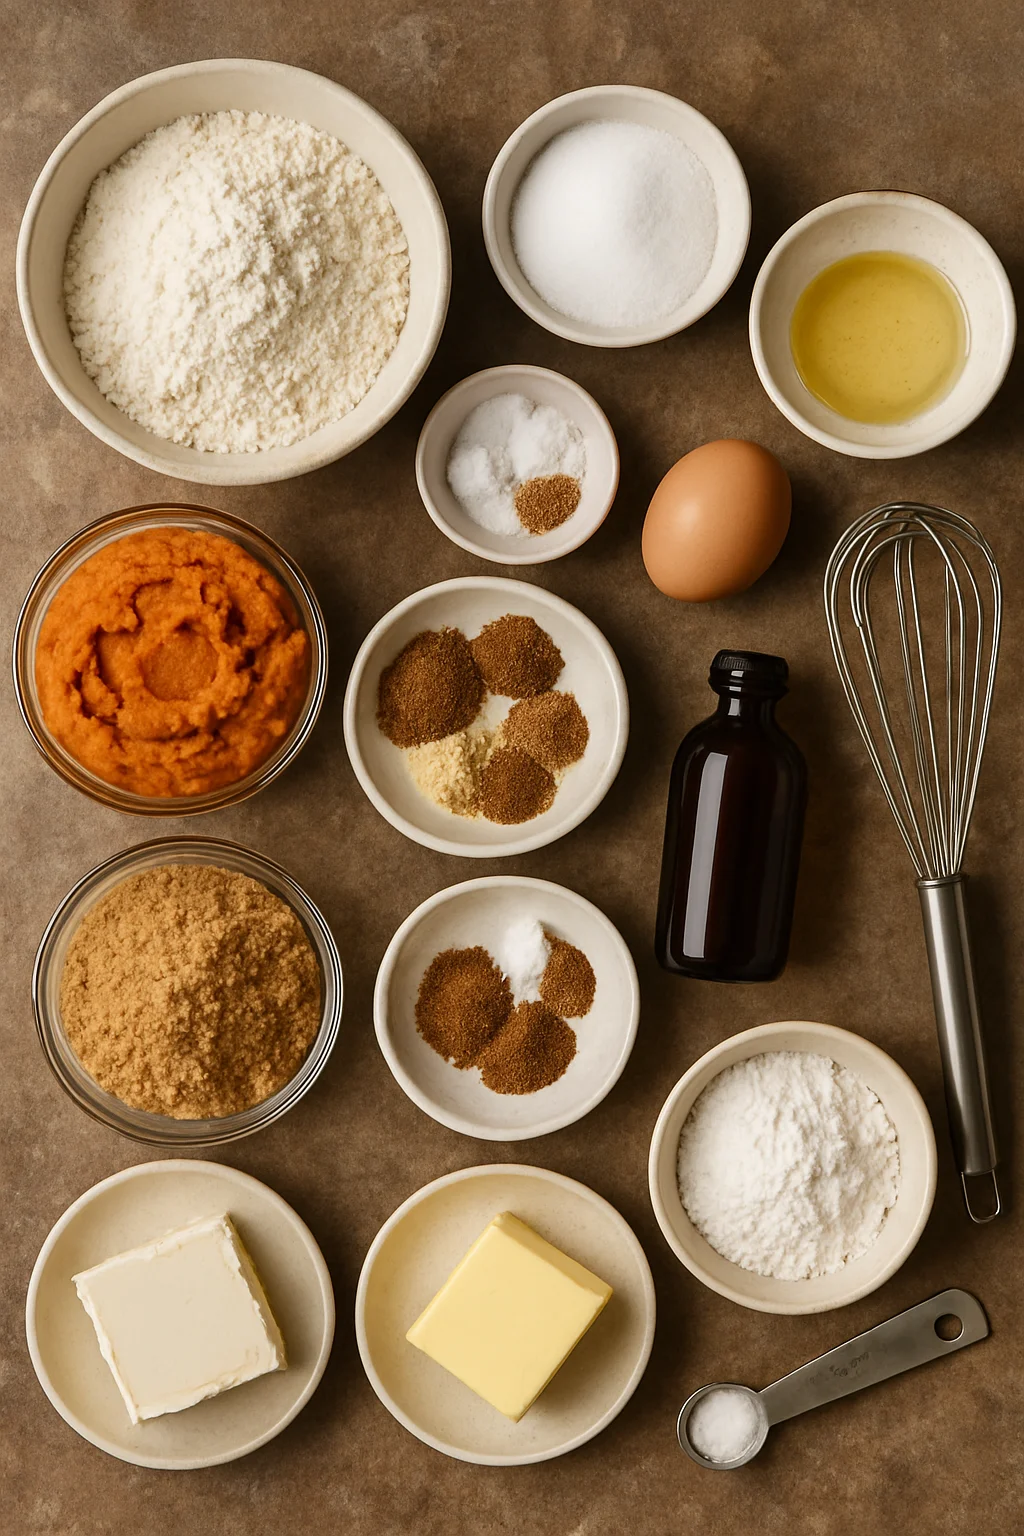
- All purpose flour
- Baking powder and baking soda
- Salt
- Spices: cinnamon, ginger, nutmeg, and a pinch of cloves (optional but nice)
- Pumpkin puree
- Brown sugar and granulated sugar
- Egg
- Neutral oil (or melted butter if you like a richer vibe)
- Vanilla extract
For the filling, I do a cream cheese based filling most of the time:
Cream cheese, butter, powdered sugar, vanilla, and cinnamon. That is it. If you want another pumpkin project after this, my cozy dinner pick is this cozy pumpkin sweet potato soup because it is basically fall in a bowl.
How to Make Pumpkin Whoopie Pies
These come together faster than you would think. The batter is thick, kind of like a muffin batter, and the cookies bake up soft. The biggest trick is to keep them similar in size so they sandwich nicely.
Step by step directions
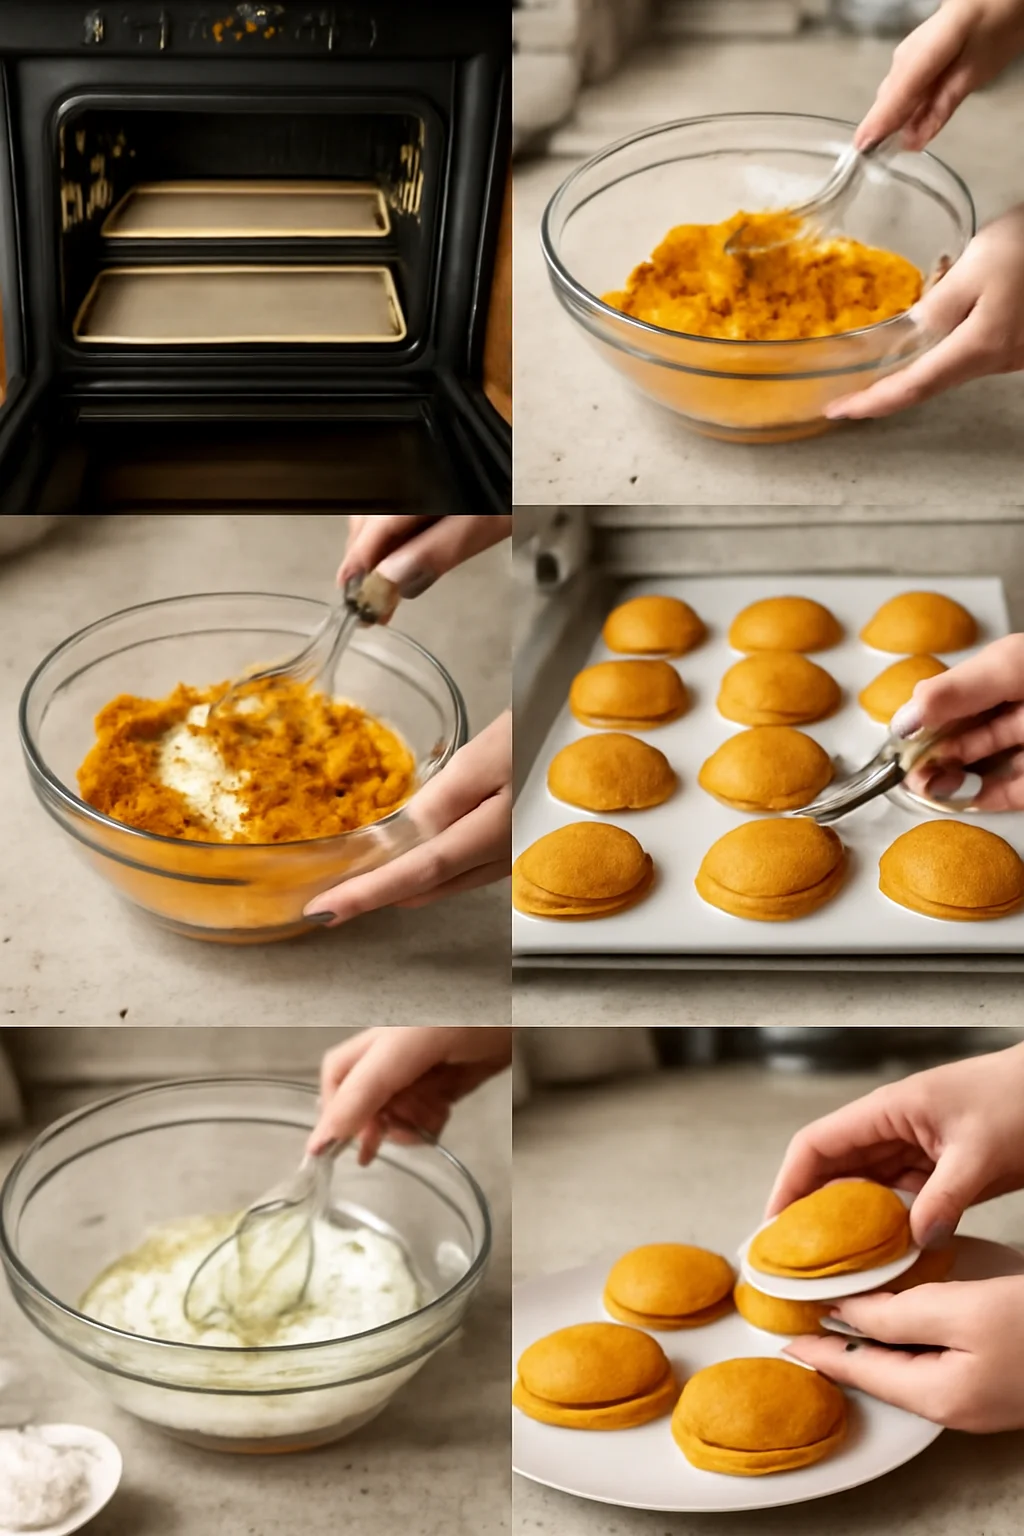
1) Heat and prep. Preheat your oven to 350 F. Line baking sheets with parchment paper. This helps prevent sticking and keeps the bottoms from getting too dark.
2) Mix dry ingredients. In a bowl, whisk flour, baking powder, baking soda, salt, and your spices. I always whisk spices into the flour so there are no random clove pockets later.
3) Mix wet ingredients. In another bowl, whisk pumpkin puree, sugars, egg, oil, and vanilla until smooth. It should look glossy and smell amazing already.
4) Combine gently. Add the dry mix into the wet mix and stir just until you do not see streaks of flour. Do not overmix. Overmixing is how you lose that tender bite.
5) Scoop and bake. Scoop batter onto the baking sheet, about 1 and a half tablespoons each. Leave space because they spread a bit. Bake about 10 to 12 minutes, until the tops look set and a toothpick comes out clean.
6) Cool completely. This part matters. If you put filling on warm cookies, it melts and slides around. Let them cool on the pan for a few minutes, then move to a rack.
7) Make the filling. Beat softened cream cheese and butter until smooth. Add powdered sugar slowly, then vanilla and cinnamon. You want it thick enough to hold its shape but still spreadable.
8) Assemble. Spread or pipe filling on the flat side of one cookie and top with another. Give it a gentle press. Now you have Pumpkin Whoopie Pies that look bakery cute with basically zero stress.
;
“I made these for my kid’s class party and I had three parents ask for the recipe. The cookies stayed soft for days and the filling was not overly sweet.”
If you are in a pumpkin baking mood, you might also like these Halloween pumpkin cookies for something a little more snacky and easy to share.
How to Store
Because of the cream cheese filling, I treat these like a fridge friendly dessert. The good news is they actually get even better after a chill because the flavors settle in.
Fridge: Store assembled Pumpkin Whoopie Pies in an airtight container in the refrigerator for up to 4 days. I like to place parchment between layers so they do not stick together.
Room temperature: If your kitchen is cool and you are serving them the same day, they can sit out for a few hours. After that, I move them back to the fridge.
Freezer: You can freeze them, but I recommend freezing the cookies and filling separately if you can. Freeze the cookies in a freezer bag for up to 2 months. The filling can be frozen too, then thawed in the fridge and re whipped. If you freeze them assembled, wrap each one and expect the texture to be a tiny bit softer after thawing.
When I am on a hand pie kick, I keep those in the freezer too. This one is super fun when you want something fruity instead of pumpkin: air fryer apple hand pies.
Variations of Pumpkin Whoopie Pies
Once you make the classic version, it is hard not to start playing around. Here are a few easy swaps that do not require any fancy ingredients.
Maple filling: Add a tablespoon or two of maple syrup to the filling and reduce powdered sugar slightly as needed. It tastes like a pancake breakfast in dessert form.
Spice level changes: Want it bolder? Add extra cinnamon. Want it milder for kids? Use just cinnamon and a tiny pinch of nutmeg.
Chocolate chips: Fold mini chocolate chips into the batter. Not too many, just enough to surprise you.
Brown butter filling: Brown the butter first, cool it back to soft, then beat with cream cheese. This adds a deeper nutty flavor.
Fluffy marshmallow style: Replace part of the filling with marshmallow creme for a lighter texture. It gets messy, but in a fun way.
If you are a pumpkin dessert collector like me, bookmark this pumpkin coffee cake with a twist of spice for lazy weekend mornings when you want something cozy with coffee.
Tips for Perfecting Your Whoopie Pies
I have made every mistake at least once, so here is what actually helps.
Use pumpkin puree, not pie filling. Pumpkin pie filling has sugar and spices already, and it can throw off the texture.
Measure flour the gentle way. Spoon flour into the measuring cup and level it off. Packing flour can make the cookies dry, and we want them soft and cake like.
Keep the scoops the same size. A cookie scoop makes this so much easier. Even sizes means easy sandwiching and they look prettier.
Do not overbake. When they are done, the tops should look set and spring back lightly. Overbaking is how you lose that pillowy feel that makes Pumpkin Whoopie Pies so good.
Let them cool fully before filling. I know it is tempting, but warm cookies will melt the filling and you will end up with a sticky situation.
Chill before serving if you want clean bites. Ten to fifteen minutes in the fridge helps the filling firm up and makes them easier to eat.
Common Questions
Can I make Pumpkin Whoopie Pies ahead of time?
Yes. I actually prefer them after a few hours in the fridge. Make them the night before, store airtight, and you are set.
Why did my cookies spread too much?
Usually it is because the batter was too warm or the baking soda was a little heavy handed. Make sure your measurements are solid, and chill the batter for 15 to 20 minutes if your kitchen is warm.
Can I use homemade pumpkin puree?
You can, but homemade puree can be wetter. If it looks watery, blot it with paper towels or simmer it gently to thicken a bit so your cookies do not turn gummy.
What is the best filling if I do not want cream cheese?
A simple vanilla buttercream works great. You can also do a marshmallow buttercream if you want something lighter and extra sweet.
How do I keep the filling from squeezing out?
Do not overfill, and chill the pies after assembling. Also, make sure the filling is thick enough before you start. If it is too soft, add a little more powdered sugar.
A sweet little wrap up
If you want a cozy fall dessert that is easy to share, Pumpkin Whoopie Pies are it. They are soft, spiced, and the creamy filling makes them feel a little extra without being complicated. If you want to compare recipes or get more inspiration, I like checking out Pumpkin Whoopie Pies – Everyday Annie and Pumpkin Whoopie Pies with Cinnamon Cream Cheese Filling because they both have great takes on the classic. Bake a batch, stash a few in the fridge, and tell me if you can stop at just one. 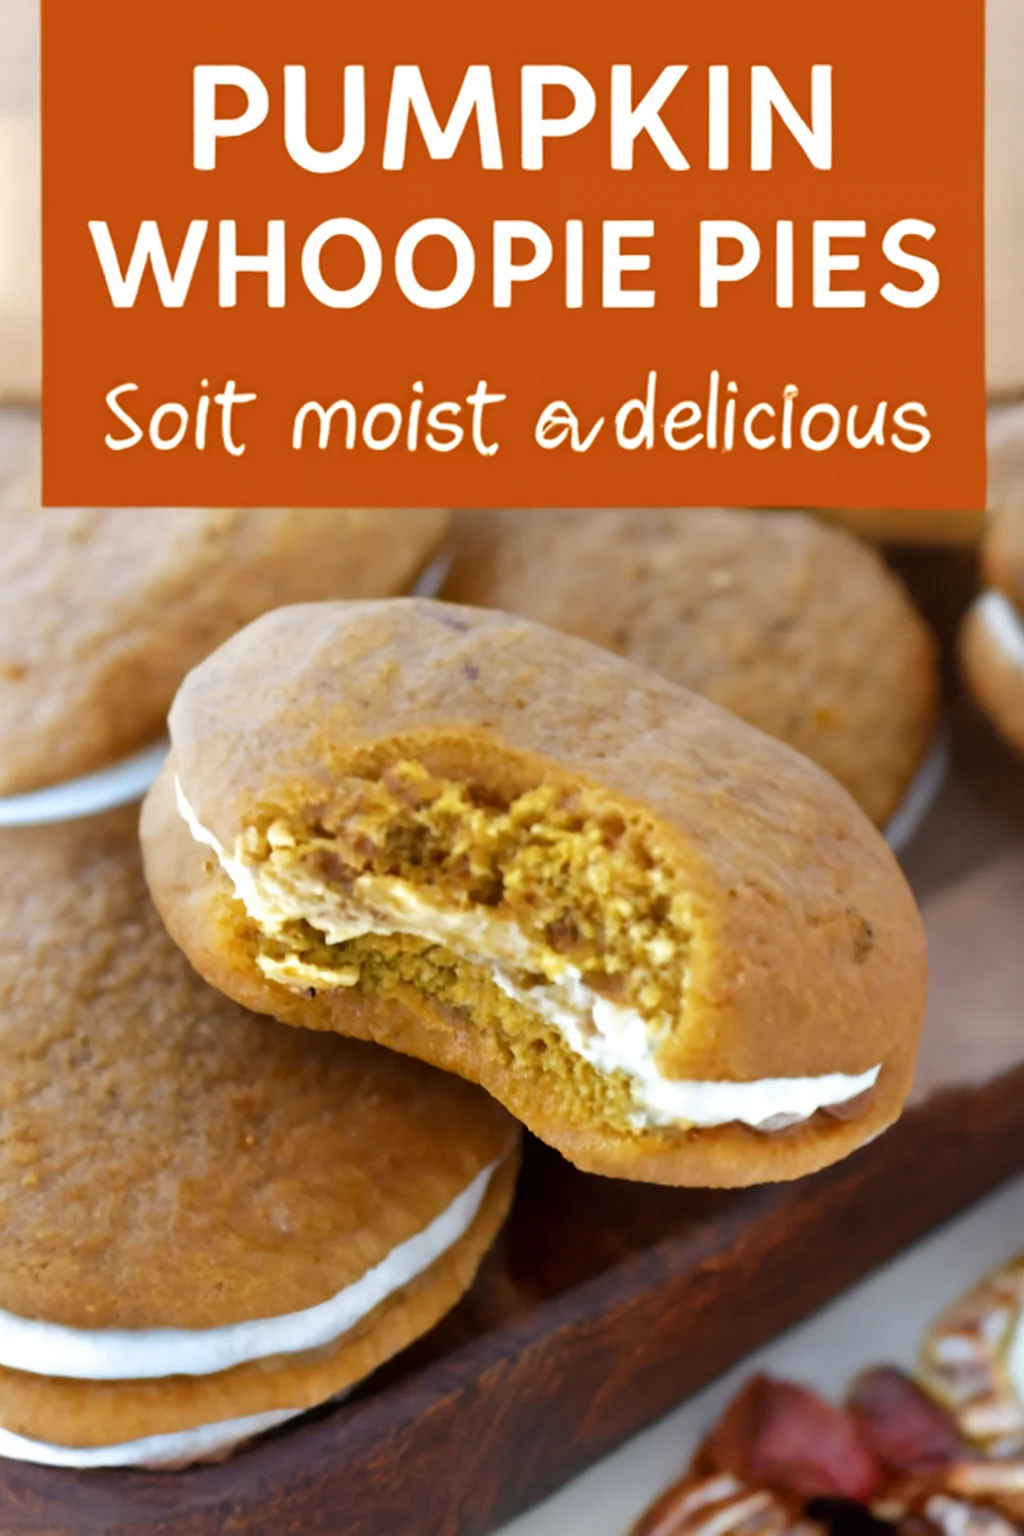
Pumpkin Whoopie Pies
Ingredients
Method
- Preheat your oven to 350°F (175°C). Line baking sheets with parchment paper.
- In a bowl, whisk together flour, baking powder, baking soda, salt, and spices.
- In another bowl, whisk pumpkin puree, brown sugar, granulated sugar, egg, oil, and vanilla until smooth.
- Gently combine the dry ingredients into the wet ingredients, stirring just until there are no flour streaks. Do not overmix.
- Scoop batter onto the baking sheet, about 1.5 tablespoons each, and leave space for spreading. Bake for 10 to 12 minutes.
- Let the cookies cool completely on a rack.
- Prepare the filling by beating softened cream cheese and butter until smooth. Add powdered sugar, then vanilla and cinnamon. Mix until thick and spreadable.
- Spread or pipe filling onto the flat side of one cookie and top with another. Give it a gentle press.