

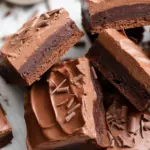
Chocolate Mousse Brownies are the kind of dessert that stops a conversation. If your brownies always vanish too fast or never feel quite indulgent enough, this is your fix. Picture a fudgy base with a cool, airy mousse on top, plus a glossy chocolate finish that sets like a dream. These are crowd pleasers and weeknight rewards in one pan. I keep a batch in the fridge for those moments when only chocolate will do. These Irresistibly Rich Chocolate Mousse Brownies might just be your new signature dessert.
Why you will love this recipe
Let me cut to the chase. These Irresistibly Rich Chocolate Mousse Brownies deliver that perfect contrast: dense and fudgy on the bottom, light and creamy on top. They feel special without requiring pastry chef skills. If you can melt chocolate, stir batter, and use a hand mixer, you can nail this recipe.
They also chill beautifully, which is a big win for planning. Bake the brownies a day ahead, top with mousse the next morning, and finish with chocolate later. The layers set up cleanly, slice like a dream, and the taste gets even better after a few hours in the fridge.
I also love that the sweetness is balanced. You get full-on chocolate flavor without that cloying finish. A tiny pinch of salt and a whisper of espresso powder wake up the chocolate so each bite tastes deep and satisfying. If you love rich desserts like my cheesecake brownies, this will be right up your alley.
Want a secret weapon for potlucks and birthdays? Bring These Irresistibly Rich Chocolate Mousse Brownies. Folks rave, and you get to soak up the compliments while sneaking an extra piece later.
My sister texted me the next morning: “I hid the last two squares so the kids wouldn’t find them. Not sorry.” That’s the energy these brownies bring to a table.
They are also flexible. You can scale the recipe, garnish it a dozen ways, or lean into seasonal toppings. Dress them up with berries or keep them plain and polished. Either way, they hit the spot.
What you’ll need to make chocolate mousse brownies
Here is what you will use and why it matters. I like to keep it simple, but a few small choices make a big difference.
- Unsalted butter: for a fudge-forward texture and rich flavor.
- Sugar: regular granulated is perfect for the brownie base.
- Eggs: bring structure and that shiny top. Room temp helps.
- Cocoa powder and melted chocolate: a duo gives depth and fudginess. Dutch-process cocoa adds extra richness.
- All-purpose flour: just enough to hold it together without getting cakey.
- Salt + espresso powder: tiny amounts to boost chocolate. Optional but recommended.
- Heavy cream: for the mousse. Cold cream whips better.
- Powdered sugar: gently sweetens the mousse without graininess.
- Cream cheese or mascarpone (optional): a spoonful stabilizes the mousse for cleaner slices.
- Chocolate for the ganache or finish: semisweet or dark, your call.
Tools you will want: an 8 or 9 inch square pan, parchment paper, a whisk, a heat-safe bowl, and a hand mixer or stand mixer. A small offset spatula helps smooth the layers, but a spoon works in a pinch.
If you are picky about chocolate quality, you will taste the difference. Use bars instead of chips when you can. If you are a chocolate purest, you might also love this classic dessert: flourless chocolate cake. It shows how simple ingredients shine when the chocolate is good.
A quick word on cocoa: natural cocoa is fine, but Dutch-process cocoa leans smoother and richer. I like to use Dutch in the brownies and semisweet chocolate for the mousse and topping. It hits that sweet spot between milky and intense.
Make sure your cream is cold. Warm cream will not whip nicely. Chill your mixing bowl for a few minutes if your kitchen runs warm.
Repeat after me: parchment paper is your friend. Line the pan with a parchment sling so you can lift the whole slab out for tidy slicing. It might seem extra, but it makes you look like a pro. 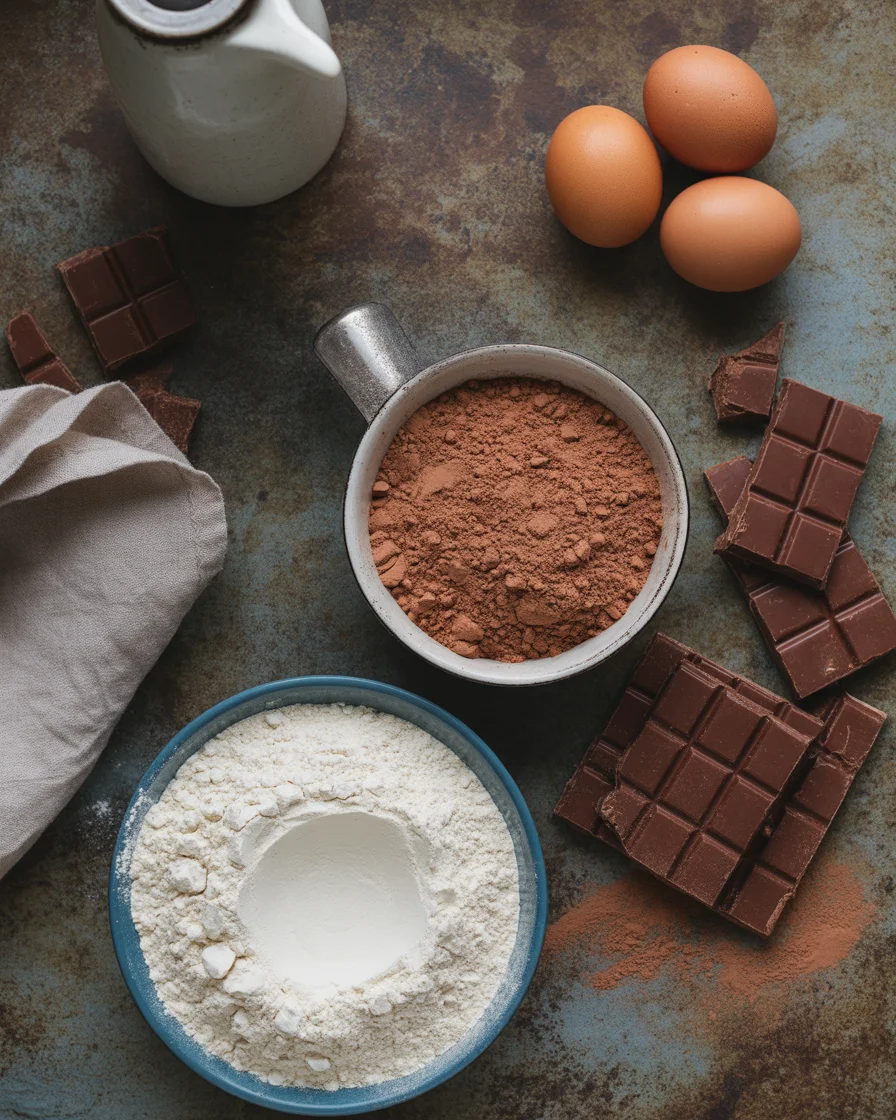
How to make chocolate mousse brownies?
Make the brownie base
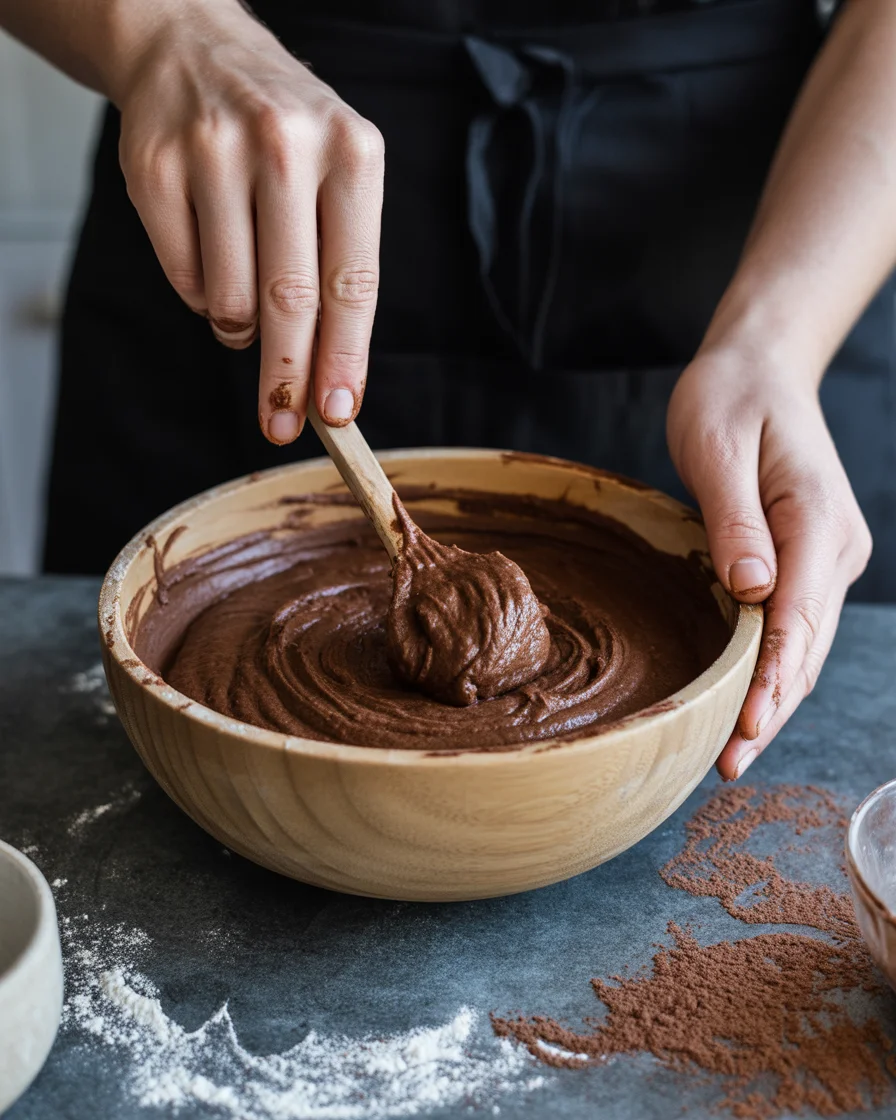
Preheat your oven to 350 F. Line your pan with parchment and lightly grease the sides. Melt butter and chocolate together in a heat-safe bowl set over a pot of barely simmering water. Or use the microwave in short bursts. Stir in sugar until glossy, then whisk in eggs one at a time until smooth. Add cocoa, a pinch of salt, and espresso powder. Fold in flour just until combined. Spread into your pan.
Bake 20 to 26 minutes, depending on your pan and oven. You want the edges set and the center just barely done. A few crumbs on the toothpick is perfect. Cool completely. If you rush this, the mousse can melt or slide.
Whip the chocolate mousse
Whip cold heavy cream with powdered sugar until it holds soft peaks that just stand up. Fold in melted and cooled chocolate gently. If you are using cream cheese or mascarpone, beat it until smooth, then fold it in. You want a silky mixture that is airy but still holds shape. The goal is cloud-like but stable.
Layer and chill
Spread the mousse over the cooled brownie base. Smooth the top. Chill for at least 60 to 90 minutes so it firms up. The mousse should feel set when you gently touch the surface. If you love fun, bite-size chocolate treats, check out these chocolate rice krispie balls while your pan chills.
Finish and serve
For a glossy finish, make a quick ganache. Warm a splash of cream, pour it over chopped chocolate, let it sit, then stir smooth. Cool slightly, then spread a thin layer over the mousse. Chill again for 20 to 30 minutes to set. Lift the brownies out by the parchment and slice with a warm knife, wiping between cuts for picture-perfect squares.
That first bite is the sell. The fudge base gives you chew, the mousse gives you float, and the top gives you sheen. These Irresistibly Rich Chocolate Mousse Brownies are worth every minute of chill time.
Ingredient Tips for the Brownie Base
Butter vs oil: Butter gives better flavor and a denser, fudgy bite. If you swap in oil, keep it to the same volume and expect a slightly different texture. Butter is my go-to here.
Sugar matters: Granulated sugar helps create that shiny top. Do not cut sugar too much or the texture will suffer. If you want to tweak sweetness, do it in the mousse layer instead.
Chocolate choices: Use real chocolate bars for melting. Chips can contain stabilizers that affect texture. Semisweet is friendly and balanced. Dark chocolate makes it more intense and grown-up.
Eggs at room temp: Cold eggs can make the batter seize when mixed with warm chocolate and butter. If you forgot to pull them out, place the eggs in a bowl of warm water for 10 minutes.
Flour and mixing: Less is more. Fold gently and stop as soon as the flour disappears. Overmixing can make brownies tough.
Baking time: Watch more than the clock. Ovens vary. You want set edges and a soft center. Pull them too late and you will get dry edges. Pull too early and the center can be underbaked. Aim for moist crumbs on your tester.
Craving another chewy chocolate fix after these? You might also like my gooey butter cookies which give that same melt-in-your-mouth joy in cookie form.
Storage note: The base can be baked a day ahead. Wrap once cooled so it stays soft. When you are ready, add the mousse and topping. That pacing makes hosting easy.
Recipe variations and add-ins
I love a classic, but playing with flavors keeps things fun. Here are some easy ideas you can try without risking the structure.
Espresso twist: Add a teaspoon of instant espresso powder to the brownie batter for extra depth. It boosts chocolate flavor without making the dessert taste like coffee.
Nut crunch: Fold in chopped toasted pecans, walnuts, or almonds to the brownie base. The mousse stays silky while the base gets a satisfying bite.
Swirl it: Warm and swirl a couple tablespoons of peanut butter or hazelnut spread into the brownie batter before baking. Drizzle a little on top of the mousse if you want the look to match the flavor.
Berry pop: Press fresh raspberries into the mousse before chilling, or top the finished pan with sliced strawberries. The bright fruit cuts through the richness in the best way.
Holiday magic: For a spooky spin, finish with candy eyeballs over the chocolate topping and take them to a party. Your friends will go nuts over these creepy eyeball brownies vibes, but with a mousse twist.
Crust swap: For a more cookie-like base, crush chocolate sandwich cookies with a little butter and press into the pan as a no-bake crust. Bake it for 8 to 10 minutes to set, then cool and add mousse.
Gluten friendly: Use a trusted 1:1 gluten free flour blend for the brownie base, or go the almond flour route for a slightly denser chew. Just keep the mousse as is.
If you prefer pure chocolate elegance with fewer layers, you can always go with a single-layer knockout like a sleek chocolate bark or a flourless cake on other days. But when you want maximum joy in each bite, These Irresistibly Rich Chocolate Mousse Brownies have your back.
Common Questions
How long do these keep? They keep well in the fridge for 4 to 5 days. Store them covered so the mousse does not pick up fridge smells.
Can I freeze them? Yes. Chill until firm, slice, and freeze pieces on a tray. Once solid, wrap individually. Thaw in the fridge before serving for the best texture.
Can I use a boxed brownie mix? You can. Bake it in an 8 or 9 inch pan and let it cool fully. The homemade base is richer, but the mousse and topping will dress up a boxed mix nicely.
Why did my mousse not set? It might be from warm cream or too little whipping. Use cold heavy cream and whip to soft peaks before folding in chocolate. Chill the layered pan at least an hour.
How do I get clean slices? Chill well, lift the slab out with parchment, and cut with a sharp knife warmed under hot water. Wipe the blade between cuts.
Ready to bake mousse magic at home?
These Irresistibly Rich Chocolate Mousse Brownies are more than a dessert. They are a little ritual you can count on: bake, chill, slice, grin. You will love the contrast of textures, the make-ahead ease, and the way everyone asks for the recipe. If you want to compare techniques or see another take, I learned a few helpful tricks from this guide to Chocolate Mousse Brownies that line up nicely with what I shared here. Now it is your turn. Grab the chocolate, heat the oven, and let this pan of happiness do the talking.
Chocolate Mousse Brownies
Ingredients
Method
- Preheat your oven to 350°F (175°C). Line an 8 or 9-inch square pan with parchment and lightly grease the sides.
- Melt butter and chocolate together in a heat-safe bowl set over barely simmering water, or use the microwave in short bursts.
- Stir in sugar until glossy, then whisk in eggs one at a time until smooth.
- Add cocoa, a pinch of salt, and espresso powder. Fold in flour just until combined.
- Spread into your prepared pan.
- Bake for 20 to 26 minutes. The edges should be set, and the center should be just barely done. Cool completely.
- Whip cold heavy cream with powdered sugar until soft peaks form.
- Fold in melted and cooled chocolate gently, and cream cheese or mascarpone if using.
- Spread the mousse over the cooled brownie base and smooth the top.
- Chill for at least 60 to 90 minutes until the mousse firms up.
- For a glossy finish, make ganache by warming cream and pouring it over chopped chocolate. Let sit, then stir until smooth.
- Cool slightly, then spread a thin layer over the mousse and chill again for 20 to 30 minutes.
- Lift the brownies out by the parchment and slice with a warm knife, wiping between cuts.