
Mint Oreo Balls are my go to move when I need a dessert that feels special but I do not have the time or energy for anything fussy. You know those moments when someone texts, “We are stopping by in an hour,” and your kitchen is basically just vibes and dirty coffee mugs? This is the fix. They taste like a cool, chocolatey mint cookie wrapped up in a creamy truffle, and people always think you worked harder than you did. Plus, they are super forgiving, so even if you are not the most confident baker, you are going to be fine. Let me walk you through how I make mine, what I have learned the hard way, and how to keep them looking cute for parties.

Why these are the best Mint Oreo Truffles
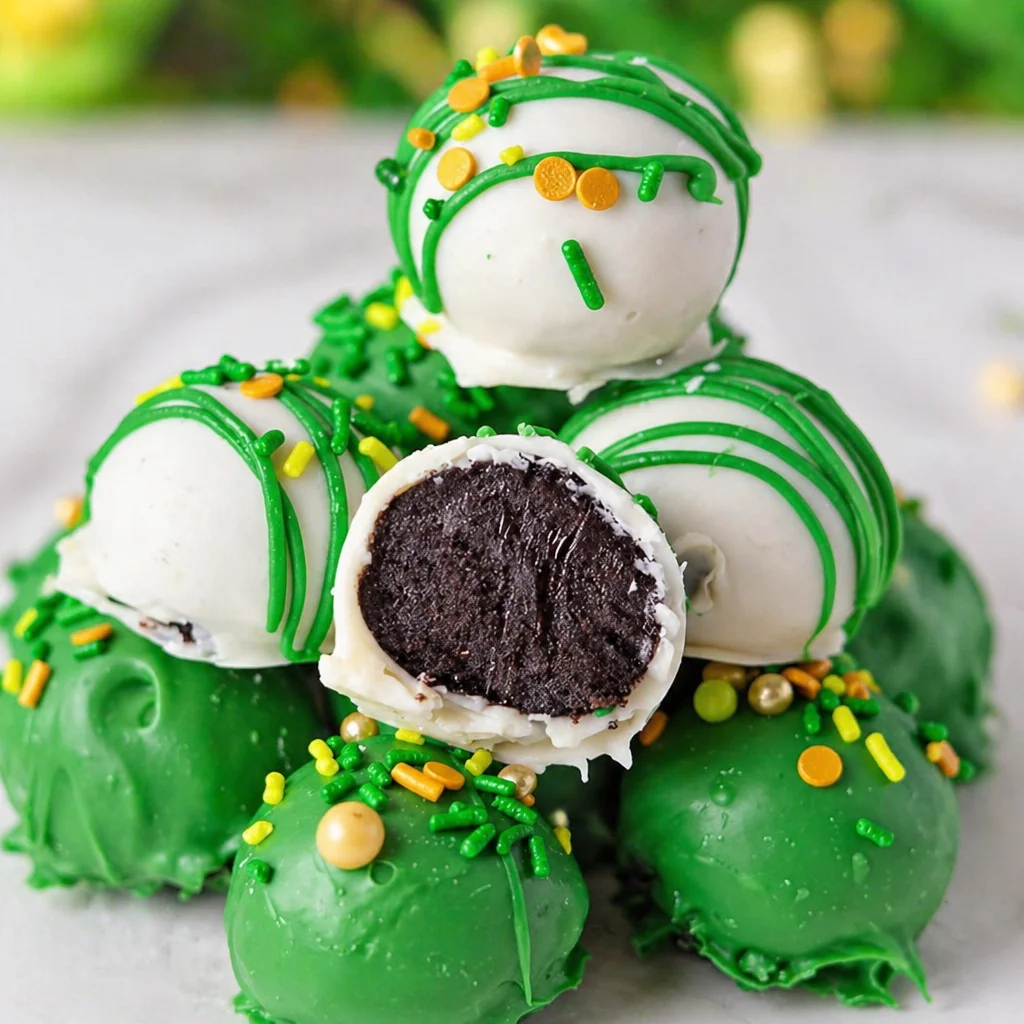
I have made a lot of Oreo truffle style treats over the years, and I keep coming back to this version. Mint and chocolate just makes sense, and the Mint Oreo filling basically does half the flavor work for you. The texture is my favorite part: soft in the middle, with that little snap of chocolate on the outside. If you chill them properly, they bite clean and look like you bought them from a fancy candy counter.
Here is why I think these are the best kind to bring to gatherings:
- They are quick: you can knock them out in one evening, even with chilling time.
- No baking: no oven drama, no timing cookies in batches.
- Easy to scale: double the batch for holidays, or make a half batch for a weeknight sweet craving.
- They travel well: once coated, they hold up nicely in a container.
Also, if you love this general Oreo ball vibe, you might want to peek at this other classic version too: Deliciously Easy Christmas Oreo Balls. I make those when I want a more traditional holiday look, but I still want the same easy process.
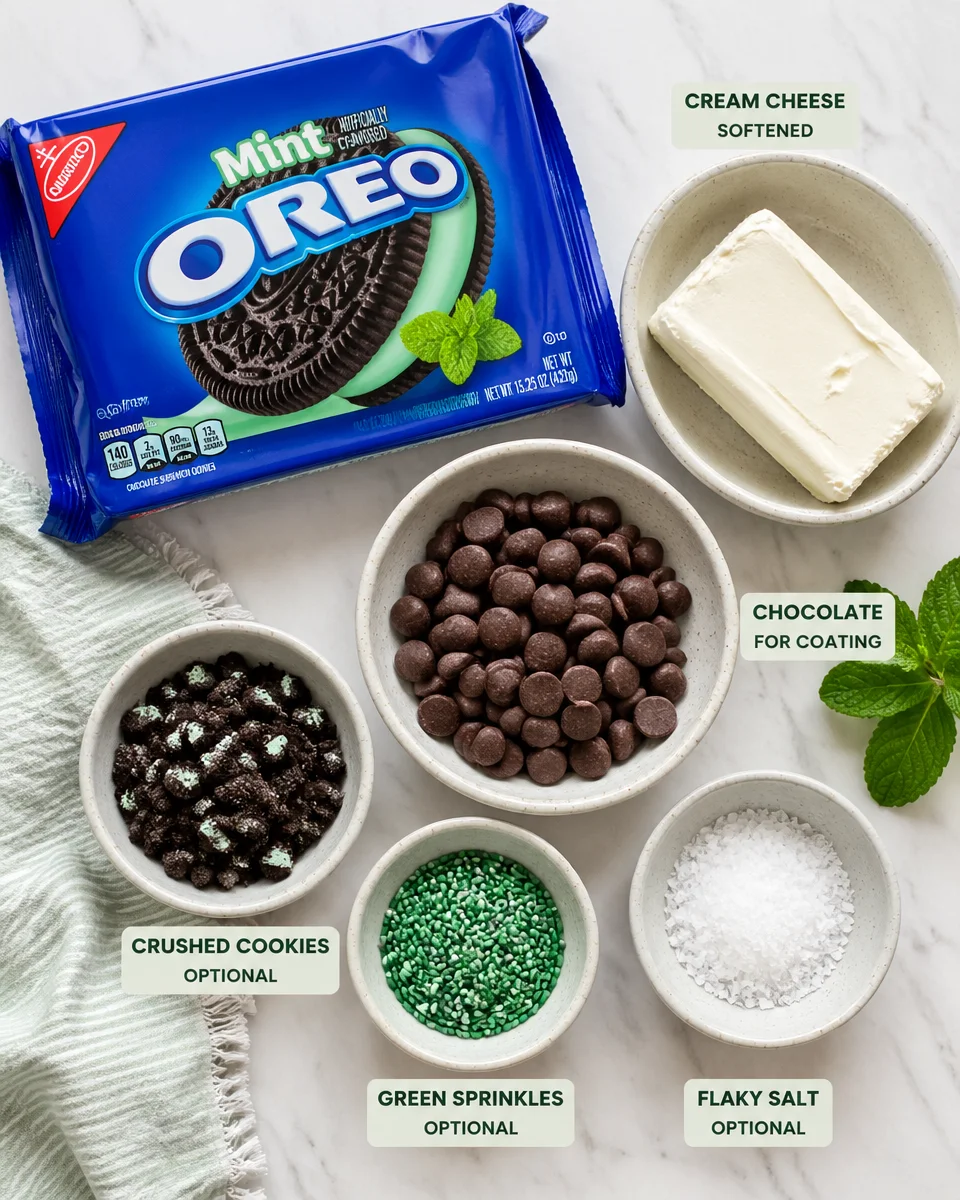
My basic ingredient list is short and sweet, which is kind of the whole point:
- 1 package Mint Oreos
- 1 block cream cheese, softened
- Chocolate for coating (more on that below)
- Optional toppings: crushed cookies, green sprinkles, flaky salt, or drizzle
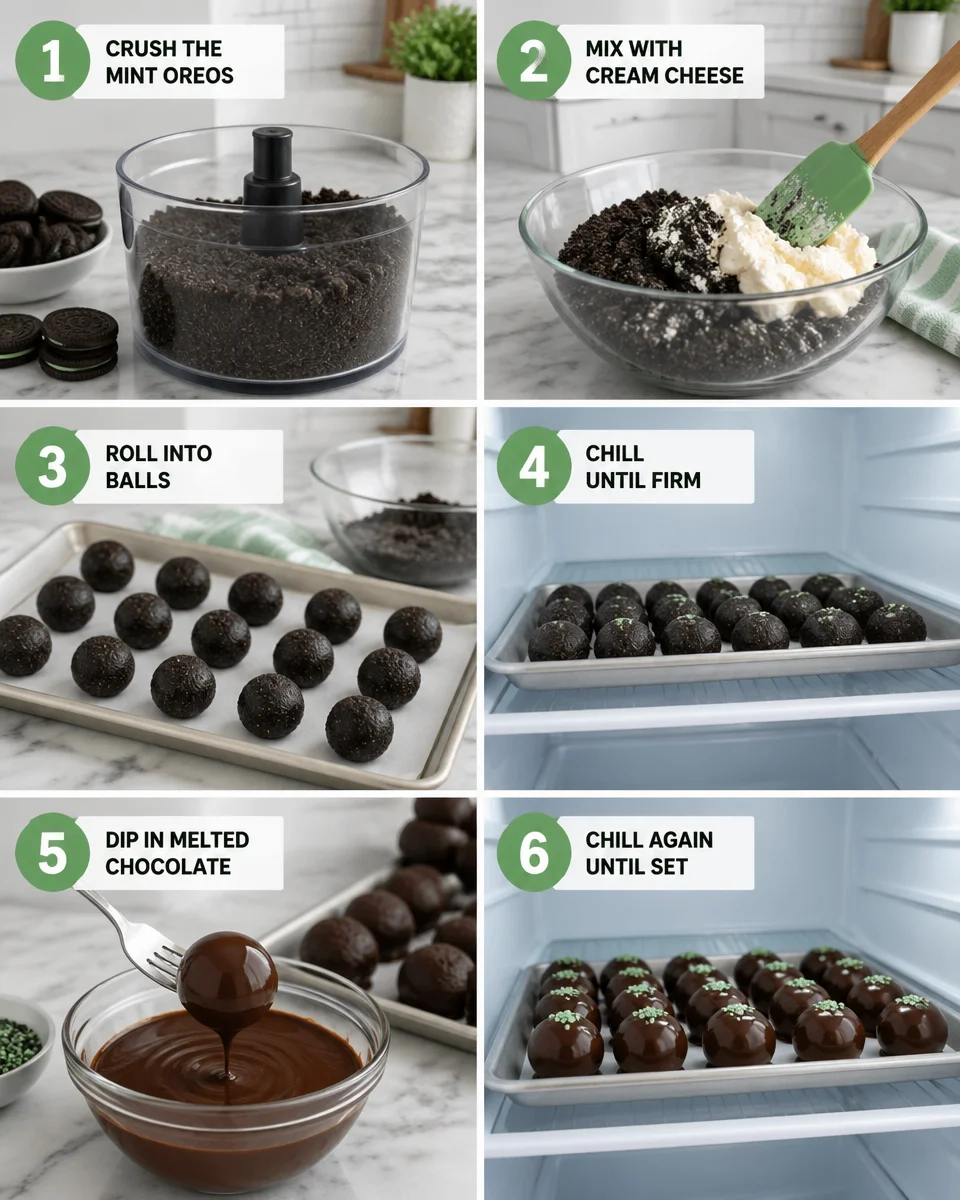
Quick directions, in real life language: crush the cookies into fine crumbs, mix with cream cheese until it turns into a thick dough, roll into balls, chill, dip in melted chocolate, then chill again until set. That is it. Mint Oreo Balls come together fast, but the chilling steps are what make them look neat instead of messy.
What Kind of Chocolate Can I Use for Coating?
This is the question that decides whether your truffles look smooth and shiny, or a little bumpy and thick. The good news is that you have options, and none of them are “wrong.” It just depends on what you have and how much effort you want to put in.
My go to coating choices
If I want the easiest route, I use candy melts or almond bark. They melt smoothly, set up fast, and do not require any special steps. If I am making Mint Oreo Balls for a party where I want them to look extra nice, I will use good chocolate bars or chocolate chips with a tiny bit of coconut oil or shortening mixed in to help it dip smoother.
Here is the quick breakdown:
Candy melts: easiest, lots of colors, sets firmly, great for beginners.
Almond bark: easy and smooth, good coverage, slightly “candy coating” taste.
Chocolate chips: real chocolate flavor, can be thicker, add a little oil for smoother dipping.
Chocolate bars: best flavor and texture, melts nicely, a little more expensive.
One small tip: whatever you use, melt it slowly. Microwave in short bursts, stir often, and do not rush it. Overheated chocolate turns grainy and sad, and nobody wants to fight with that when you are just trying to make a cute dessert.
If you are in a minty mood and want another fun twist, I also love this crunchy snacky idea: Peppermint Oreos Crunch. It is a totally different texture, but it hits that same mint chocolate craving.
And because it helps to hear from real people, here is what my friend said after I dropped a batch off during December cookie season:
“I ate two before I even put my groceries away. The mint is perfect and the chocolate shell makes them feel like a real candy shop treat.”
Tips for Oreo Truffle Success
I have made every mistake you can make with Oreo truffles. Too warm hands, not enough chilling, chocolate too hot, balls falling into the bowl, you name it. So here are the tips that actually help, without overcomplicating anything.
Little tricks that make a big difference
Use softened cream cheese. If it is too cold, you will fight the mixing process and end up with weird lumps. I leave it out for about 30 to 45 minutes.
Crush the cookies really well. Big chunks make rolling harder and can cause cracks. A food processor is easiest, but a zip top bag and rolling pin works too. Just take your time.
Chill before dipping. I chill the rolled balls for at least 30 minutes. If they are soft, they will fall apart in warm chocolate. If you are in a hurry, pop them in the freezer for 15 minutes.
Dip with a fork. I drop a ball in, use a fork to lift it out, tap gently on the side of the bowl, then slide it onto parchment. If there is a little fork mark, I cover it with sprinkles or a drizzle. Nobody will care, I promise.
Keep your hands cool. If your kitchen is warm, your hands will melt the mixture and you will get sticky dough. Wash hands in cool water and dry them well, then roll a few at a time.
Also, if you want a super cute themed version for winter parties, this one always makes people smile: Melted Snowman Oreo Balls Recipe. It is the same idea, just decorated in a playful way.
One more note: if your coating is getting thick while you dip, warm it up again for a few seconds and stir. Thick chocolate makes clunky truffles. Smooth chocolate makes that clean, pretty finish.
How to Store Oreo Truffles
This is where Mint Oreo Balls really shine, because you can make them ahead and still have them taste fresh. That makes them perfect for the weeks when your calendar is packed and you are juggling a million things.
Storage and make ahead tips
In the fridge: Store them in an airtight container, with parchment between layers. They are best within 5 to 7 days. The flavor stays great, and the texture stays nice and truffle like.
In the freezer: You can freeze them for 1 to 2 months. Freeze on a tray first so they do not stick together, then move to a container or freezer bag. Thaw in the fridge overnight for the best texture.
For serving: I like to pull them out of the fridge about 10 minutes before serving. They soften slightly and taste extra creamy.
If you are bringing them to a party, keep them chilled until you leave, especially if the room will be warm. The coating holds up, but the filling is still cream cheese based, so it is better not to let them sit out for hours.
And if you are planning a whole spread of bite sized snacks, I know it sounds random, but this savory recipe is always a hit next to sweets at gatherings: Cheddar Bay Sausage Balls. People love having something salty in between desserts.
Bite Size Desserts for Parties and Holidays
I love a big cake moment, but bite size desserts win for parties. People can grab one, chat, grab another, and nobody needs plates or forks. Mint Oreo Balls are basically made for holiday trays, game days, baby showers, and those work potlucks where you want to bring something that looks impressive but does not stress you out.
Here are some simple ways to dress them up depending on the vibe:
- Holiday party: green and white sprinkles, or a white chocolate drizzle.
- Fancy look: dark chocolate coating with a tiny pinch of flaky salt.
- Kid friendly: crushed Mint Oreos on top and extra sprinkles.
- Gift box: place each truffle in a mini cupcake liner so they look neat.
If you want to plan your tray like a pro, mix textures and flavors. Something minty, something peanut buttery, something fruity, something crunchy. That way everyone finds their favorite.
Whenever I make Mint Oreo Balls for a crowd, I also make a few “chef’s snacks” for myself, meaning the imperfect ones that do not look as smooth. Those are for quality control. Very important work.
Common Questions
1) Can I make Mint Oreo Balls without a food processor?
Yes. Put the cookies in a zip top bag and crush them with a rolling pin. Aim for fine crumbs so the mixture rolls smoothly.
2) Why are my truffles falling apart when I dip them?
They are probably not cold enough, or your chocolate is too hot. Chill the balls longer and let the melted chocolate cool for a minute before dipping.
3) Do I need to remove the Oreo filling?
Nope. Keep the filling. It helps with flavor and texture, and it is part of what makes these taste so good.
4) Can I use white chocolate instead of milk or dark?
Absolutely. White chocolate is really good with mint. If it seems thick, add a tiny bit of coconut oil to help it dip smoother.
5) How many does one batch make?
It depends on size, but I usually get about 30 to 40 truffles if I roll them around 1 inch wide.
A sweet little wrap up before you go
If you need a low stress dessert that still feels festive, Mint Oreo Balls are the answer. You just crush, mix, roll, chill, dip, and suddenly you have a tray of glossy mint chocolate truffles that disappear fast. If you want to compare recipes or see other variations, I found these helpful: Mint Oreo Balls – Butter with a Side of Bread and Oreo Mint Truffles – Grits and Gouda. Put your own spin on them with different coatings and toppings, and do not worry if a few come out “rustic.” Make a batch this week and tell me how fast they vanish in your house. 
Mint Oreo Balls
Ingredients
Method
- Crush the Mint Oreos into fine crumbs, either using a food processor or by placing them in a zip-top bag and using a rolling pin.
- Mix the crushed cookies with the softened cream cheese until a thick dough forms.
- Roll the mixture into 1-inch balls and place them on a tray.
- Chill the rolled balls in the refrigerator for at least 30 minutes (or 15 minutes in the freezer).
- Melt the chocolate of your choice in short bursts in the microwave, stirring often until smooth.
- Using a fork, dip each chilled ball into the melted chocolate, tapping gently on the side of the bowl to remove excess chocolate.
- Transfer the coated balls onto parchment paper. While the coating is still wet, add any optional toppings.
- Chill again until the chocolate is set.