
French Silk Pie is the dessert I make when I need something that feels a little fancy but doesn’t make me stress out. You know those days when you promised to bring “something good” and suddenly it’s the night before and you’re scrolling recipes with one eye open? Yep, that’s where this pie comes in. It’s rich, chocolatey, and super smooth, and it always makes people think you worked harder than you did. Also, it’s the kind of pie that disappears quietly from the fridge at midnight, slice by slice. Let’s get into how I make it at home without overcomplicating anything.
Why This Is My Best French Silk Pie
I’ve tried a few versions over the years, and this one is the keeper because it nails the texture. The filling is fluffy but still dense enough to feel like a real treat, and it doesn’t taste like boxed pudding. The chocolate flavor is bold, and the whole thing feels balanced once you add the whipped topping.
Here’s what makes my French Silk Pie “the one” in my house:
- Real chocolate taste from melted chocolate, not just cocoa powder.
- Super smooth filling because we take our time creaming the butter and sugar.
- A fully baked crust so nothing gets soggy.
- Make ahead friendly which is my love language for desserts.
If you’re in a chocolate mood lately, you might also like these deliciously easy French silk brownies recipes. Same vibe, less chill time, and very snackable.
One more thing: I keep it simple with ingredients you can find at any grocery store. No weird specialty stuff, no “let it rest for 14 hours under a full moon.” Just a solid French Silk Pie you can trust.
How to Fully Blind Bake Pie Crust
Blind baking sounds like a baking show term, but it’s honestly just pre baking the crust so it’s totally cooked before the filling goes in. Since French Silk Pie has a no bake style filling, the crust has to be done and cooled first. And yes, it makes a difference.
My no stress method for blind baking
You can use a homemade crust or a store bought one. I’ve done both. When I’m busy, store bought is totally fine. Here’s my simple method:
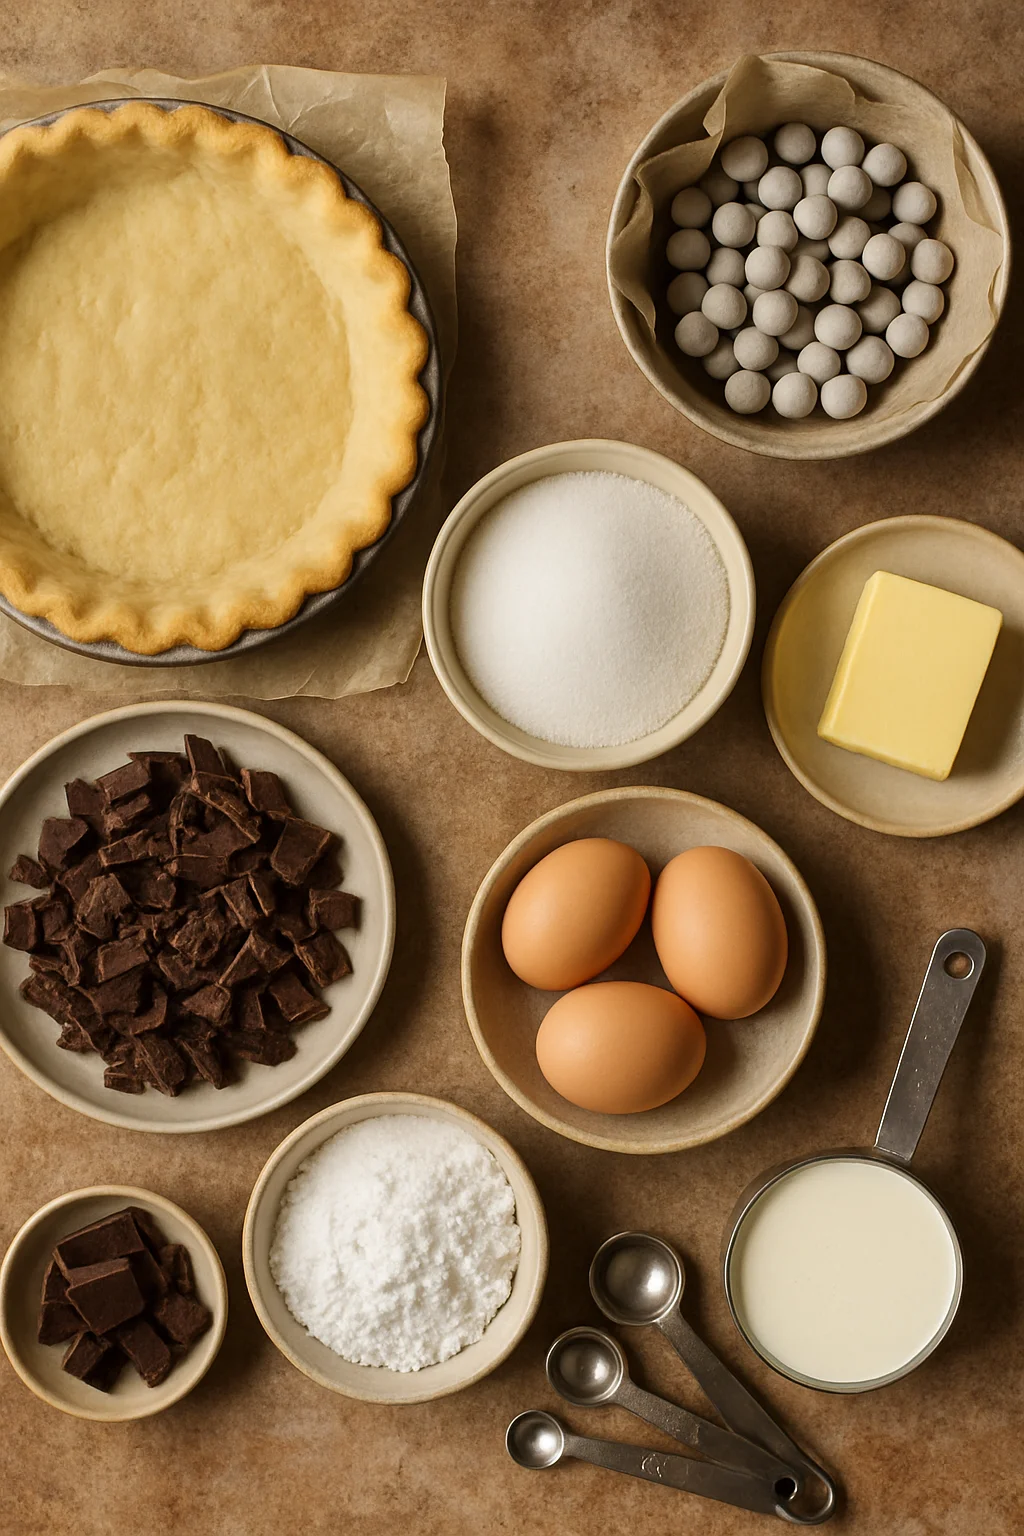
What you’ll need: pie crust, parchment paper or foil, and pie weights (or dry beans or rice).
- Heat your oven to 375°F.
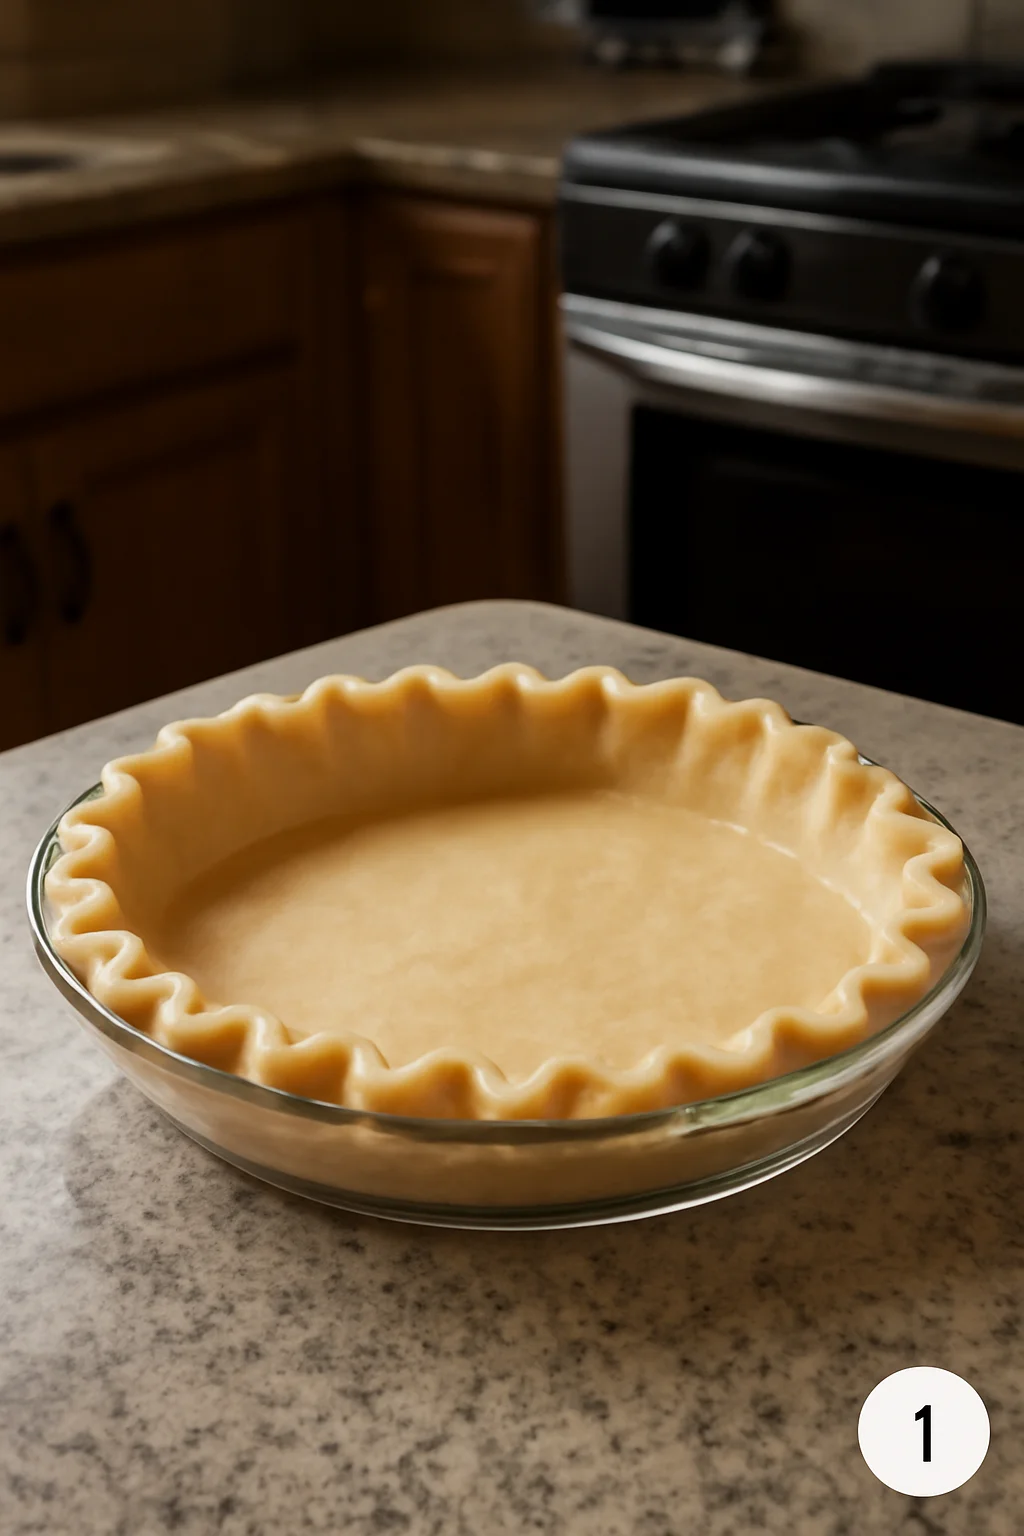
- Place the crust in your pie dish and crimp the edges.
- Chill the crust for 15 to 20 minutes. This helps it keep its shape.
- Line it with parchment or foil, then fill with pie weights.
- Bake for 15 to 18 minutes, then carefully remove the weights and liner.
- Bake again for 10 to 12 minutes until the bottom looks dry and lightly golden.
- Cool completely. Not slightly. Completely.
If the crust bubbles a bit after you remove the weights, just poke it gently with a fork and keep going. Nobody’s judging your crust. Also, I like to bake mine a little deeper in color because chocolate filling + slightly toasted crust is such a good match.
If you’re a pie person in general, you should try this easy fluffy key lime pie sometime. It’s the total opposite flavor wise, but it’s another crowd pleaser.
4 Parts to Chocolate Pie Filling
Okay, this is where the magic happens. The filling for French Silk Pie is basically a few simple parts that come together into something that tastes like a chocolate cloud. I’m going to explain it in normal people language, because that’s how I learned it.
Part 1: Melted chocolate
Melt your chocolate and let it cool down a bit. You want it pourable, not hot. If it’s hot, it can mess with the texture when it hits the butter mixture. I usually melt it in the microwave in short bursts, stirring a lot. Slow and steady is the vibe.
Part 2: Butter and sugar, creamed until fluffy
This step matters more than people think. You’re basically whipping air into the base. Cream the butter and sugar until it looks lighter and feels fluffy. If you rush this, the pie can feel heavy. I give it a solid few minutes.
Part 3: Eggs, handled safely
Traditional French Silk Pie often uses raw eggs, which is why some people avoid making it. I get it. What I do at home is use pasteurized eggs if I’m going the classic route, or I use an egg free or cooked egg method depending on who I’m serving. If you’re unsure, pasteurized eggs are the easiest swap for peace of mind. If you need extra guidance, check reliable baking sources and follow their safety notes closely.
The key is adding the eggs slowly and beating well so the filling stays silky, not grainy.
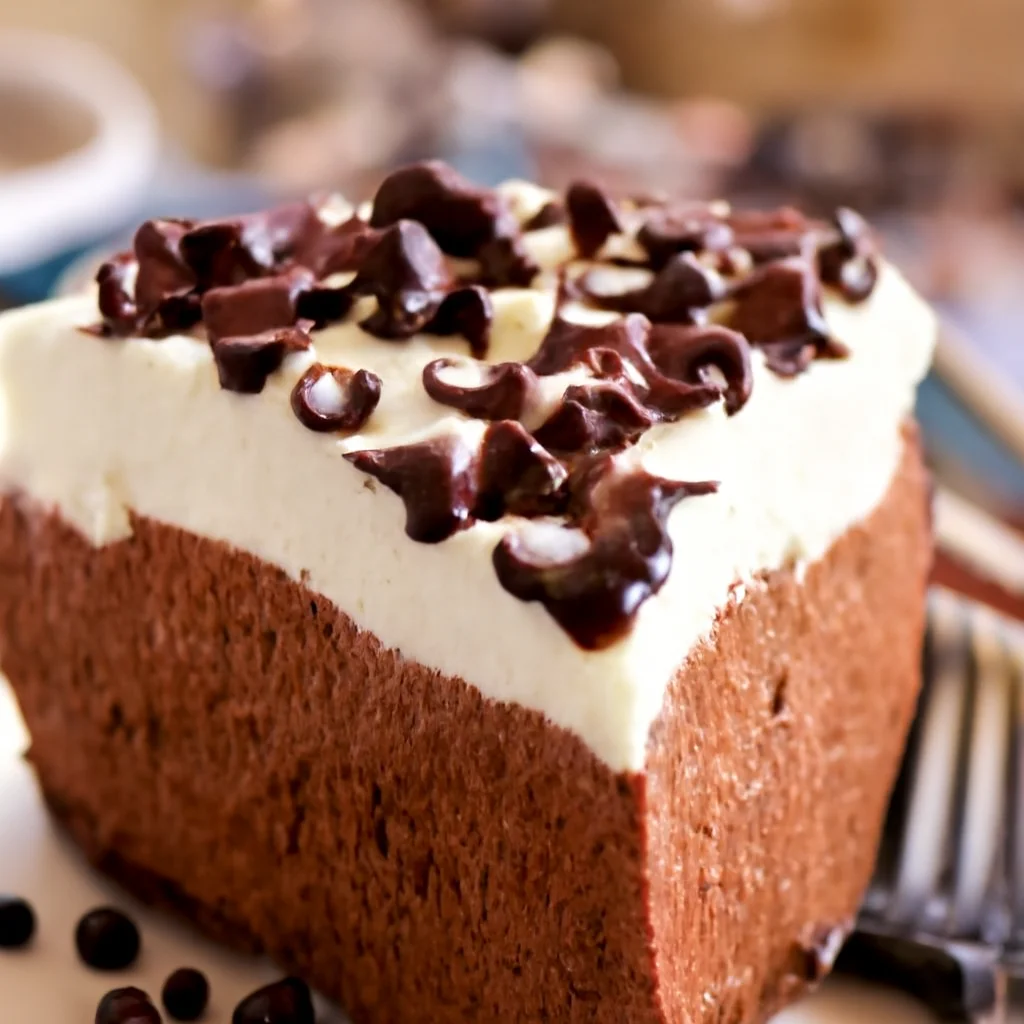
Part 4: Whipped topping layer
You can make fresh whipped cream with heavy cream and a little powdered sugar, or use a good quality store bought whipped topping if you’re short on time. I prefer homemade because the flavor is clean and it holds up really well once chilled.
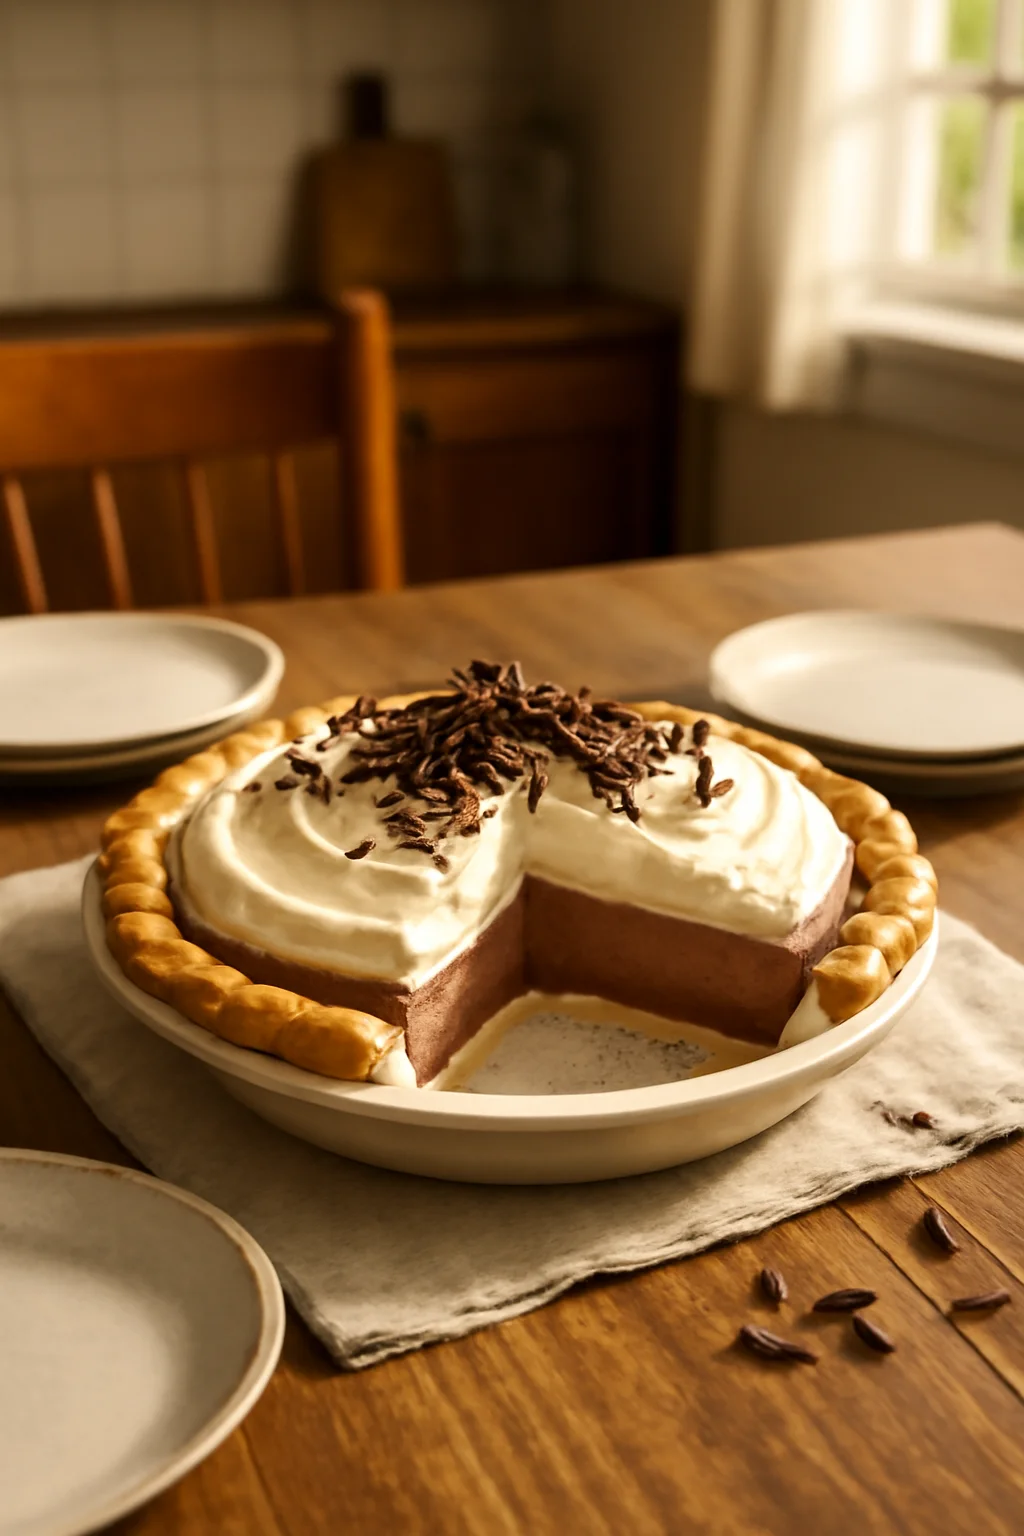
Once the filling is in the cooled crust, spread the whipped topping on top. Then I finish with chocolate curls or chocolate shavings. It looks fancy with basically no effort.
If you like chocolate desserts that are easy to share, these decadent chocolate rice krispie balls everyone will love are dangerously good.
Success Tips
This pie is not hard, but it does reward a little patience. Here are the things I’ve learned after making French Silk Pie for birthdays, potlucks, and one random Tuesday where I just needed chocolate.
- Cool the crust fully before adding filling or it can melt and turn weird.
- Don’t rush the butter and sugar creaming step. Fluffy base equals silky filling.
- Let melted chocolate cool a bit so it blends smoothly.
- Chill long enough. This is not a “serve in 30 minutes” dessert.
- Use pasteurized eggs if you are doing the classic method and want extra safety.
“I brought this to a family dinner and my uncle, who never comments on dessert, asked if I bought it from a bakery. The texture was unreal and it wasn’t overly sweet.”
Also, if you ever need a savory comfort meal to balance out the dessert situation, this chicken pot pie casserole with tater tots is the kind of cozy that makes everyone happy.
Storage & Make Ahead
This is one of my favorite make ahead desserts because it actually gets better after chilling. French Silk Pie needs time in the fridge to set and to get that dreamy slice that holds together.
How to store it:
Cover it loosely and keep it in the fridge. I usually use a big overturned bowl if I don’t want plastic wrap touching the whipped cream. It keeps well for about 3 days, though the crust is best in the first 2 days.
Can you freeze it?
Yes, you can. Freeze the pie without any delicate toppings if you want the prettiest finish later. Wrap it well, then thaw overnight in the fridge. Add fresh whipped topping and chocolate shavings after it’s thawed.
Make ahead plan:
If you’re serving it for an event, I recommend making it the day before. Bake the crust in the morning, make the filling in the afternoon, and let it chill overnight. The next day you can add extra toppings right before serving if you want it looking fresh.
Common Questions
Do I have to use raw eggs in French Silk Pie?
No, you don’t have to. Some versions use pasteurized eggs, and others use a cooked egg method or no egg method. Choose what fits your comfort level and follow a trusted recipe.
Why is my filling not fluffy?
Most of the time it’s from not creaming the butter and sugar long enough, or adding the chocolate while it’s too warm. Give it time and keep ingredients at the right temperature.
How long does it need to chill?
I aim for at least 6 hours, but overnight is even better. If you slice too early, it can look messy even if it still tastes great.
Can I use a cookie crust instead of pie crust?
Absolutely. An Oreo style crust is amazing with this filling. Just press it in firmly and chill it well before filling, or bake it briefly if the recipe calls for it.
What toppings work besides whipped cream?
Chocolate curls, mini chocolate chips, a dusting of cocoa powder, or even a drizzle of chocolate sauce all work. Keep it simple so the pie stays the star.
A sweet final note before you start
If you’ve been wanting a chocolate dessert that feels special but still doable, French Silk Pie is it. Once you get the crust baked and the filling whipped up, the fridge does the rest of the work. For extra guidance and variations, I’ve found these two recipes helpful to compare techniques and safety notes: French Silk Pie (No Raw Eggs + Oreo Crust) – Handle the Heat and French Silk Pie Recipe – Sally’s Baking Addiction. Try it once, make it your own, and don’t be surprised if it becomes your go to “people are coming over” dessert.
French Silk Pie
Ingredients
Method
- Preheat the oven to 375°F (190°C).
- Place the crust in a pie dish and crimp the edges.
- Chill the crust for 15 to 20 minutes.
- Line it with parchment or foil, and fill with pie weights.
- Bake for 15 to 18 minutes, then carefully remove the weights and liner.
- Bake again for 10 to 12 minutes until the bottom looks dry and lightly golden.
- Cool the crust completely.
- Melt the chocolate and let it cool until pourable (not hot).
- In a bowl, cream the butter and sugar until light and fluffy.
- Add the eggs one at a time, ensuring to beat well after each addition.
- Slowly mix in the cooled chocolate until fully combined.
- Spread the filling into the cooled pie crust.
- In a separate bowl, whip the heavy cream with powdered sugar until stiff peaks form.
- Spread the whipped topping over the chocolate filling.
- Garnish with chocolate curls or shavings.
- Refrigerate the pie for at least 6 hours, but overnight is preferred.