

Christmas Cake Pops are the little bites of holiday magic that always save me when I’m short on time but still want something festive and adorable. I love how they look like tiny ornaments on a stick, and honestly, they’re a crowd-pleaser every single year. If you’ve felt overwhelmed by messy chocolate or crumbling cake balls, you’re not alone. I’ve had my fair share of cake pop flops and sticky fingers. Today I’m showing you how I make mine so they’re smooth, sturdy, and fun to decorate. I call them my go-to party treat, and once you try them, you’ll see why. Delicious Christmas Cake Pops: Perfect for Holiday Celebrations!
Ingredients You Need for Christmas Cake Pops
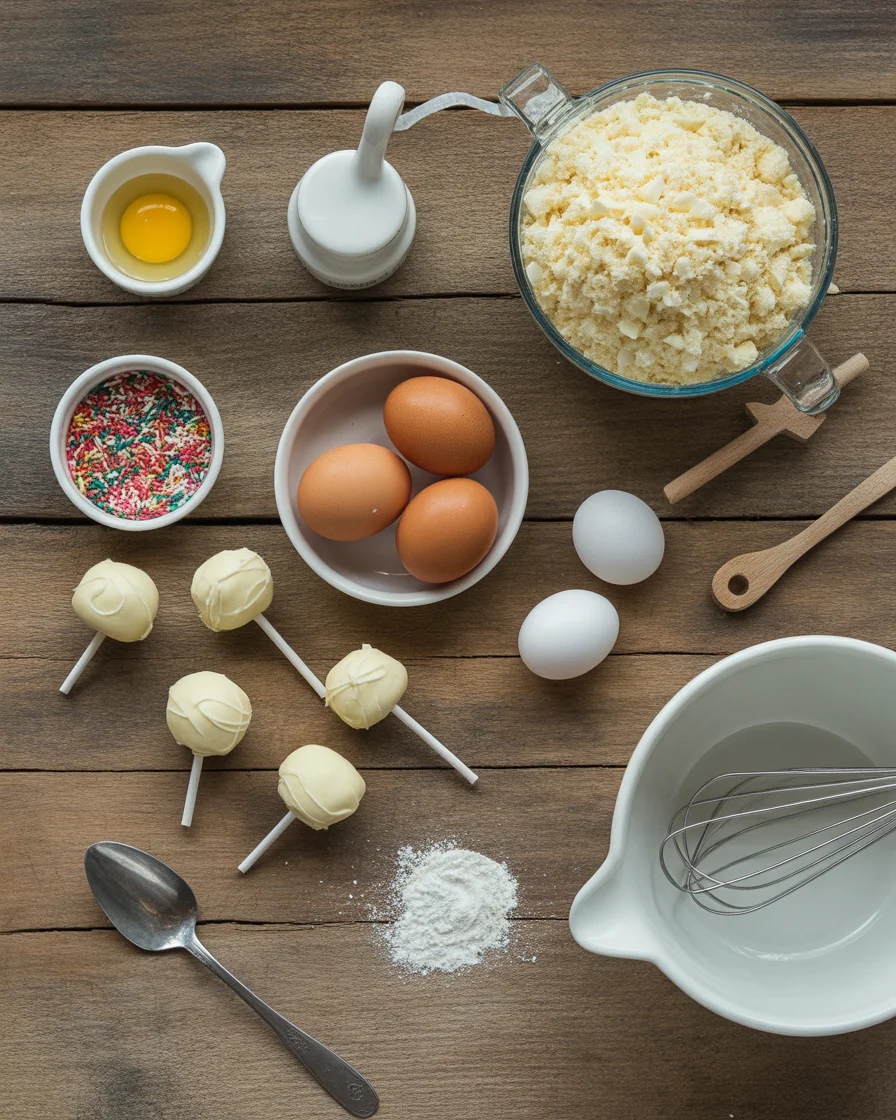
What you will need
These are the building blocks for Delicious Christmas Cake Pops: Perfect for Holiday Celebrations! Feel free to use a boxed cake mix and store-bought frosting. No judgment here. The goal is simple and tasty.
- 1 baked 9×13 cake, fully cooled (vanilla, chocolate, red velvet, or spice)
- 1/3 to 1/2 cup frosting (buttercream or cream cheese)
- 12 to 16 ounces candy melts or chocolate wafers (white, red, or green)
- 1 to 2 teaspoons neutral oil or coconut oil to thin coating if needed
- Sprinkles, crushed candy canes, or sanding sugar for garnish
- Lollipop sticks
- Styrofoam block or a cardboard box with small holes for drying
- Optional flavor boosts: vanilla extract, almond extract, orange zest
- Optional fillings: mini chocolate chips or finely chopped peppermint bark
- Optional drizzles: melted dark chocolate or colored candy melts
For cake, you can use any flavor you love, even leftover cake. Crumbs that are slightly dry actually help you control the texture. For frosting, add a little at a time. You want the mix to feel like soft cookie dough, not sticky paste.
If candy melts feel too thick, stir in a tiny bit of oil. It should flow like honey off a spoon. That’s your sweet spot for smooth dipping.
How to Make Christmas Cake Pops
Step by step
Here is my exact process, tested in my tiny kitchen with a big mug of cocoa nearby. It’s cozy, easy, and you’ll end up with Christmas cuteness on a stick.
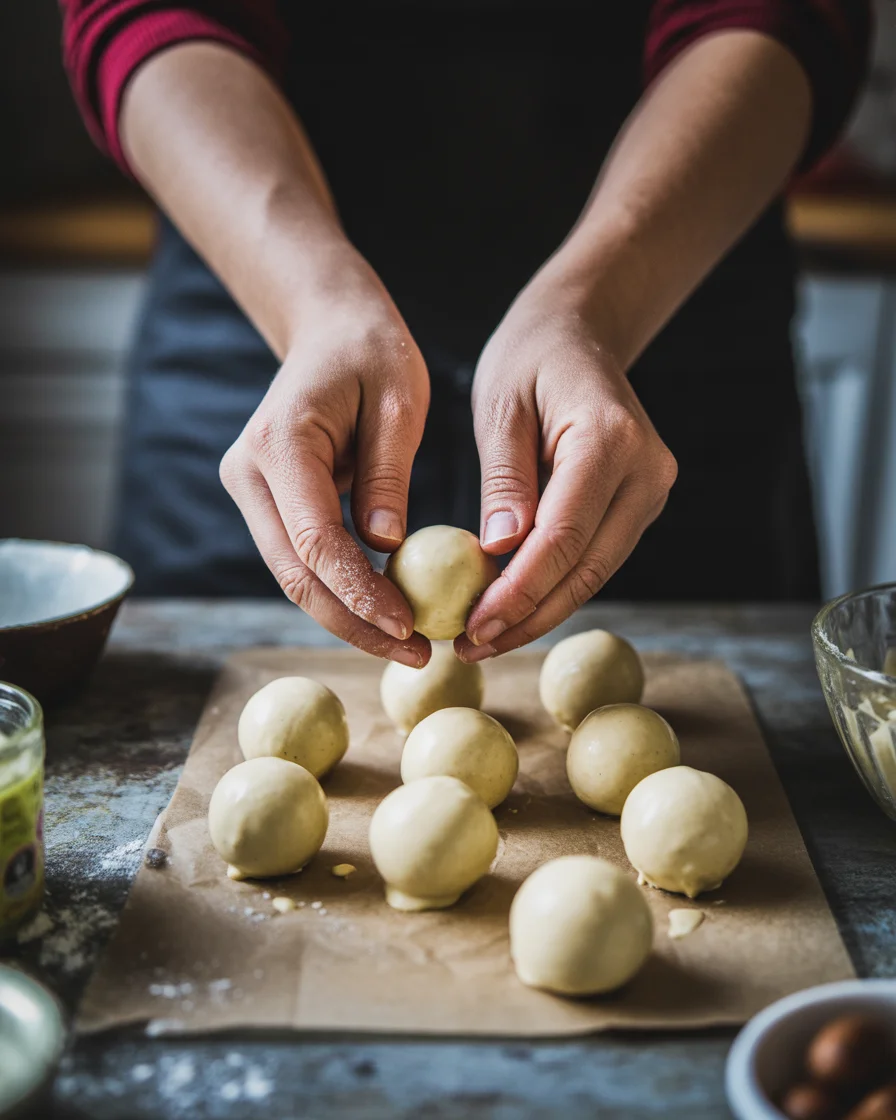
1. Crumble the cake into a large bowl. Rub it between your hands until no big chunks remain.
2. Add a spoonful of frosting and mix with your hands or a spatula. Keep adding frosting in small amounts until the mix holds together when pressed. Stop as soon as it feels like soft clay.
3. Scoop and roll. Use a tablespoon or small cookie scoop to portion even balls. Roll quickly between your palms to smooth them out. Aim for golf ball size or a little smaller.
4. Chill the balls. Place them on a lined tray and chill for 20 to 30 minutes. Don’t freeze solid. You want them firm but not icy, or the coating may crack later.
5. Prep the sticks. Melt a small amount of candy melts. Dip the tip of each lollipop stick in the melted coating and insert about halfway into each cake ball. Chill another 10 minutes to set the “glue.”
6. Melt the coating. Microwave candy melts in short bursts, stirring between each one. Add a few drops of oil if thick. Keep it warm but not hot.
7. Dip like a pro. Tilt the cup and dip the cake pop in, turning slowly to coat. Lift and let excess drip off. Gently tap the stick on the rim while rotating the pop to smooth it out.
8. Decorate and dry. Add sprinkles right away before the coating sets. Stand the pops upright in a styrofoam block or a pierced box to dry completely.
9. Add details. Once set, you can drizzle another color on top or attach tiny sugar decorations with a dot of melted coating.
If you want to try a cookie twist too, I’ve got a soft spot for these festive bites: Irresistible Christmas Cookie Pops. They pair beautifully with these cake pops on a holiday dessert board.
“I tried this method for the first time last year and it worked like a charm. The pops didn’t crack, the coating was smooth, and they were the first to disappear at our party.”
Tips for Easy Cake Pops
These practical tricks have saved my sanity more than once, especially when I’m making a big batch for a party. They keep things tidy and predictable, and help your pops look store-worthy without fancy tools.
- Don’t overdo the frosting. Too much frosting makes pops heavy and prone to falling off the stick. Add slowly until the mix just holds together.
- Chill in two rounds. First after rolling, then again after inserting sticks. It keeps the shape tight and helps the coating set cleanly.
- Use short dipping cups. A narrow, deep cup makes it easier to fully submerge each pop without wasting coating.
- Thin the coating a little. Candy melts should flow and cover smoothly. Add a tiny bit of oil if needed.
- Tackle bubbles. If you see tiny air bubbles, lightly tap and spin the stick until they rise and pop.
- Sprinkle fast. Add decorations while the coating is still wet or they won’t stick.
- Let them set at room temp. Fridge setting can cause condensation or dullness on the finish.
- Store smart. Keep finished pops in an airtight container at cool room temperature for 2 to 3 days, or refrigerate if your kitchen runs warm.
For more festive inspo, browse my collection of Christmas recipes and mix these pops into your holiday dessert lineup. Easy to make, easy to share, and yes, still Delicious Christmas Cake Pops: Perfect for Holiday Celebrations!
Variation Ideas for Christmas Cake Pops
Flavor twists
Switch up the cake and frosting to fit your vibe. Chocolate cake with peppermint frosting tastes like a peppermint mocha dream. Red velvet with cream cheese is iconic. Vanilla cake with almond extract and red green confetti sprinkles is classic holiday bakery style. If you’re feeling adventurous, try spice cake with orange zest and a white chocolate coating. You can even gently fold in mini chocolate chips for tiny bursts of sweetness.
Decoration ideas
Decorating is where you can get playful. Go for white coating with red drizzle, red coating with white nonpareils, or crushed candy canes for sparkle. Draw tiny holly leaves with green icing and place a few red sprinkle “berries.” Add a little gold luster dust for a fancy glow. Or decorate them as mini snowmen with candy eyes and an orange sprinkle nose. If you’ve got kids around, set up a sprinkle station and let them go wild.
Another fun option for treat boards is light and chewy marshmallow pops. They look adorable next to cake pops and take only minutes to decorate.
More Related Christmas Recipes
Once you’ve got a rhythm with cake pops, you can build a whole dessert tray around them. Add crunchy bites, something creamy, and a candy element for variety. Here’s what I love to pair:
Try these Christmas Oreo balls for a no-bake treat that always vanishes first. Toss in a bowl of chocolate bark shards, a plate of soft cookies, and a bright red punch to round it out. It’s simple, festive, and so good for sharing with neighbors or bringing to school parties.
Common Questions
How do I prevent cake pops from falling off the stick?
Make sure the cake mixture is not too soft, and always dip the stick in melted coating before inserting. Chill after inserting sticks so the glue sets.
Why does my coating crack?
Temperature shock. If the cake balls are too cold and the coating is warm, cracks happen. Let the chilled balls sit out a few minutes before dipping.
Can I make them ahead?
Yes. Roll and chill the cake balls a day ahead, or dip them fully and store in an airtight container for up to 3 days. They also freeze well before dipping.
What coating works best?
Candy melts or chocolate wafers are the easiest. If too thick, stir in a bit of neutral oil. Avoid adding water or milk.
How do I get perfectly round pops?
Use a small scoop for even sizes and roll quickly with light pressure. If they crack while rolling, chill the dough 10 minutes and try again.
A Sweet Holiday Wrap Up
If you want a dessert that looks joyful and tastes even better, Delicious Christmas Cake Pops: Perfect for Holiday Celebrations! belong on your list. Keep the process simple, chill between steps, and decorate while the coating is still tacky for those pretty finishes. If you like following along with another method, this guide is super helpful too: Easy Christmas Cake Pops Recipe (For The Holidays) – Basics With Bails. I hope you make a batch, share them with friends, and feel that little spark of holiday magic in every bite. Tag me when you make yours so I can cheer you on.
Christmas Cake Pops
Ingredients
Method
- Crumble the cake into a large bowl until no big chunks remain.
- Add a spoonful of frosting and mix until the mixture holds together when pressed, like soft clay.
- Use a tablespoon or small cookie scoop to portion even balls, rolling them quickly between your palms.
- Place the balls on a lined tray and chill for 20 to 30 minutes.
- Melt a small amount of candy melts and dip each lollipop stick in it before inserting into the cake balls.
- Chill for an additional 10 minutes to set.
- Melt the candy melts in short bursts, stirring in between. Add oil if thick.
- Tilt the cup and dip the cake pop in, turning slowly until fully coated.
- Let excess drip off and gently tap the stick to smooth the coating.
- Add sprinkles immediately before the coating sets and stand the pops upright to dry completely.
- Once set, you may drizzle another color on top or attach tiny decorations with melted coating.