

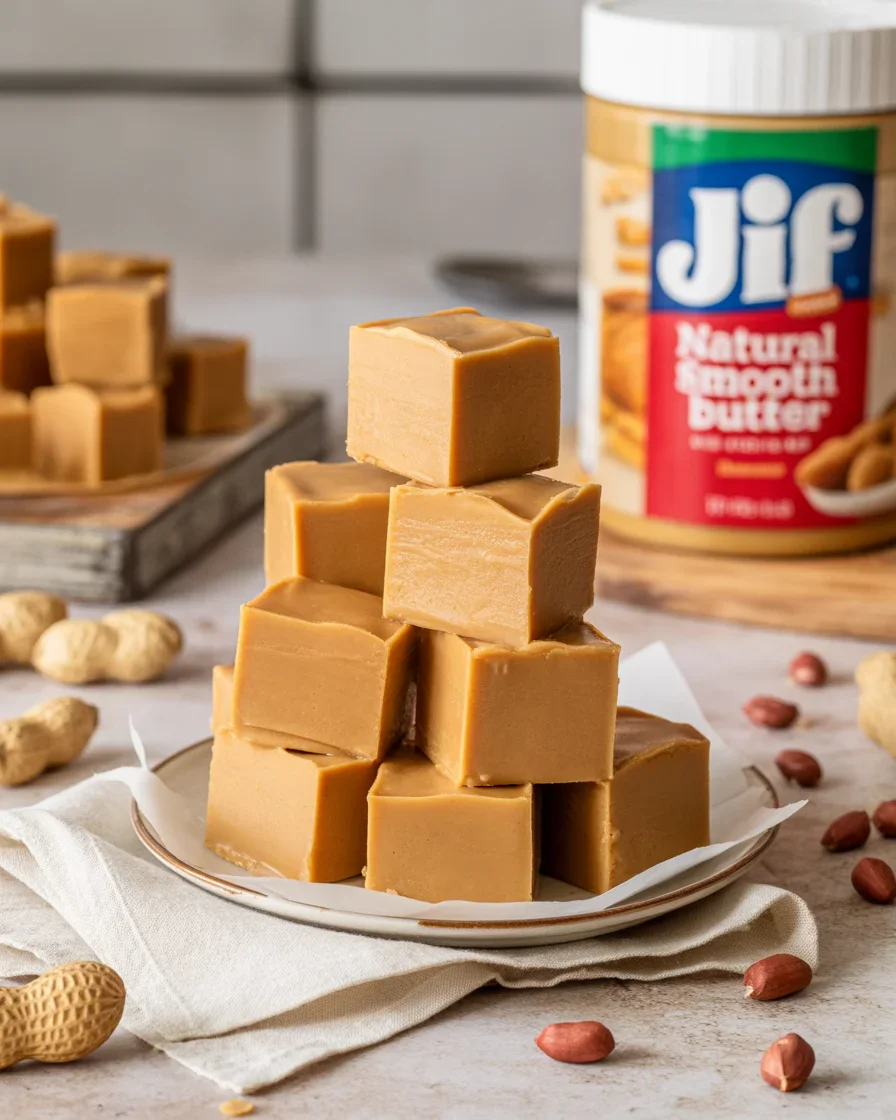
2-INGREDIENT PEANUT BUTTER FUDGE saved me last weekend when I needed a quick dessert that still felt like a hug on a plate. You know those moments when friends are on their way and the snack drawer is empty? This is my go-to rescue. It’s simple, sweet, and rich without being fussy, and it’s the kind of treat that makes people say wait, this only has two ingredients? I’ve tested it a bunch of ways, and I’ll share the easiest method, smart swaps, and how to store it so every square stays dreamy. Ready to make your kitchen smell amazing in under 10 minutes?
What Ingredients are in 2 Ingredient Fudge?
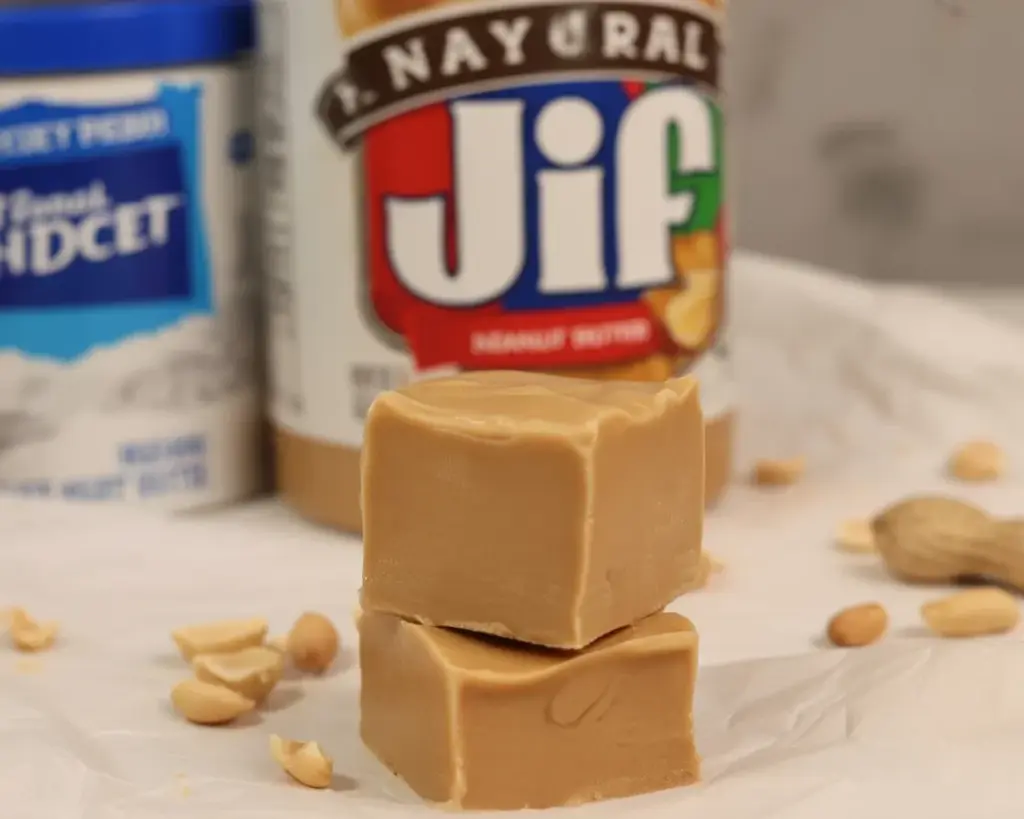
Here’s what I use for the most reliable, creamy results. No candy thermometer, no stress. Just two pantry staples and a lined pan.
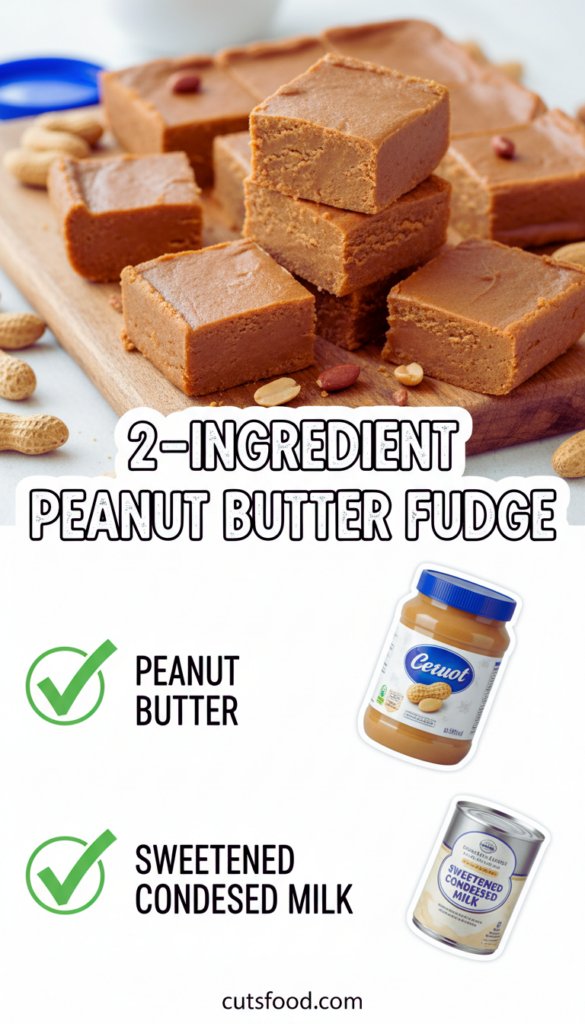
- Creamy no-stir peanut butter: The classic base. Look for peanut butter that doesn’t separate. I prefer creamy for a smooth finish, but crunchy works if you like texture.
- White chocolate chips or baking wafers: This is the structure that helps the fudge set. White chocolate melts easily and gives that sweet, fudge-like bite.
That’s it. Two ingredients you can keep on hand and pull out when the snack situation goes sideways. If you’re in a peanut butter mood and want another easy win, check out these soft cake mix peanut butter cookies for a quick-bake option that hits the same cozy notes.
For reference, you can also make this using canned vanilla frosting instead of white chocolate. It will be slightly softer with that old-school sweet flavor. But the white chocolate version slices cleaner and holds up better at room temp.
This 2-INGREDIENT PEANUT BUTTER FUDGE is rich enough to share and simple enough to make on a Tuesday. It’s the happy middle between effortless and impressive. 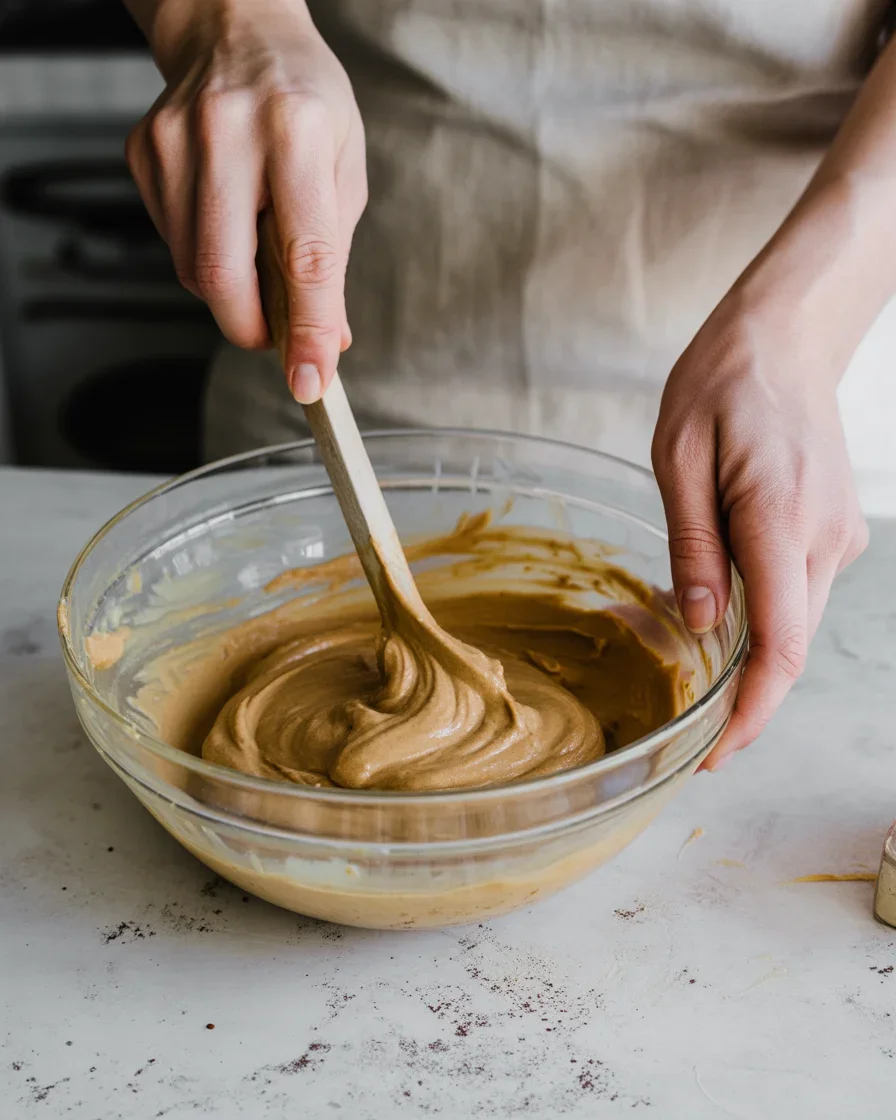
How to Make 2 Ingredient Peanut Butter Fudge
Grab a square pan and line it with parchment so you can lift the whole slab out to slice. Then decide how you want to melt. I use the microwave for speed, but stovetop works too.
Microwave method
- Line an 8-inch pan with parchment, leaving overhang for easy lifting.
- Add 2 cups white chocolate chips to a microwave-safe bowl. Heat in 20 to 30 second bursts, stirring between each, until mostly melted.
- Stir in 1 cup creamy peanut butter until silky. The residual heat finishes melting and everything becomes thick and glossy.
- Spread into your prepared pan, smoothing the top with a spatula.
- Tap the pan on the counter to pop air bubbles. Chill 1 to 2 hours until firm, or let it set at cool room temp if your kitchen isn’t warm.
- Lift out, slice into squares, and try not to eat three before anyone sees you.
Stovetop method
Set a heatproof bowl over a pot with an inch of simmering water. Melt the white chocolate gently, then remove from heat and stir in peanut butter until smooth. Spread and set as above.
Pro tips for that clean, candy-shop bite: keep your bowl completely dry so the chocolate doesn’t seize, and stop heating when the chips look 80 percent melted. Patience and stirring finish the job without scorching.
Love no-fuss candy? Try this fun marshmallow swirl fudge recipe when you want something playful and pretty on a platter.
When you make 2-INGREDIENT PEANUT BUTTER FUDGE the first time, you’ll get a feel for how quickly it comes together. The hardest part is waiting for it to set.
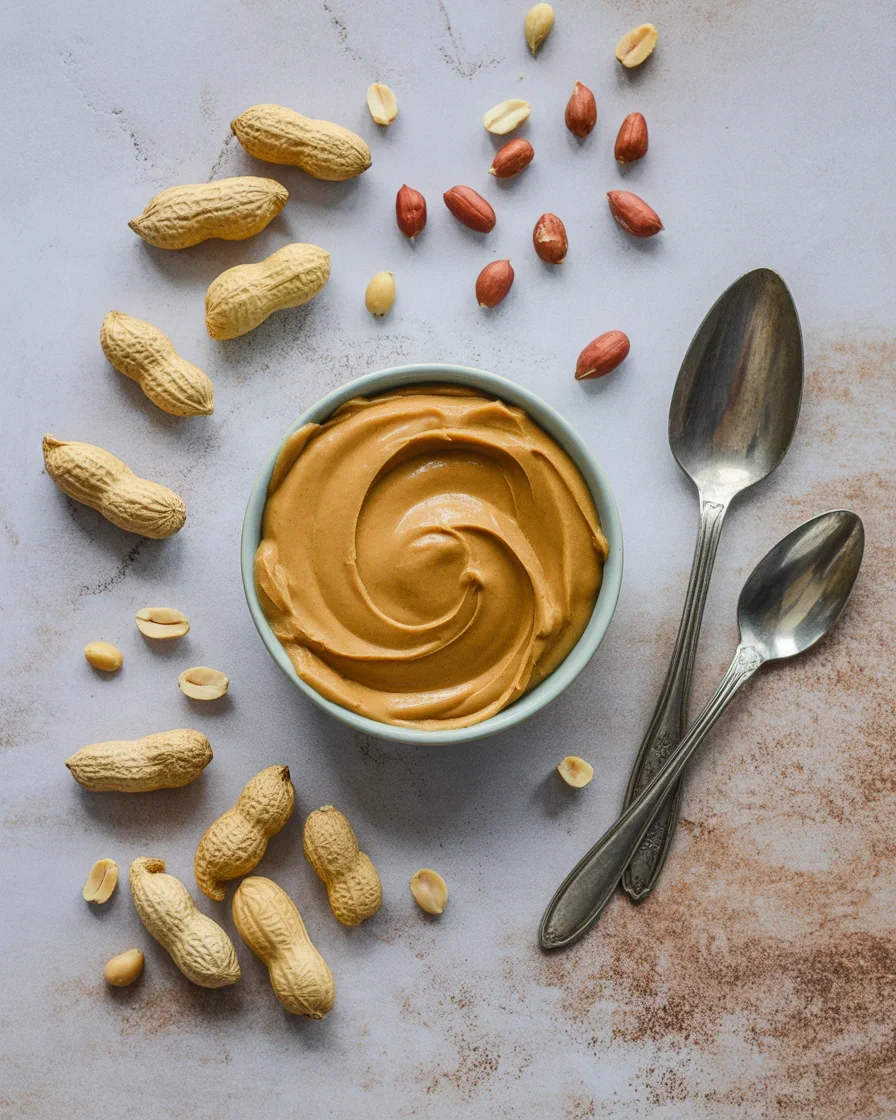
What Kind of Peanut Butter Is Best for Fudge?
Short answer: use a creamy, no-stir peanut butter. I reach for mainstream brands that list sugar and oil already mixed in. They give consistent texture and a smooth set. Natural peanut butter that separates can work, but it’s tricky. If there’s too much oil, your fudge may be greasy or soft.
Natural vs no-stir
If you love natural peanut butter, spoon off any excess oil on top and stir like your life depends on it. Aim for a thick, uniform consistency before measuring. Even then, your fudge might be a touch softer. Store it chilled for the cleanest slices.
Crunchy peanut butter adds nutty bites, which I love for a rustic finish. Salted vs unsalted? Salted gives a balanced, bakery-style flavor. If using unsalted, add a tiny pinch of salt to the melted mixture.
I made this for a weekend picnic and it vanished in ten minutes. I used a common creamy brand and it set perfectly at room temp. Zero leftovers, which is the best kind of review.
Above all, pick a peanut butter you actually like eating by the spoonful. The flavor really shines in such a simple recipe.
Easy Peanut Butter Fudge Variations
Once you nail the basics, it’s fun to riff. Drizzle melted dark chocolate across the top before chilling for a stylish marbled look. Or stir in a handful of mini marshmallows right before spreading for a chewy surprise. I also love to sprinkle flaky sea salt over the warm surface to balance the sweetness.
Craving something with crunch? Fold in chopped salted peanuts or pretzel pieces. You can also add a teaspoon of vanilla for a soft, cozy aroma. For a candy-shop vibe, press mini peanut butter cups into the top, then chill and slice around them.
If you’re obsessed with the peanut butter and chocolate combo, bookmark this easy dark chocolate peanut butter bark. It’s the snap-to-your-fudge’s-creaminess pairing you didn’t know you needed.
For cookie lovers, crumble a batch of these lunch lady peanut butter bars over the top for a nostalgic texture. I’ve also finished the fudge with a dusting of cocoa powder for a grown-up finish that looks fancy with zero effort.
How to Store Peanut Butter Fudge
This fudge is friendly. It stores well and travels like a champ. For the best texture, keep slices in an airtight container with parchment between layers.
At room temp, it stays fresh for 3 to 4 days, as long as your kitchen isn’t hot. If it’s warm where you are, tuck it in the fridge where it will keep up to a week. Refrigeration gives a firmer bite, which some folks love.
Want to make it ahead? Freeze in a sealed container for up to 2 months. Thaw in the fridge overnight, then bring to room temp before serving to restore that creamy, melt-in-your-mouth feel. If you’re in the mood for another simple treat to round out a dessert tray, this playful peanut butter cup dump cake is a crowd pleaser that pairs perfectly with bite-sized fudge squares.
Common Questions
Can I use almond bark instead of white chocolate chips?
Yes. Almond bark melts super smoothly and sets firm. Use the same amount as the chips and proceed with the same method.
Can I use natural peanut butter?
You can, but results vary. Stir it very well, pour off excess oil, and be prepared for a slightly softer fudge. Chill for the cleanest cuts.
Why did my fudge turn grainy or oily?
Grainy usually means the chocolate overheated. Oily can come from separated peanut butter. Melt gently, stir often, and use no-stir peanut butter for best texture.
How do I fix fudge that didn’t set?
Scrape it back into a bowl, warm gently, and stir in more melted white chocolate a little at a time until it thickens. Spread again and chill.
What size pan should I use?
An 8-inch square gives a nice thickness. A 9-inch pan works for thinner squares. Double the recipe for a 9 by 13 when feeding a crowd.
A Sweet Little Wrap-Up for Fudge Lovers
That’s the whole story: simple ingredients, quick melting, and a pan of creamy squares ready to share. 2-INGREDIENT PEANUT BUTTER FUDGE is the kind of recipe that fits real life. It’s fast, friendly, and easy to customize. If you want more ideas or visual guidance, I like this walkthrough for Easy 2 Ingredient Peanut Butter Fudge with video, and this cozy read on the 2-ingredient retro dessert I’m making for the holidays adds fun tips you can use. Now grab a spoon, melt some chocolate, and make your kitchen smell like pure peanut-buttery joy.

2 Ingredient Peanut Butter Fudge
Ingredients
Method
- Line an 8-inch square pan with parchment paper, allowing overhang.
- In a microwave-safe bowl, add the white chocolate chips and heat in 20 to 30-second bursts, stirring in between, until mostly melted.
- Stir in the peanut butter until smooth and glossy.
- Spread the mixture into the prepared pan and smooth the top with a spatula.
- Tap the pan on the counter to release air bubbles, then chill for 1 to 2 hours until firm.
- Lift out of the pan, slice into squares, and enjoy.
- Set a heatproof bowl over a pot with simmering water.
- Melt the white chocolate gently, then remove from heat and stir in peanut butter until smooth.
- Spread the mixture into the prepared pan and proceed as above.