

Christmas Cookie Pops have basically become my “uh-oh, last minute, I-need-something-festive” recipe. So, raise your hand if you’ve ever stared down a holiday cookie platter and thought, “Seriously, another sugar cookie, wow, can’t wait.” Insert sarcasm and holiday panic here. Listen, it happens. The best thing about these cookie pops is they’re stupid simple, can be adorable with minimal effort, and—best part—they actually taste good. Your kitchen won’t look like a disaster either (unless you hate sprinkles, then I dunno what to tell you). Let’s get into how you can make your very own irresistible batch and avoid that bland-cookie fate.
A few things I’ve learned along the way about creating a Christmas cookie pop
I’ll just put this on record: the first time I tried to make Christmas cookie pops, it was somewhere between a fabulous Pinterest fail and a family hit. The stick kept sliding out? Yes. Sprinkles everywhere? Obviously. But after my third attempt, I’ve learned some solid tricks, such as—don’t even bother with popsicle sticks if you’re feeling lazy, just go for mini skewers. Also, chilling the dough is not optional, it’s absolutely necessary. Otherwise, you’ll have cookie globs, not pops.
Use a thicker cookie dough (sugar or shortbread works great). Don’t overbake them, or they’re harder than your aunt’s fruitcake. Once cooled, I love smashing together two cookies with a dab of chocolate, pop in the stick, and then decorate like a hyperactive elf. Trust me, the flavor is classic, but the look? On a good day, five-star restaurant style. People will ooh and ahh—mostly because they look fancier than they really are.

“I made these for a holiday party and everyone thought I bought them from a bakery. Super easy, and my kids loved the decorating part most!” – Molly, actual chaotic mom
What you need for Christmas Cake Pops?
If you’ve got a basic kitchen, you probably already own most of this stuff. Here’s what you’ll need for Christmas cookie pops (and please don’t get lost in the aisle—stick to the basics):
- Sugar cookie dough (homemade or, real talk, store-bought works fine)
- Lollipop sticks or wooden skewers (seriously, whatever’s handy)
- Melting chocolate or candy melts (white, dark, whatever floats your sleigh)
- Assorted Christmas sprinkles
- Small holiday cookie cutters, if you’re feeling official
You could jazz it up with crushed peppermint, mini marshmallows, or edible glitter. I’ve seen people use food coloring for fancy swirls, too. Keep it fun, not stressful. 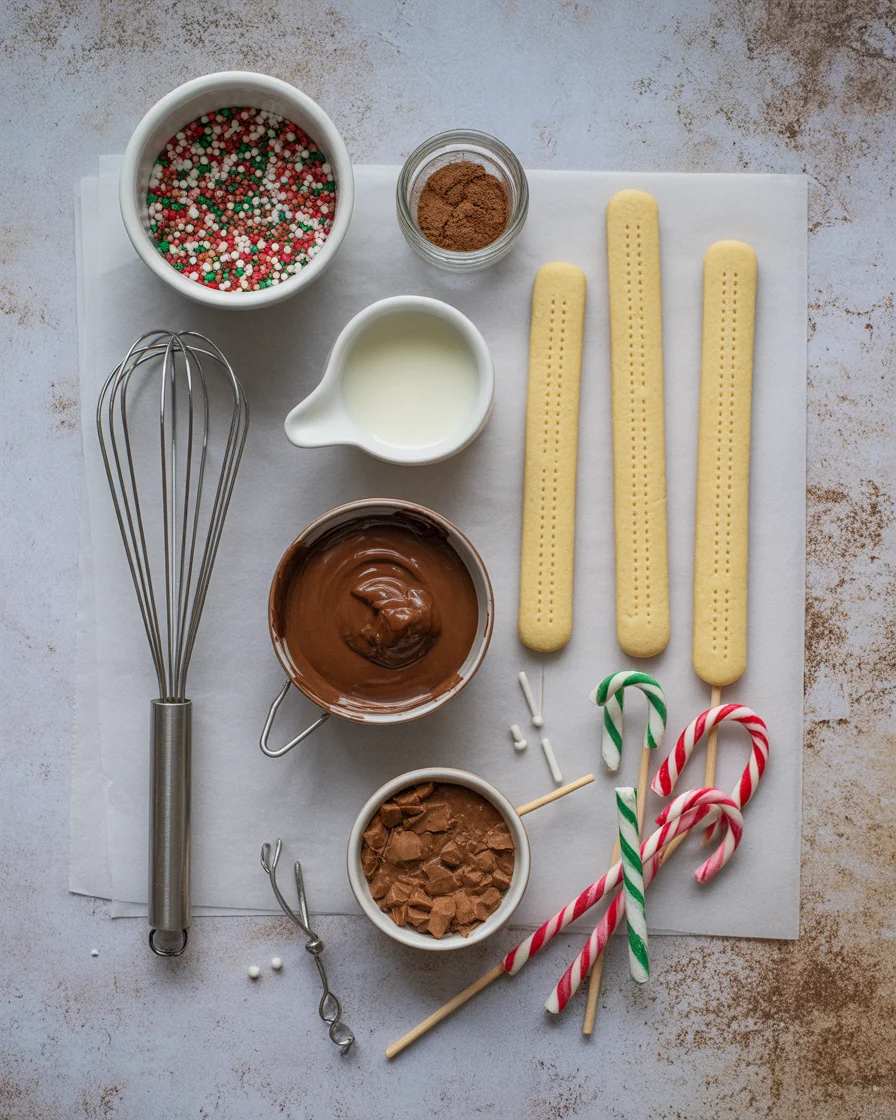
How to make Christmas Cake Pops?
First things first, roll out that sugar cookie dough—about half an inch thick works best. Cut it into festive shapes, slap a stick in the base, and pinch the dough around so the stick’s mostly hidden. This probably feels weird, but it holds up better! Space them out on a baking tray lined with parchment, then freeze them for ten minutes (serious game changer).
Bake at 350°F till the edges are golden brown but don’t go full toaster oven on them because dry cookie pops are sad. Cool completely, then get wild with your chocolate: melt in a microwave-safe bowl, dunk those baked pops, and sprinkle like you’ve got a direct line to Santa’s workshop. The chocolate helps keep everything together, plus it hides any “oops” moments from baking. Let ‘em set on wax paper, and you’re done. Eat one before anyone sees, obviously.
Cake Pop Tips
Big tip: Chilling is your best friend, don’t half-heartedly do it. If you skip it, I promise your kitchen will look like a crime scene and your pops won’t stay on the stick. Smaller shapes stay on the stick better (personal experience from picking up cookie shards off the floor).
Want vibrant colors? Use colored candy melts instead of regular chocolate. If the chocolate feels too thick, just add a drop or two of coconut oil and thank me later. If you’re doing this with kids, wear aprons. I learned the hard way that sprinkles bounce everywhere—like, weeks later, you’re still finding them behind your toaster.
It’s totally fine to make these a day before your event—just store in an airtight container at room temp. If you put them in the fridge, sometimes the chocolate sweats (weird, but true). One last tip: Allow yourself to have fun with this. No one cares if they’re not identical. In fact, the wonky ones always taste the best.
How to make Christmas Tree Cake Pops?
Okay, so the Christmas tree cookie pop is kind of where you show off a little bit. Roll your basic dough and use a tree-shaped cookie cutter. Gently slide a stick into the bottom (pointy side up, but don’t push too hard or you’ll get awkward breakage—ask me how I know).
After baking, dunk each in green-dyed white chocolate or green candy coating. Before it hardens, go nuts with colored sprinkles for ornaments and maybe a yellow star sprinkle at the top (it makes a difference, really). Sometimes, I pipe squiggly lines of melted white chocolate like garland. Kids get a kick out of adding “ornaments,” aka random candy bits. If you want, drizzle a little extra chocolate for that snowy vibe.
Patience is not my strong suit, but you do have to let these set completely so the pops don’t flop over. Stack ‘em in a festive mug and you’ve basically won at Christmas.
Common Questions
How do I stop my sticks from sliding out?
Chill the cookie pops before baking, and again after adding chocolate. This helps the stick fuse right in there. Trust me on this.
Can I use other types of dough?
Absolutely. Shortbread works fantastic, but gingerbread gets a little soft. Just avoid doughs that expand too much, or your shapes will look…unpredictable.
How do I store Christmas cookie pops?
Keep them in an airtight container at room temperature for about four days. Fridge not necessary.
Can you freeze Christmas cookie pops?
Sure can! Just wrap in plastic wrap and stick ’em in the freezer. Let them thaw at room temp before serving.
What’s the best way to decorate with kids?
Set up bowls of sprinkles and melted chocolate and let them go to town. It’ll get a bit messy, but honestly, that’s half the fun.
All I want for Christmas is More Cookie Pops!
At the end of the day, making Christmas cookie pops is all about fun, not perfection. It’s fine if every single pop doesn’t look like something out of a magazine. If you want more ideas or extra festive twists, check out Christmas Cookie Pops – A Savory Feast and Christmas Cookie Pops – Love In My Oven for even more sweet inspiration. Grab your dough, your sprinkles, and go make some memories (plus, maybe a mess). I promise every bite tastes like holiday spirit.

Christmas Cookie Pops
Ingredients
Method
- Roll out the sugar cookie dough to about half an inch thick.
- Cut the dough into festive shapes using cookie cutters.
- Insert a lollipop stick or skewer into the base of each cookie and pinch the dough around it for support.
- Place cookies on a parchment-lined baking tray and freeze for 10 minutes.
- Bake the cookies in a preheated oven at 350°F until the edges are golden brown.
- Cool completely after baking.
- Melt the chocolate in a microwave-safe bowl.
- Dunk the cooled cookie pops into the melted chocolate, ensuring they are well coated.
- Immediately sprinkle with assorted Christmas sprinkles before the chocolate sets.
- Let the decorated cookie pops set on wax paper.
- Enjoy immediately or store for later.