
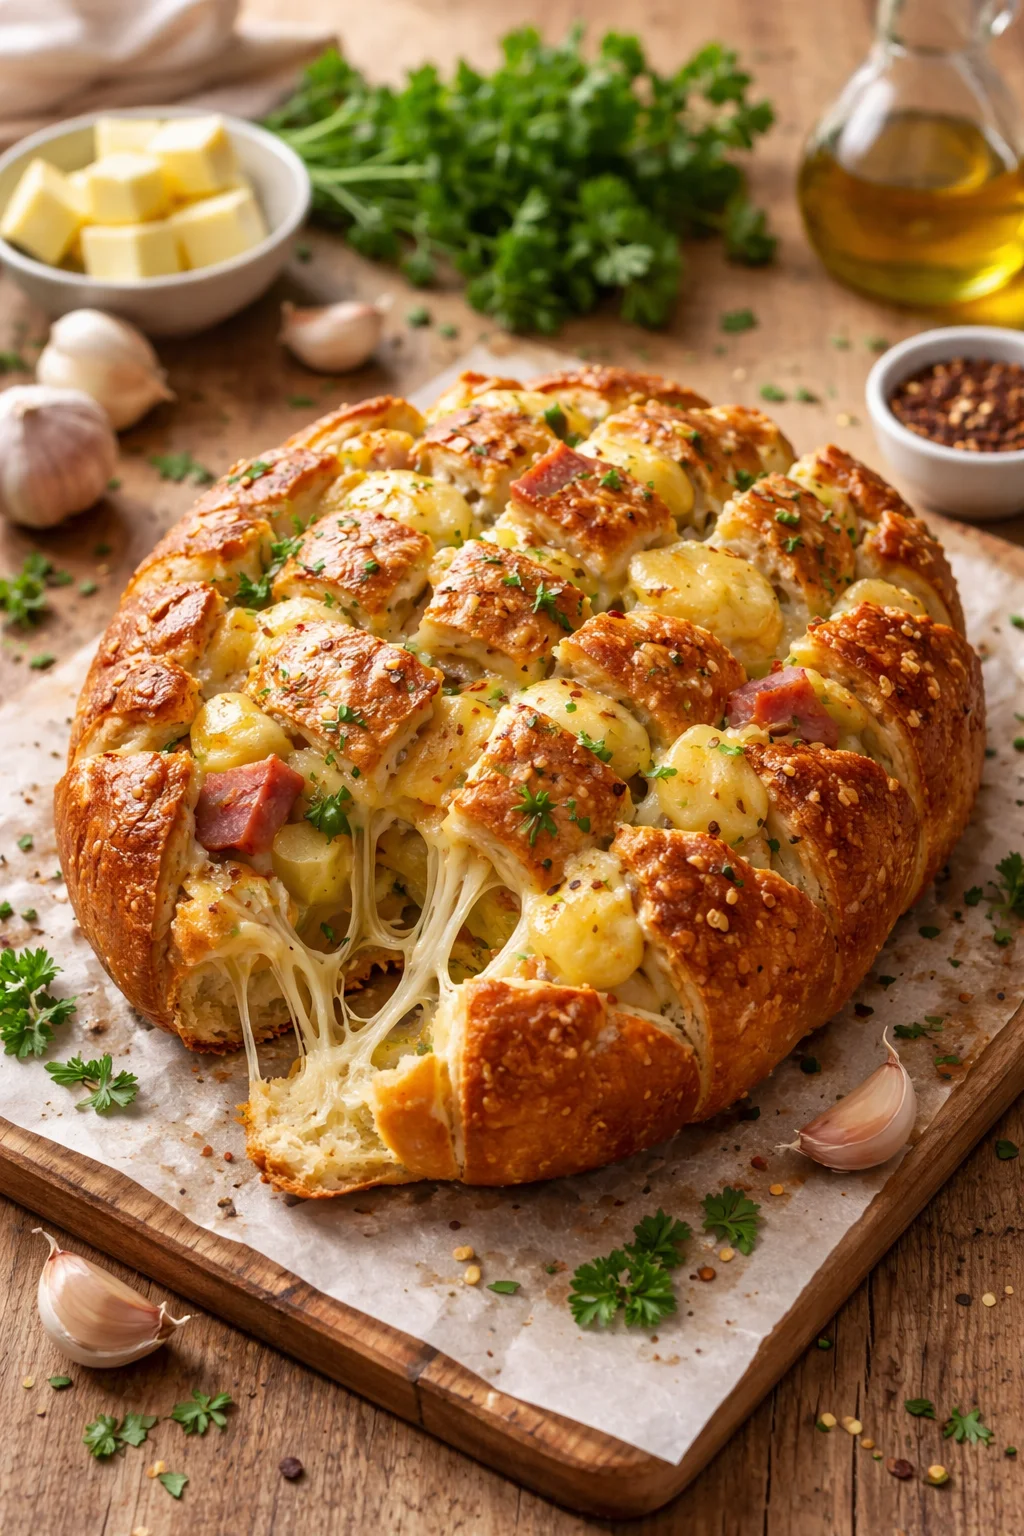
Cheesy Pull-Apart Garlic Bread is my go to fix when I need something warm, filling, and guaranteed to make people wander into the kitchen asking, “What smells so good?” If you have ever hosted friends and realized you forgot a snack, this is the kind of recipe that saves you. It looks impressive, but it is honestly very forgiving. The best part is everybody gets to grab their own cheesy piece, no slicing stress, no fancy plating. I make it for movie nights, game days, and those random Tuesdays when dinner feels a little boring.
A CHEESY PULL APART GARLIC BREAD
I first fell hard for this bread after ordering something similar at a restaurant and realizing I could not stop “just pulling one more piece.” The combo of butter, garlic, and melted cheese is basically unfair in the best way. What makes Cheesy Pull-Apart Garlic Bread extra fun is that it turns the table into a shared snack moment. People talk, pull, laugh, and before you know it, the whole loaf is gone.
I usually use a crusty loaf like sourdough or a round boule because it holds its shape and gives you those crisp edges. But you can absolutely do this with a softer loaf too. The only real goal is getting the bread cut into a grid so the buttery garlic mixture can sneak into every crack.
If you love cheesy bread in general, you might also like this quick, crispy option I make when I do not want to turn on the oven: simple air fryer cheesy garlic bread. Different vibe, same comfort.
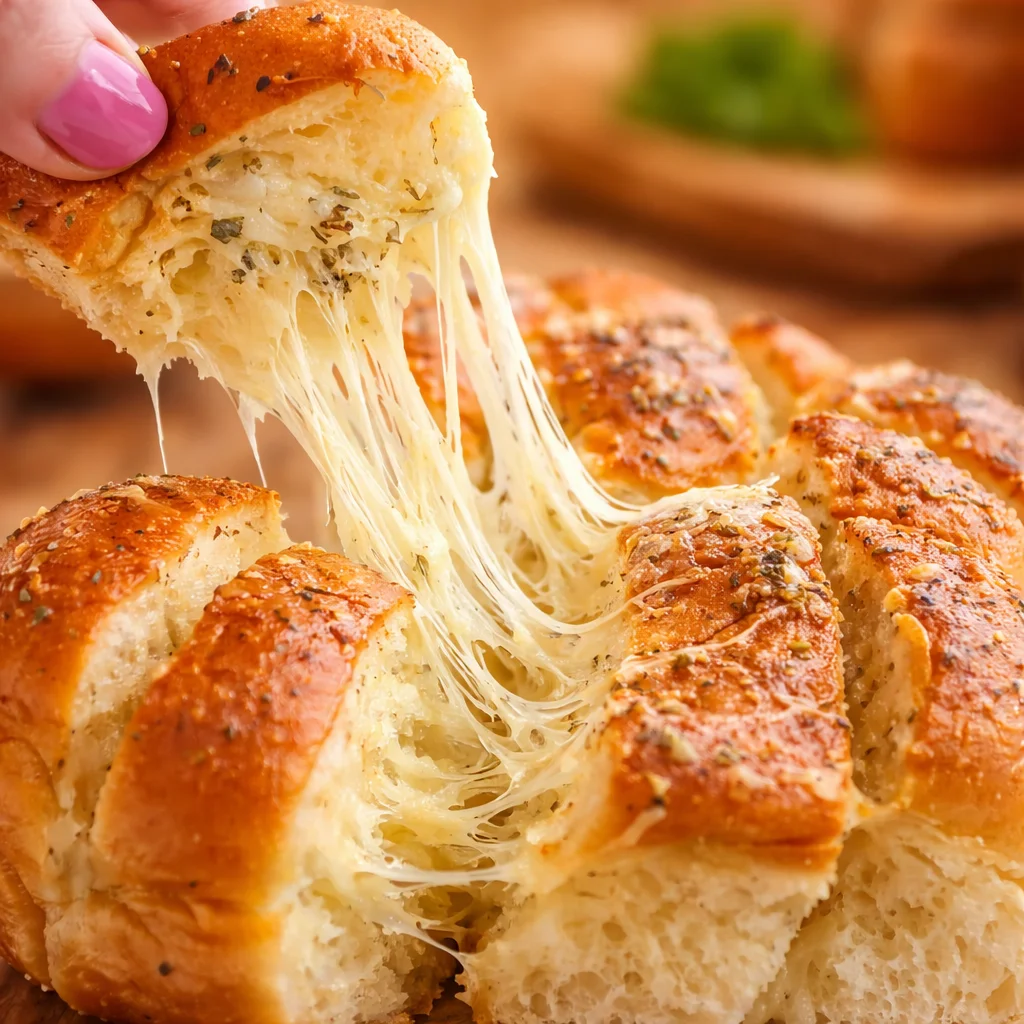
I also want to say this upfront: this is not one of those recipes where you need a perfect cheese pull photo to “win.” If the cheese gets extra melty and a little messy, you are doing it right. The smell alone is enough to make you feel like you have your life together.
WHAT YOU NEED TO MAKE THIS PERFECT PULL-APART BREAD
Let us keep this simple and practical. Here is what I reach for every time. The ingredients are basic, but the way they come together is what makes Cheesy Pull-Apart Garlic Bread such a crowd pleaser.
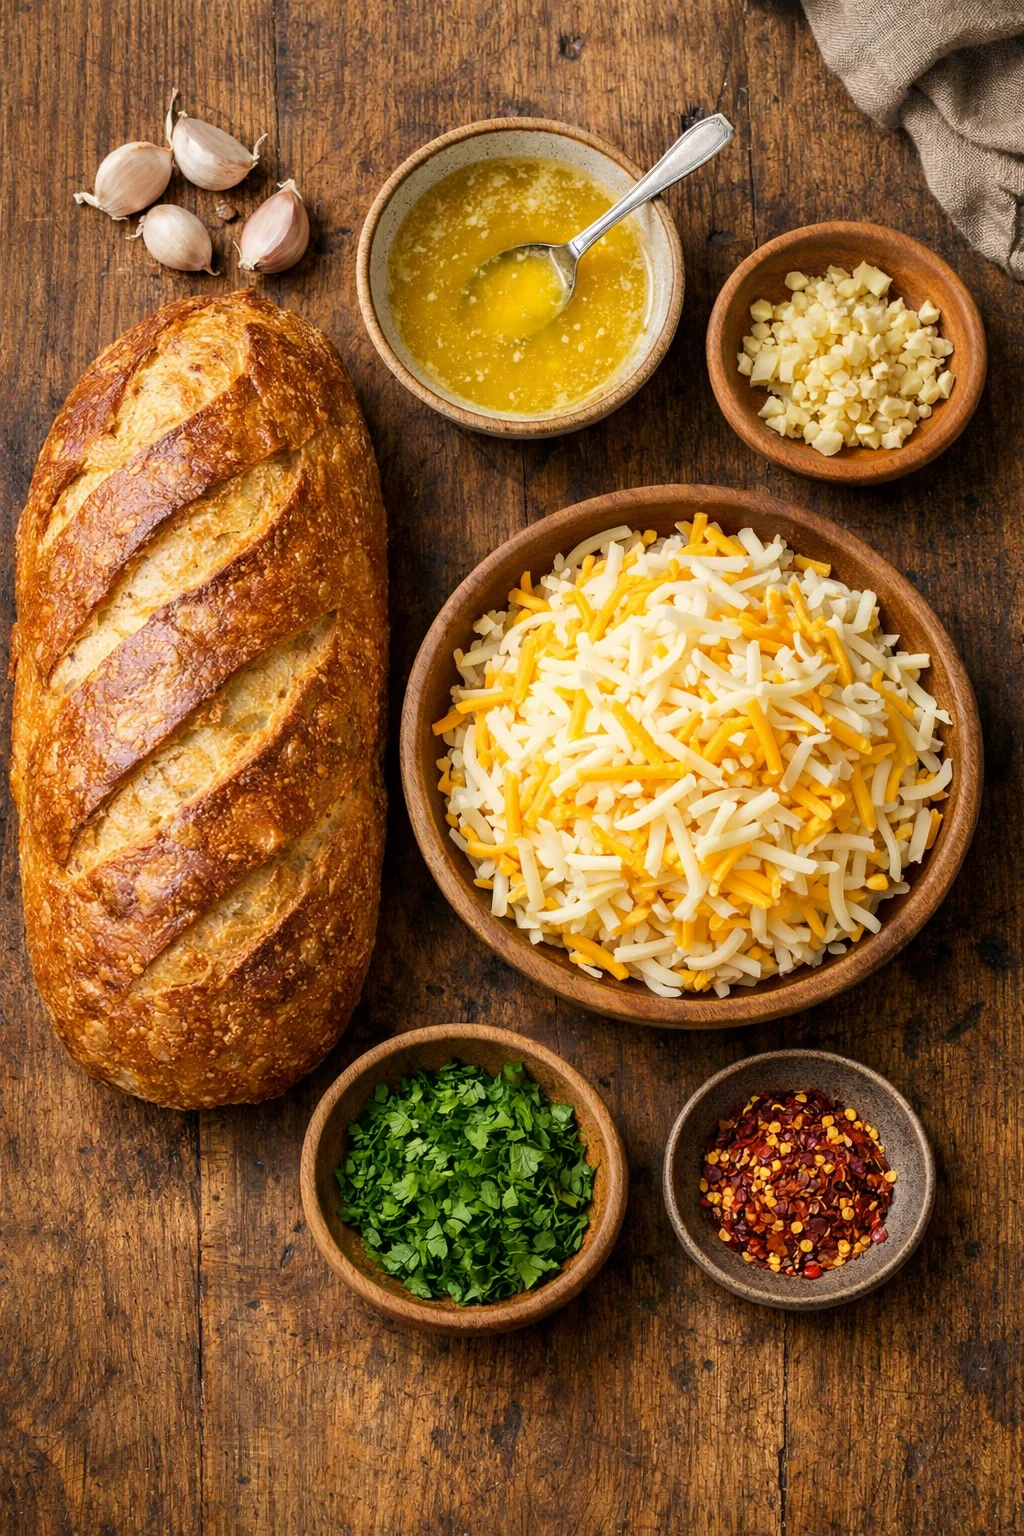
- 1 large crusty loaf (sourdough, boule, or even a big French loaf)
- 6 to 8 tablespoons butter (melted)
- 3 to 5 cloves garlic (minced, or use garlic paste if you are in a hurry)
- 2 to 3 cups shredded cheese (mozzarella for stretch, plus cheddar or provolone for flavor)
- 2 tablespoons chopped parsley (optional, but it makes it feel fresh)
- Pinch of salt (only if your butter is unsalted)
- Optional extras: red pepper flakes, a little grated Parmesan, or a tiny sprinkle of Italian seasoning
About cheese: I usually do mostly mozzarella, then a handful of sharp cheddar. If you want it extra rich, throw in a little provolone. Pre shredded cheese works, but if you shred it yourself, it melts smoother. Not a deal breaker, just a nice upgrade when you have time.
And if you are on a bread kick lately, I keep a little list of comforting bakes bookmarked in this bread recipe collection. It is handy when you want to switch things up.
One more thing: use real butter if you can. I have tried swaps in a pinch, and butter just gives the best flavor. It also helps the top get those golden spots that make you want to “taste test” before serving.
HOW TO MAKE THIS EASY, CHEESY BREAD
This is the part where you feel like a kitchen genius, because it is simple but looks fancy. I will walk you through it like I would if you were standing at my counter.
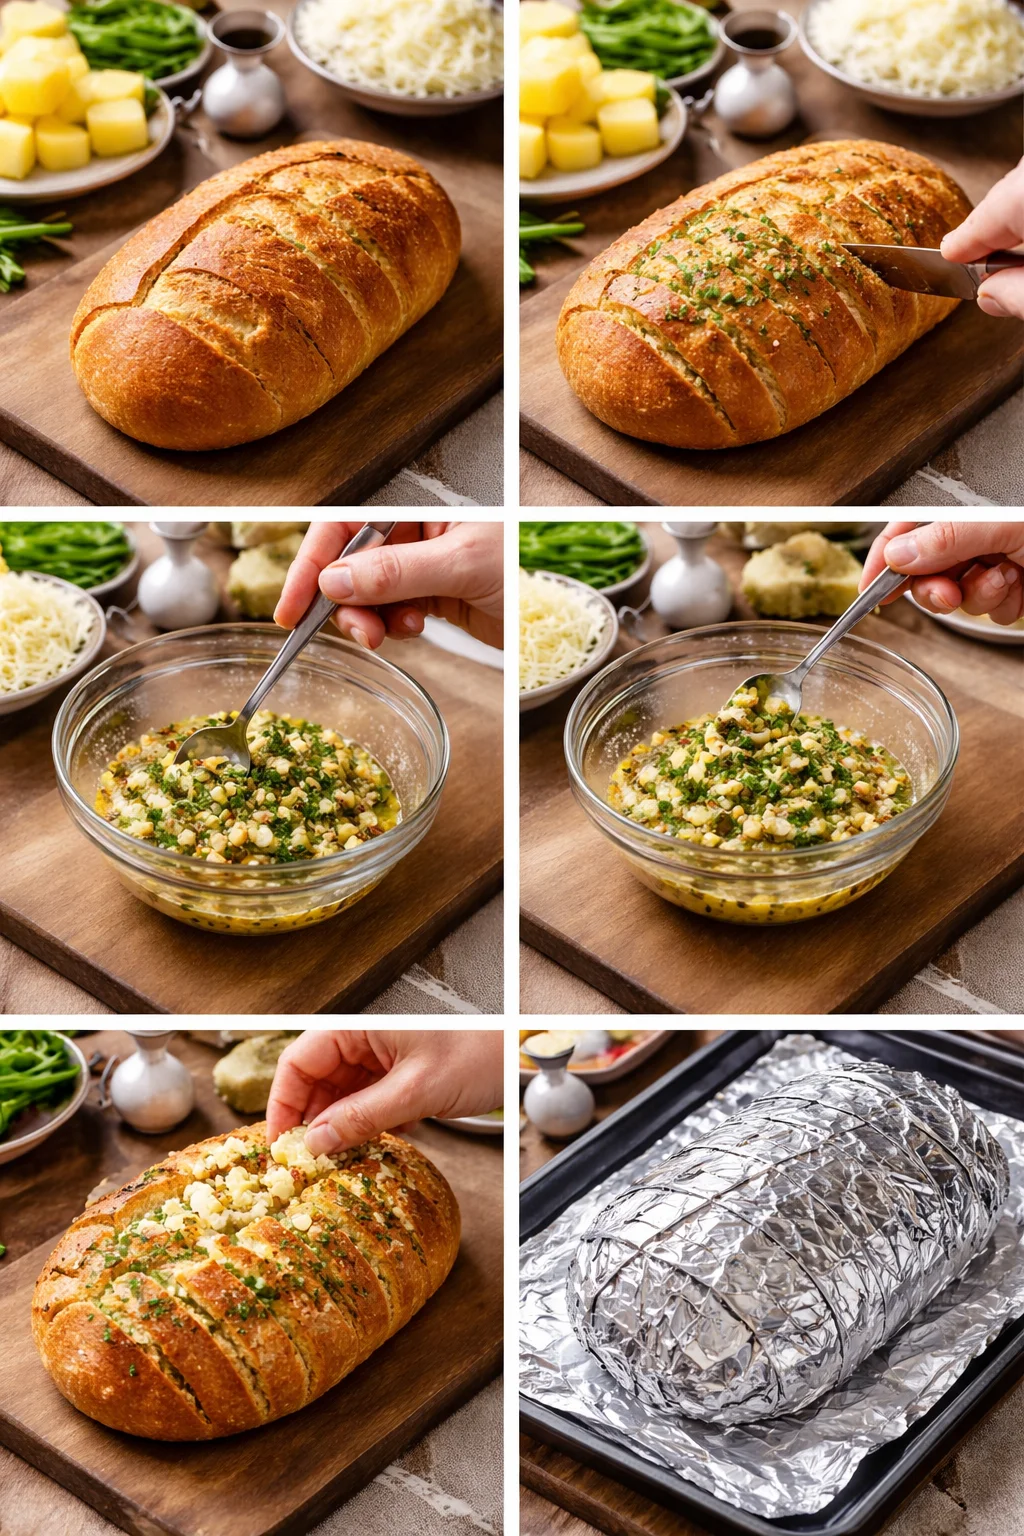
1) Preheat your oven to 350 F. Line a baking sheet with foil or parchment. Foil is great because it catches all the buttery drips.
2) Cut the bread into a grid. Place the loaf on a cutting board. Slice it one direction, then the other direction, making little squares. Do not cut all the way through. Leave the bottom intact so the loaf stays together.
3) Mix the garlic butter. Melt the butter, then stir in minced garlic, parsley, and a pinch of salt if needed. If you like a little heat, add red pepper flakes.
4) Get the butter into the cracks. I use a spoon and slowly drizzle it into all the cuts. You can also use a pastry brush, but spooning helps get it deeper.
5) Stuff with cheese. Push shredded cheese into the cuts. Yes, it takes a minute. Yes, your fingers will get cheesy. This is a good thing.
6) Wrap and bake. Place the loaf on the baking sheet and loosely tent with foil. Bake about 15 minutes, then remove the foil and bake another 10 minutes until the top is bubbly and lightly browned.
If you want a fun dinner pairing, I love serving this bread next to a cozy pasta. This creamy garlic tomato pasta is one of my favorites when I want an easy comfort meal that still feels special.
“I made this for my kids and they literally hovered around the oven. We pulled it apart right on the pan and there were no leftovers. I am officially adding it to our Friday night routine.”
Little tip from my many batches: if your loaf is super crusty, you may want to add an extra tablespoon of butter. That extra moisture makes the inside soft and keeps the edges from going too dry.
CHECKING PULL-APART BREAD FOR DONENESS
This is where people sometimes overthink it, so let us keep it easy. Your bread is done when the cheese is melted in the center cuts, not just on top. The top should look bubbly, and the corners should be lightly golden.
Here is what I do:
Look: The cheese should be glossy and melted, not still shredded and dry looking.
Pull test: Use a fork to gently pull one middle piece. If it comes away easily and the cheese stretches, you are good.
Tap check: The loaf should feel hot and soft inside, not stiff like it just warmed on the outside.
If the top is browning too quickly but the middle is not melted, lightly cover the loaf with foil again and give it 5 more minutes. Ovens vary a lot, and bread sizes vary too, so timing is always a range.
Also, I know some people love shortcuts. If you ever need a fast bread fix that does not involve the oven, this is a fun one to keep in your back pocket: 10 minute no oven bread magic.
HOW TO STORE PULL-APART BREAD
Honestly, storing Cheesy Pull-Apart Garlic Bread is rarely a problem in my house because it disappears fast. But if you do have leftovers, you can absolutely save them and still enjoy them.
Room temp: Wrap tightly in foil and keep it for up to 1 day. After that, the texture starts to go a little sad.
Fridge: Wrap in foil, then place in an airtight container for 2 to 3 days. The fridge dries bread out a bit, but reheating fixes most of it.
Freezer: If you know you will not finish it soon, freeze it. Wrap in foil, then put it in a freezer bag. It will keep about 1 month. Thaw in the fridge overnight before reheating.
Reheating: I prefer the oven at 325 F, wrapped in foil for about 10 to 15 minutes. Then open the foil for a couple minutes to crisp the top. Microwave works in a pinch, but the bread can go chewy.
If you are planning a party spread, this bread fits right in next to cozy casseroles. I have served it with this 5 ingredient cheesy hashbrown casserole for brunch and people went back for seconds of both.
Common Questions
Can I make it ahead of time?
Yes. You can cut the loaf and mix the garlic butter a few hours ahead. I would wait to add the cheese until right before baking so it does not get weird or clumpy.
What is the best bread to use?
A sturdy crusty loaf like sourdough or a boule is easiest because it holds the cuts. Softer loaves work too, just cut gently so you do not squish it.
How do I keep the bottom from getting too hard?
Do not overbake, and keep it tented with foil for the first part of baking. Also, make sure some of that garlic butter makes it down into the cuts.
Can I add extra flavors?
Totally. Add cooked crumbled bacon, chopped jalapenos, or a sprinkle of Italian seasoning. Just do not overstuff so the loaf still pulls apart nicely.
Why is my cheese not melting in the middle?
Usually the cuts were not deep enough, or the oven time was too short. Tent with foil and bake a few more minutes, then do the pull test again.
A warm, cheesy plan for your next snack night
If you take one thing from this, let it be this: Cheesy Pull-Apart Garlic Bread is supposed to be easy, a little messy, and completely satisfying. Cut the grid, drown it in garlic butter, stuff it with cheese, and bake until bubbly. If you want to compare styles or get extra inspiration, I like checking recipes like Cheese and Garlic Crack Bread (Pull Apart Bread) – RecipeTin Eats and From Scratch Cheesy Garlic Pull-Apart Bread – I Am Homesteader. Now go make a loaf, set it in the middle of the table, and watch how fast everyone turns into a bread thief in the best possible way. 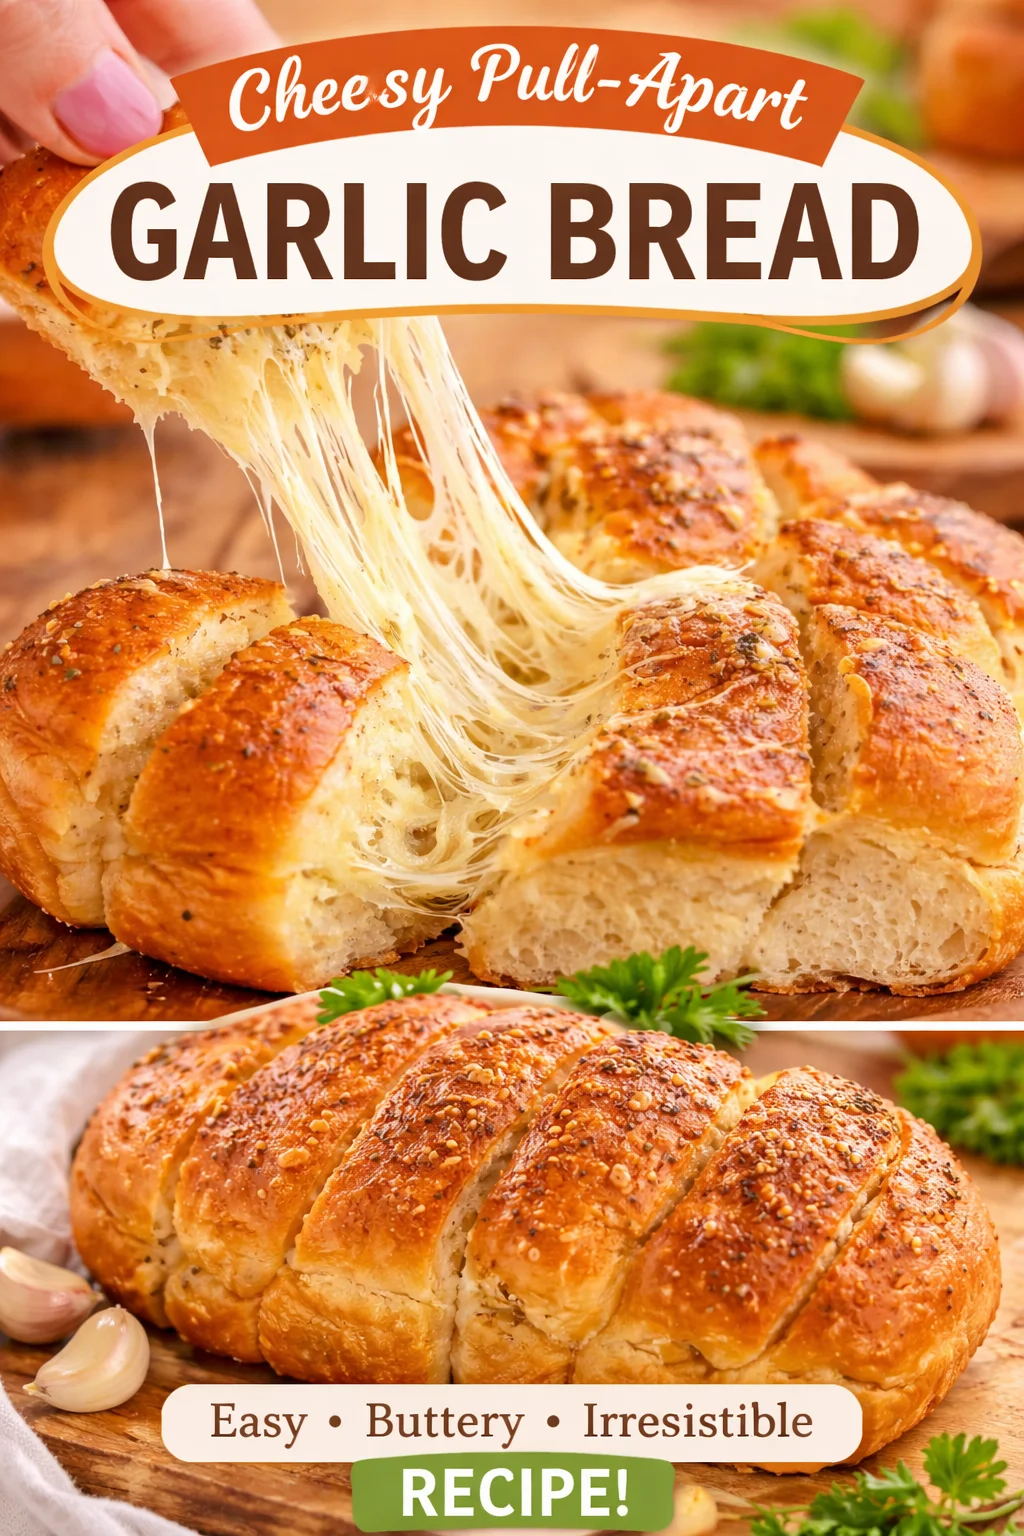
Cheesy Pull-Apart Garlic Bread
Ingredients
Method
- Preheat your oven to 350°F (175°C). Line a baking sheet with foil or parchment.
- Cut the bread into a grid, slicing one direction, then the other, without cutting all the way through.
- Melt the butter and stir in the minced garlic, parsley, and a pinch of salt.
- Drizzle the garlic butter mixture deep into the cuts of the bread using a spoon.
- Stuff the cuts with shredded cheese.
- Place the loaf on the baking sheet and loosely tent with foil. Bake for about 15 minutes.
- Remove the foil and bake for another 10 minutes until the top is bubbly and lightly browned.
- Serve warm and enjoy pulling apart the cheesy pieces!