
peppermint bark recipe season hits every year and suddenly I need something sweet that looks festive but does not take my whole afternoon. If you have ever volunteered to “bring a dessert” and then realized you also have gifts to wrap, this is for you. This bark is crisp when you bite it, melty right after, and it has that cool peppermint pop that makes the kitchen smell like the holidays. I make it for cookie swaps, movie nights, and those random December Tuesdays when I just want a treat with my coffee. I will walk you through what matters most so your layers look clean and your candy canes do not sink.
When it turns out right, peppermint bark has that satisfying snap, then a smooth chocolate melt, then crunchy peppermint bits that wake everything up. It feels fancy in a gift tin, but it is honestly one of the easiest holiday sweets I know. I love it because you can make a big batch fast, break it into rustic pieces, and it still looks cute. It is also the kind of treat people recognize immediately, so it disappears fast at parties. If you want the super simple version too, I have another post you might like, easy peppermint bark 3 ingredient, and yes it is as low stress as it sounds. In this post, I am focusing on the small choices that make your bark look smooth and taste clean, and you can scroll right to your recipe card when you are ready to make it.
Why You’ll Love This Recipe
Here is why I keep coming back to this peppermint bark recipe every single year:
- Fast, no fussy shaping because you spread, chill, and break into pieces.
- Great for gifting since it travels well and looks festive without extra decorating.
- Easy to scale for a small family night or a big cookie exchange.
- Make ahead friendly so you are not scrambling the day of your party.
Also, it is a nice break from baking trays of cookies. Sometimes I want holiday sweets without preheating the oven, you know?
What to Know Before Making It
Before you start melting chocolate, grab a sheet pan, parchment paper, and a spatula. Parchment is your best friend because it helps you lift the bark out cleanly and it keeps the bottom from getting weird marks. Make sure your pan is dry and your tools are dry too. Water is what causes chocolate to seize, and it is such a mood killer.
One more thing that helps a lot is having your candy canes already crushed and ready. Once chocolate is melted and spread, you do not want to stop and wrestle with a plastic bag of peppermint sticks. If you want another fun bark idea for the same season, this one is dangerously snackable: deliciously easy pecan pie bark recipe. It is a totally different vibe but still super giftable.
What Is Peppermint Bark?
Peppermint bark is basically layered chocolate candy topped with crushed peppermint candy. Most versions have a darker chocolate base and a white chocolate top, then peppermint pieces pressed in. Some people swirl the layers, some do clean stripes, and some do one single layer. The whole point is that mix of smooth chocolate and bright peppermint crunch.
It is popular around Christmas because peppermint and chocolate are a classic holiday combo, and the red and white candy pieces make it look instantly seasonal. And honestly, it is hard to mess up if you follow a few simple rules.
Choosing Chocolate for the Best Flavor and Snap
Chocolate choice makes a big difference here because there are not many ingredients to hide behind. Pick something you actually like eating straight. For the dark layer, semisweet or dark chocolate gives you a deeper flavor and keeps the bark from being too sugary. Milk chocolate works too, but it is sweeter and softer.
For the white layer, you will see “white chocolate chips” and “white baking bars.” In my experience, bars usually melt smoother. Chips are designed to hold their shape a bit more, so they can melt thicker. Not impossible, just something to know. If your white layer always looks a little grainy, try switching brands or using a bar next time.
And a quick real life tip, if you are melting in the microwave, go slow and stir often. Most scorched chocolate stories start with “I just gave it another 30 seconds.”
White Chocolate vs. Dark Chocolate Layers (If Used)
I like the two layer look because it screams peppermint bark, but you do not have to do it that way. Dark plus white gives you contrast, both in flavor and appearance. The darker layer adds bitterness that balances the sweet peppermint candy, and the white layer gives that creamy top that looks pretty under the red peppermint bits.
If you only want one layer, go with what you love most. I have made this peppermint bark recipe with only semisweet chocolate and it was still a hit. The peppermint stands out either way.
And totally random, but if you are planning a holiday menu and need something savory too, this dinner is one I lean on when company is coming: bourbon chicken recipe. Sweet, sticky, and easy to serve with rice.
How to Get a Smooth Finish and Even Layers
For smooth layers, spread the melted chocolate while it is still fluid. If you wait too long, it starts setting and then you get drag marks. I use a simple spatula and gently nudge it to the corners. No need to obsess over perfection, but even thickness helps the bark break nicely later.
Another little trick is to tap the pan on the counter once or twice after spreading. Not aggressively, just enough to settle the chocolate and pop air bubbles. If you want sharp looking layers, let the first layer set until it is firm enough that the top is not tacky, but not so cold that the second layer refuses to stick. More on that next.
How to Keep Chocolate Layers from Separating
Layer separation is the most common peppermint bark frustration I hear about. Usually it happens when the bottom layer is too cold and fully set, then the top layer goes on and basically sits there like a hat. When you break the bark, the layers pop apart.
What works for me is letting the bottom layer set to a firm, slightly matte surface, then adding the next layer while there is still a tiny bit of give. If I accidentally chilled it too long, I let it sit at room temp for a few minutes before adding the next layer. You want the layers to bond, not just stack.
If you are gifting it, bonded layers matter because nobody wants to open a tin of separated slabs.
Crushed Candy Canes: Texture and Distribution
Candy canes are fun, but they can be a little chaotic. I like a mix of small shards and a few slightly bigger bits. Too powdery and it melts into the chocolate, too chunky and it makes the bark hard to break.
Here is my simple approach:
- Crush candy canes in a zip bag with a rolling pin or heavy mug.
- Sprinkle right after you spread the top layer so it sticks.
- Gently press the candy into the chocolate with your palm or spatula, very lightly.
Try to distribute it evenly so every piece gets that peppermint crunch. If you dump it in the center, you will end up with some bare pieces and some that feel like you are chewing a minty gravel pile.
By the way, if you want a shortcut version for a busy day, this is the one I send friends who are new to holiday candy: easy peppermint bark 3 ingredient.
Cutting or Breaking Bark into Giftable Pieces
I am team “break it with your hands.” It looks more natural and you do not get perfect squares that feel too manufactured. Once it is fully set, lift the whole sheet using the parchment and place it on the counter. Then break into chunks.
If you prefer cleaner edges, you can use a large knife, but let the bark warm up for a couple minutes first so it does not shatter into tiny bits. Also, do not saw back and forth too much or the top layer can crack weirdly. One firm press is better than lots of little cuts.
Pro tip from my own impatience: do not try to break it early. It will bend and smear, and then you are stuck calling it “peppermint bark clusters” which is not the worst thing, but still.
How to Package Peppermint Bark for Christmas Gifts
Packaging is half the fun, especially if you are giving this as a little host gift. I like using small tins lined with parchment or wax paper. Cellophane bags work too, just try not to pack the pieces too tightly or they can snap into crumbs.
A few easy packaging ideas:
- Treat tins lined with parchment, then tie a ribbon around the outside.
- Clear bags with a simple gift tag and a twist tie.
- Mason jars for a cute stacked look, especially for coworkers.
And if you are doing a full holiday food drop, I love pairing sweet bark with something savory for balance. I have done bark tins plus a meal kit note pointing to bourbon chicken recipe for an easy dinner after the parties are over.
Storage, Shelf Life, and Humidity Concerns
Humidity is the sneaky enemy of peppermint bark. If your kitchen is very warm or damp, the chocolate can develop a dull look or the candy canes can get a little sticky over time. It still tastes good, but it is not as crisp.
I store this peppermint bark recipe in an airtight container with parchment between layers. Keep it in a cool, dry place away from the stove. If your house runs warm, the fridge is okay, but seal it well so it does not pick up random fridge smells.
I made this for my kid’s school cookie swap and it was the first thing gone. A mom asked if it was from a fancy candy shop, which made my whole day.
Variations: Different Chocolate Combinations and Toppings
Once you get the basic method down, you can play. The easiest variation is swapping the chocolate types. Dark and white is classic, but milk and white is extra sweet, and dark only is bold and grown up. You can also add a tiny drop of peppermint extract to the top layer, but go easy because it can taste like toothpaste fast.
Topping ideas that still make sense with peppermint:
- Crushed peppermint candies instead of candy canes for smaller bits
- Mini chocolate chips sprinkled lightly for extra texture
- Crushed pretzels for a sweet salty crunch
- Holiday sprinkles if you want more color
The big rule is not overloading the top. If you bury the chocolate under toppings, the bark will fall apart when you break it. Keep it balanced.
Also, if you love bark recipes in general, you might enjoy that pecan pie version I mentioned earlier. It is a totally different flavor profile, but it scratches the same “easy holiday treat” itch: deliciously easy pecan pie bark recipe.
Frequently Asked Questions About Homemade Peppermint Bark
Why does peppermint bark separate into layers?
Peppermint bark can separate into layers when the chocolate layers do not bond properly during preparation. This often happens when the bottom chocolate layer has become completely hardened or excessively cold before the second layer is added. For better adhesion, allow the first layer to set until firm but still slightly tacky before carefully spreading the next layer over the surface. If the bottom layer has already been refrigerated until very cold, letting it warm slightly before adding the second layer may help improve the bond. Using compatible chocolate products and avoiding sudden temperature changes can also reduce the likelihood of separation, resulting in peppermint bark with smooth, attractive layers that stay together when broken into pieces.
Can I make peppermint bark without white chocolate?
Peppermint bark can easily be made without white chocolate, making it a versatile holiday treat for anyone who prefers a richer chocolate flavor. Instead of creating the traditional two-layer combination of dark or semisweet chocolate and white chocolate, you can prepare a single chocolate layer and finish it with crushed peppermint candies or candy canes. Dark chocolate creates a more intense flavor that balances the sweetness of the peppermint topping, while milk chocolate produces a sweeter, creamier result. The crushed candy canes provide the familiar minty flavor and festive appearance associated with classic Christmas peppermint bark. This simplified variation is especially convenient when you want an easy homemade holiday candy with fewer ingredients and less preparation time.
How long does homemade peppermint bark last?
Homemade peppermint bark generally maintains its best flavor, texture, and appearance for approximately one to two weeks when stored properly. Keep the bark in an airtight container in a cool, dry location away from direct sunlight, heat, and excessive humidity. The chocolate itself may remain suitable for longer depending on the ingredients used, but crushed candy canes can gradually absorb moisture and lose their crisp texture. For the best presentation, separate layers of peppermint bark with parchment paper to prevent the pieces from sticking together or becoming scratched. If you are preparing peppermint bark for Christmas gifts or holiday dessert platters, making it within a week or two of serving is a practical way to preserve its fresh flavor and satisfying crunch.
Should homemade peppermint bark be refrigerated?
Homemade peppermint bark does not usually require refrigeration when made with shelf-stable chocolate and peppermint candies, provided it is stored in a cool, dry environment. Room-temperature storage is often preferable because it helps preserve the chocolate’s smooth finish and prevents moisture from affecting the crushed peppermint topping. However, refrigeration may be helpful if your kitchen is particularly warm or the chocolate begins to soften. When refrigerating peppermint bark, place it in a tightly sealed, moisture-resistant container to protect it from condensation and surrounding food odors. Before serving, allow the sealed container to gradually reach room temperature to reduce moisture formation on the chocolate and maintain its attractive appearance.
Can you freeze homemade peppermint bark?
Homemade peppermint bark can be frozen, although careful packaging is important to protect the chocolate and peppermint topping from moisture-related changes. Freezing may cause condensation during thawing, which can leave the chocolate with a dull or streaky appearance and soften the crushed candy canes. To minimize these effects, wrap the bark securely, place it in an airtight freezer-safe container, and separate individual layers with parchment paper. For the best quality, use frozen peppermint bark within approximately two to three months. When ready to enjoy it, transfer the sealed container to the refrigerator for gradual thawing, then allow it to reach room temperature before opening. This controlled process helps reduce condensation and preserve the bark’s texture and appearance.
How do I prevent melted chocolate from seizing when making peppermint bark?
Chocolate can seize when even a small amount of water or steam comes into contact with melted chocolate, causing it to become thick, grainy, and difficult to spread. To prevent this problem, make sure all bowls, spatulas, and utensils are completely dry before beginning the melting process. When using a microwave, heat the chocolate in short intervals at reduced power, stirring thoroughly between each interval to distribute the heat evenly and prevent overheating. If melting chocolate over a double boiler, keep the water at a gentle simmer and ensure the bottom of the bowl does not touch the water or allow steam to enter. Avoid adding water-based flavorings directly to melted chocolate, and choose oil-based peppermint flavoring when additional mint flavor is desired. Gentle heating and careful moisture control will help produce smooth, glossy chocolate that spreads evenly and sets with a satisfying snap.
Final Thoughts
If you want a holiday sweet that looks special but feels low effort, this peppermint bark recipe is the move. Focus on good chocolate, timing your layers so they bond, and sprinkling the candy canes while the top is still soft. Make a batch, break it into imperfect pieces, and watch people hover around the container like it is magnetized. When you are ready, head down to the recipe card and make it your own.
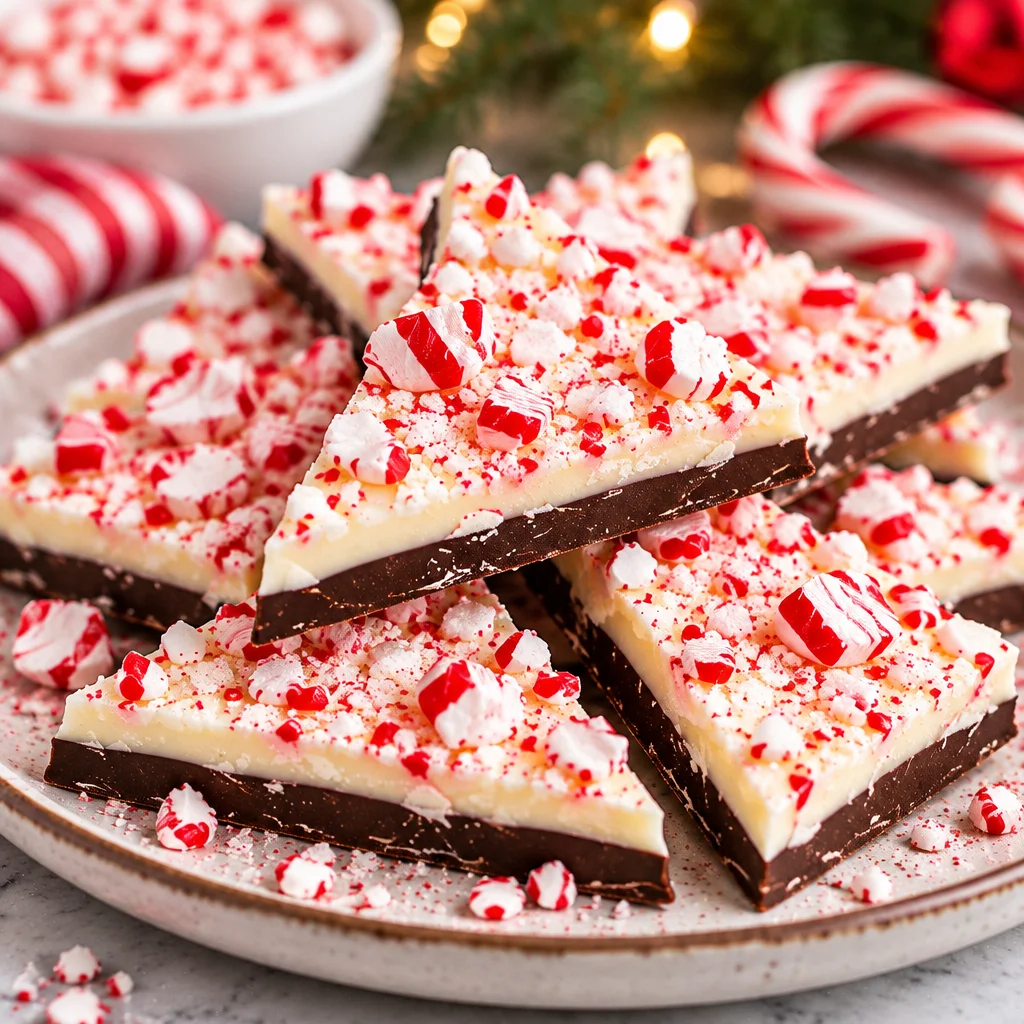
Peppermint Bark
Ingredients
Method
- Line a sheet pan with parchment paper.
- Melt the semisweet or dark chocolate in a microwave or double boiler, stirring frequently until smooth.
- Spread the melted chocolate evenly on the lined sheet pan.
- Let the chocolate set until firm but not completely hard.
- Melt the white chocolate using the same method and spread it over the dark chocolate layer.
- Sprinkle the crushed candy canes over the melted white chocolate immediately.
- Gently press the candy canes into the chocolate.
- Allow the bark to set completely at room temperature.
- Once set, lift the bark out using the parchment paper and break it into rustic pieces.