
Snowman Chocolate Bark is my go to fix for that very specific holiday problem: you want something cute and festive, but you do not want to bake cookies for three hours and then wash a mountain of dishes. I make this when friends pop by, when the kids need a class treat, or when I just want something fun on the counter with my coffee. It looks like you tried really hard, but honestly it is mostly melting chocolate and playing with sprinkles. If you have ever burned candy melts or ended up with streaky chocolate, do not worry. I have a few simple tricks that make this come out smooth and gift worthy every time. =
What Is Snowman Chocolate Bark?
Think of bark as a big sheet of melted chocolate that you chill and then break into snacky pieces. Snowman bark is just the holiday version where you decorate it to look like little snowman faces. The best part is you do not need special tools, and it is very forgiving. If a face looks a little goofy, it actually makes it more charming.
I like making snowman chocolate bark because it checks all the boxes: quick, cute, and easy to transport. It is also a nice “something sweet” to put out next to hot cocoa, and it feels more special than a regular candy bar.
While we are talking holiday candy, if you love that peppermint plus white chocolate vibe, you would probably also like this easy Christmas peppermint bark with white chocolate. It is the same kind of satisfying, break into pieces situation.
What Type of Chocolate Works Best for Snowman Bark?
For that classic snowy look, I usually use white chocolate or vanilla candy melts. Both work, but they behave a little differently.
Here is the real life breakdown:
- White chocolate bars: Tastes the best, but it can be a little fussy if overheated. Melt it slowly and gently.
- White chocolate chips: Convenient, but sometimes thicker and more likely to seize. Still totally doable with slow heating.
- Candy melts: Easiest for beginners. They melt smoothly and set up well, and you can find them everywhere in December.
If you want a richer flavor without much effort, you can do a mix: mostly white chocolate plus a small handful of candy melts to help the texture. Also, if your kitchen is warm, candy melts tend to stay easier to work with.
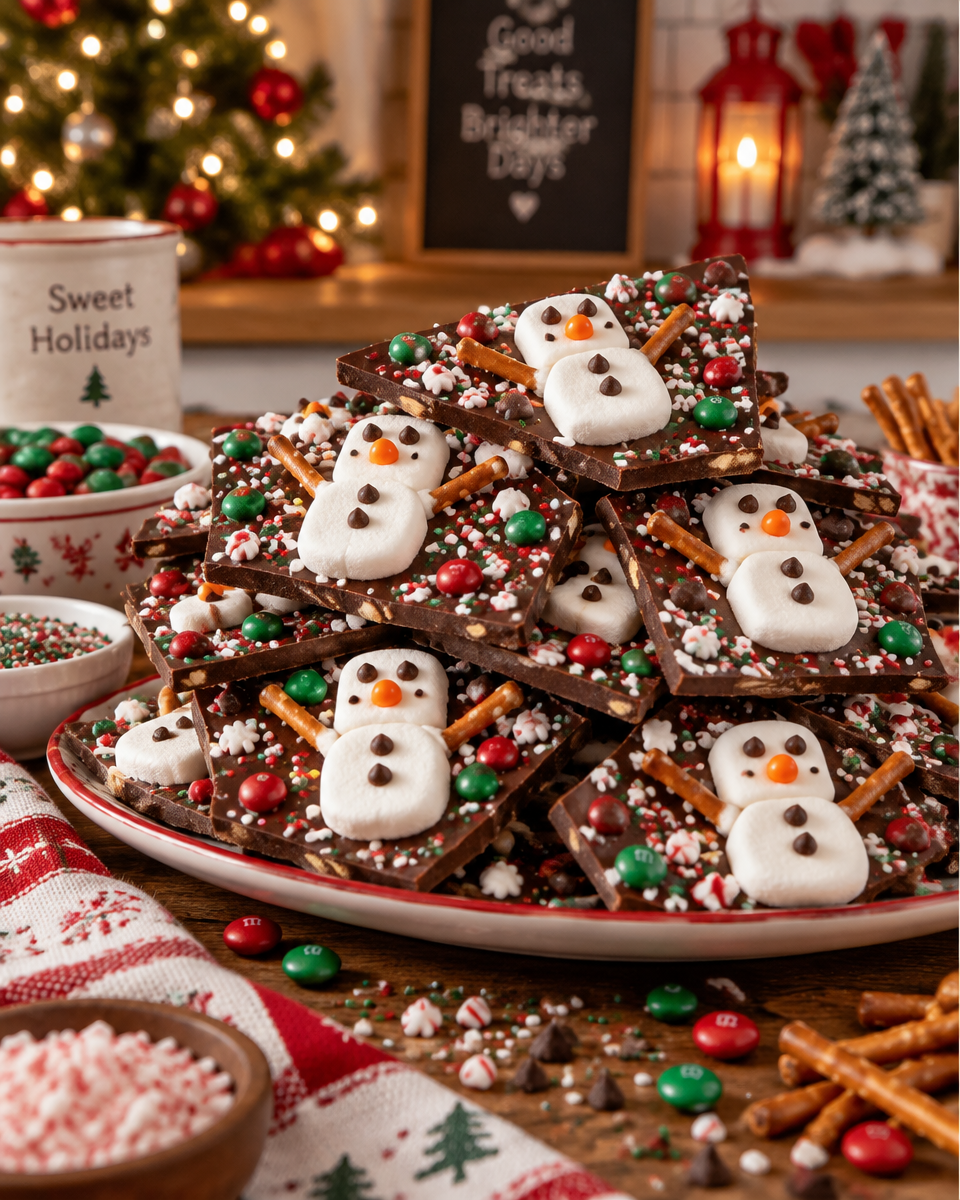
How to Create the Snowman Face Design on Chocolate Bark
This is the part that makes people say “wait, you made this?” even though it is basically edible crafts. I keep it simple: face, scarf, buttons, done.
My simple step by step method
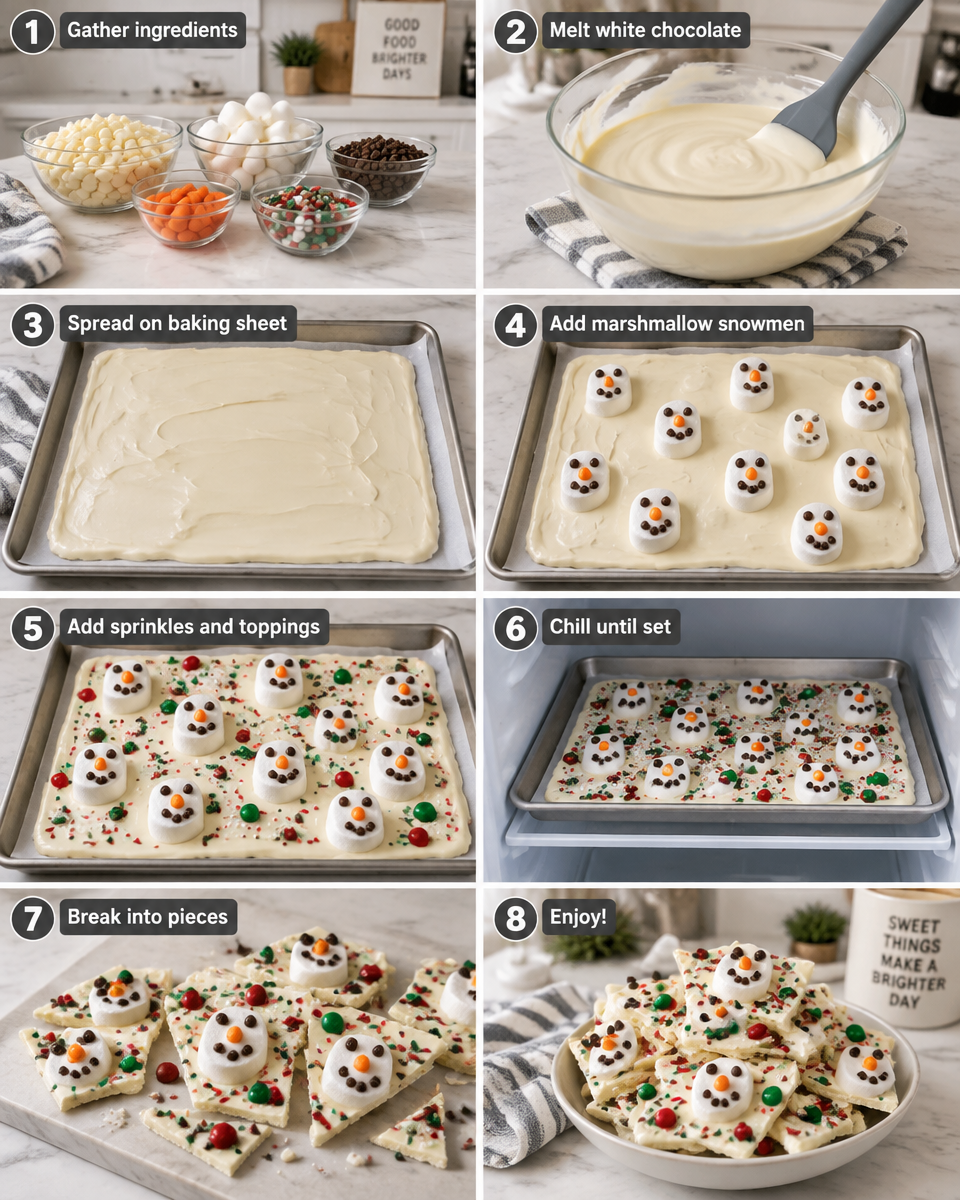
Here is exactly how I do my snowman chocolate bark at home:
- Line a baking sheet with parchment paper.
- Melt your white chocolate slowly, stirring often, until smooth.
- Pour it onto the parchment and spread into an even layer. I aim for about 1/4 inch thick so it breaks nicely.
- While it is still soft, place mini marshmallows or white candy circles where you want snowman faces. I like doing rows so it looks neat.
- Add eyes with mini chocolate chips or black sprinkles.
- Add a nose with an orange sprinkle, an orange candy pearl, or a tiny bit of orange frosting.
- Make a scarf with red and green sprinkles or a strip of fruit leather cut into tiny pieces.
- Let everything set completely, then break into pieces around the faces.
My biggest tip is to stop and look at it after you add the eyes. If the eyes are too close, the snowman looks stressed. Too far apart and it looks surprised. I say this with love because I have made plenty of shocked snowmen over the years.
Tips for Smooth and Glossy Chocolate Bark
Let’s talk about the thing nobody wants to admit: white chocolate can go grainy fast. The fix is mostly patience. Use low heat, stir a lot, and avoid getting even a drop of water in the bowl.
These are my best practical tips:
1. Microwave in short bursts. Do 15 to 20 seconds at a time, stir, repeat. When it is mostly melted, just keep stirring until smooth.
2. Keep tools dry. A damp spoon can ruin the texture.
3. Do not overheat. If it looks thick and clumpy, it is usually too hot. Stop heating and stir gently for a minute.
4. Spread quickly. Once it is smooth, pour and spread right away so it sets evenly.
If you ever end up with a slightly thicker bark layer than planned, do not stress. Thicker pieces are actually amazing with coffee because they feel extra indulgent.
“I made this with my daughter for her school party and the teachers asked where I bought it. The faces were not perfect but they were adorable, and every piece got eaten.”
What Toppings Can You Use to Decorate Snowman Bark?
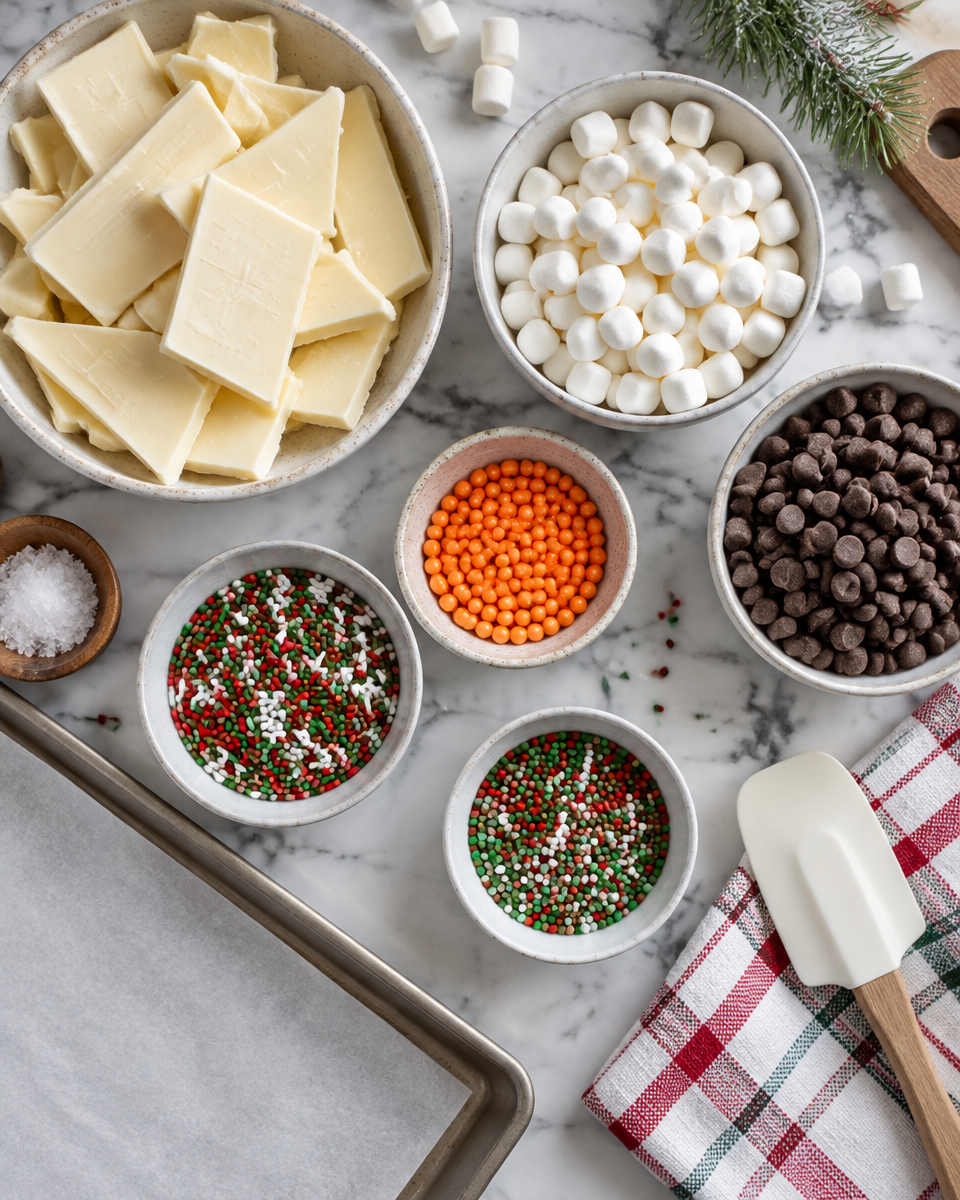
This is where you can use whatever is already in your pantry. I like a mix of crunchy and chewy toppings so every bite is interesting. The goal is that the snowman face reads clearly, but you do not need fancy ingredients.
Here are easy topping ideas that work really well:
Eyes: mini chocolate chips, black sanding sugar, black sprinkles
Nose: orange jimmies, orange candy pearls, tiny triangle of orange fruit snack
Scarf: red and green sprinkles, mini M and M candies, thin strip of fruit leather
Buttons: mini chocolate chips, confetti sprinkles, mini sugar pearls
Extra snow: shredded coconut, white sanding sugar, crushed peppermint
If you are in a baking mood after you make bark, I also love keeping easy breakfast bakes around during the holidays like banana chocolate chip muffins. They are great for lazy mornings when everyone is still in pajamas.
Can You Make Snowman Chocolate Bark Ahead of Time?
Yes, and that is one reason I rely on it every December. snowman chocolate bark is perfect for making a day or two before a party, because it sets up firm and holds its shape well.
My routine is to make it at night, let it set fully, then break and store it the next morning. If you decorate with marshmallows, they stay soft inside as long as you keep everything sealed.
One thing to watch is humidity. If your kitchen is super humid, the bark can get a little tacky on the surface. It will still taste great, but packaging it well helps a lot.
How to Package Snowman Bark as a Holiday Gift
This is the part that makes it feel like a real present. You do not need to spend much. Clear bags, a ribbon, and a little tag is honestly enough.
Here are a few packaging ideas I have used:
Cellophane bags with a twist tie and a handwritten tag
Little treat boxes with parchment paper inside so it does not slide around
Mason jars if you make smaller pieces, then layer with parchment
Tins lined with wax paper, especially if you are mailing it
If you are mailing gifts, choose thicker pieces and cushion them. I like putting parchment between layers, then a final snug wrap so nothing rattles.
And if you are building a whole holiday cookie box, adding something soft and chewy next to bark is always a win. These brown butter chocolate chip cookies are one of my favorite “wow” additions because the flavor is cozy and deep.
How Long Does Snowman Chocolate Bark Last?
When stored properly, snowman chocolate bark lasts about 1 to 2 weeks at room temperature. If your house is warm, I would go closer to 1 week so the decorations stay looking fresh.
Store it in an airtight container, in a cool and dry spot, away from the stove or sunny windows. If you stack pieces, put parchment between layers so faces do not smudge.
I do not usually refrigerate it unless I have to, because fridge moisture can cause condensation. If you do refrigerate, keep it sealed tight, and let it come to room temp before opening the container so water does not form on the chocolate.
Frequently Asked Questions About Snowman Chocolate Bark
Q: Why did my white chocolate turn thick and grainy?
It likely got too hot or had a little water contact. Next time, melt slower and stir more. If it is only slightly thick, sometimes stirring in a teaspoon of neutral oil can help smooth it out.
Q: Can I use dark chocolate for this?
You can, but the snowman face is harder to see. A fun compromise is a dark chocolate base with white chocolate “face” circles piped on top.
Q: Do I need a candy thermometer?
Nope. This recipe is meant to be simple. Just use gentle heat and do not rush it.
Q: How do I make the faces look consistent?
Make rows. Place all the face circles first, then go back and add eyes to all of them, then noses, then scarves. It speeds things up and helps them look uniform.
Q: What is the best way to break bark without cracking the faces?
Flip the sheet over and peel off the parchment, then break from the back side. Also, do not make the chocolate layer too thin.
More Easy Christmas Chocolate Bark Recipes
If you liked making this, you will probably get hooked on bark in general. It is one of those holiday treats that feels creative without being stressful. Here is a quick little reference that helps you mix and match flavors when you want to riff on the idea:
I always keep a few bark options in rotation for parties, because people love variety. Peppermint is classic, cookie crumbles are always a hit, and anything with pretzels disappears fast.
If you want another sweet treat that is still easy but feels bakery style, try cheesecake chocolate chip muffins. They are so good for holiday mornings when you want something a little special.
A Sweet Little Send Off
snowman chocolate bark is one of those recipes that makes the season feel fun instead of frantic, and it is honestly hard to mess up once you know the basics. Keep the heat low, decorate while the chocolate is still soft, and do not overthink the faces. If you want more inspiration and a slightly different take, this is a great read on Snowman chocolate bark for a sweet Winter and Christmas treat. Make a batch, stash a few pieces for yourself, and gift the rest. And if your snowmen end up a little silly looking, that just means they have personality.
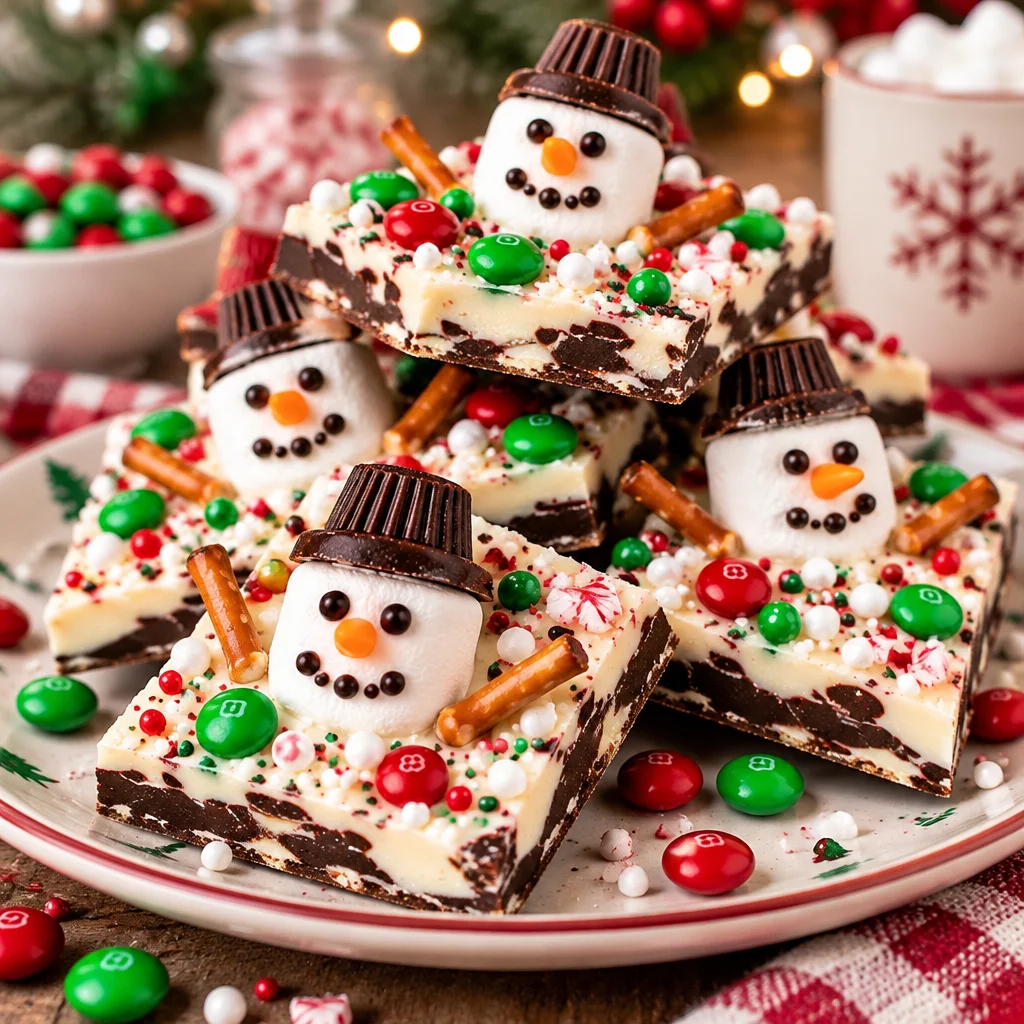
Snowman Chocolate Bark
Ingredients
Method
- Line a baking sheet with parchment paper.
- Melt the white chocolate slowly, stirring often, until smooth.
- Pour the melted chocolate onto the parchment and spread into an even layer, about 1/4 inch thick.
- While the chocolate is soft, place mini marshmallows or candy circles where you want the snowman faces.
- Add eyes using mini chocolate chips or black sprinkles.
- Add a nose with an orange sprinkle, candy pearl, or a small amount of orange frosting.
- Make a scarf using red and green sprinkles or thin strips of fruit leather.
- Allow the chocolate to set completely before breaking it into pieces around the faces.
