
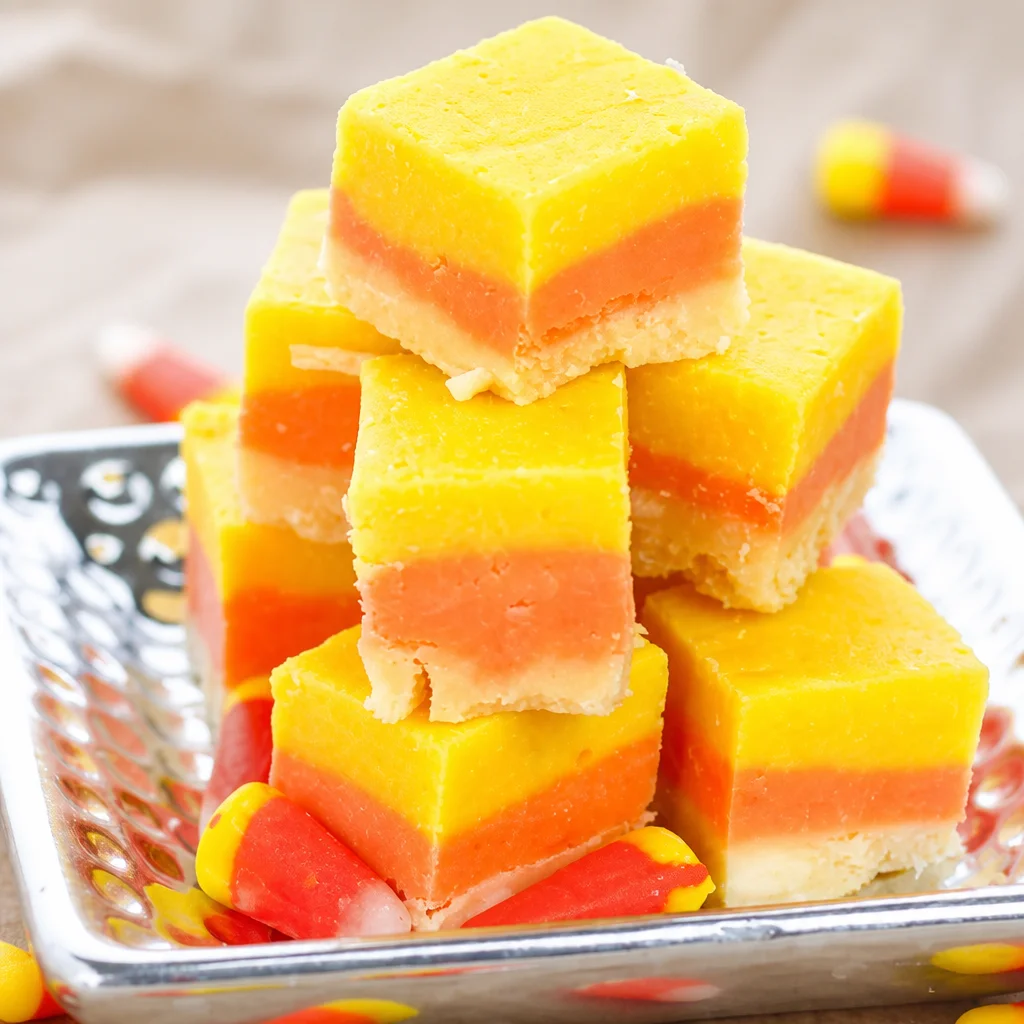
Easy Candy Corn Fudge 3 Color Layered is my go to treat for that moment when you want something cute, sweet, and super festive, but you do not want to babysit the stove all afternoon. I started making it after realizing I always buy candy corn for the vibes, then barely eat it. This fudge fixes that, because it gives you the candy corn look without the weird waxy bite. It is creamy, bright, and honestly kind of calming to make since it is just mix, melt, and layer. If you have a fall party, a bake sale, or you just want something fun in the fridge, this is it. 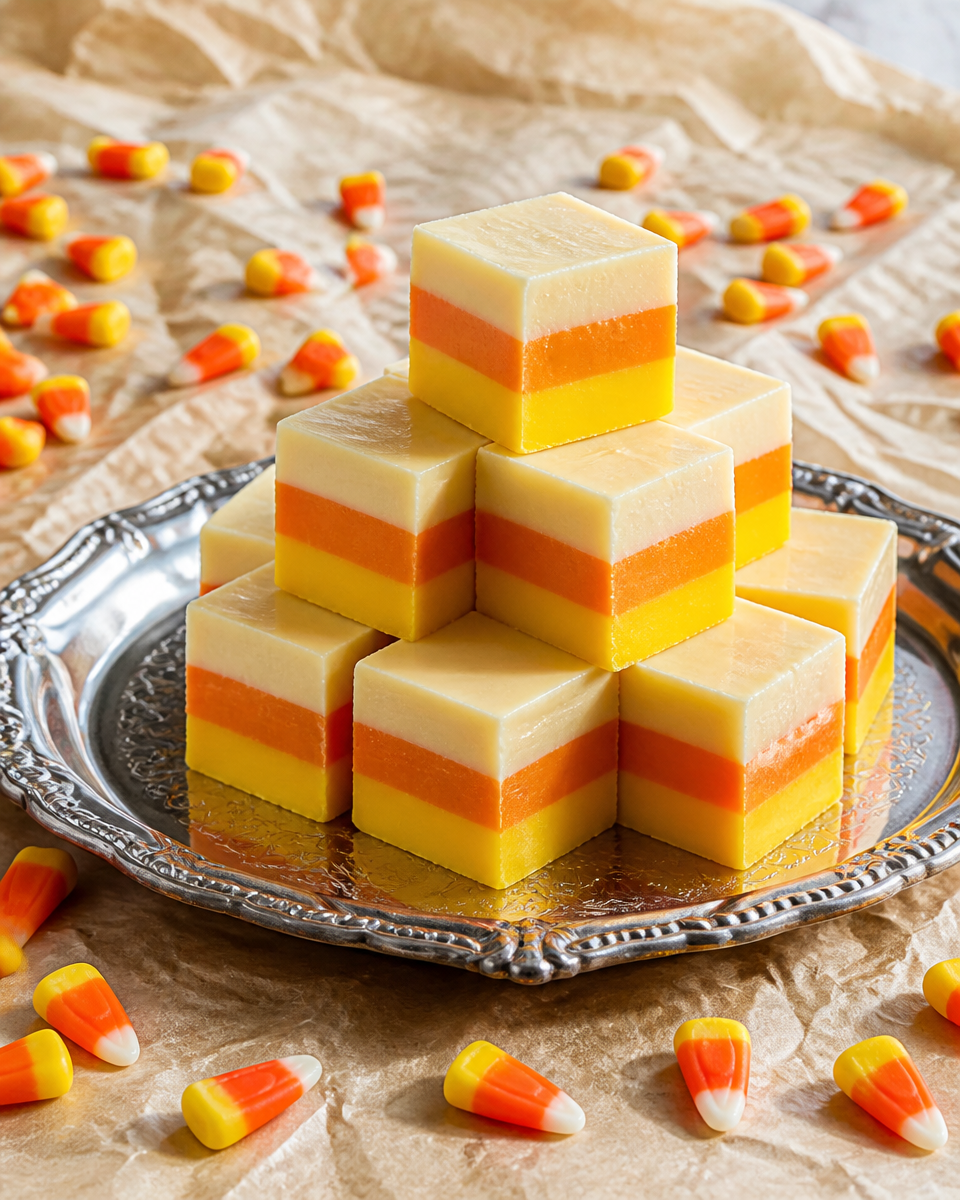
How To Make Candy Corn Fudge {video_youtube}
I am going to walk you through this like I would if you were in my kitchen leaning on the counter. The basic idea is simple. You make one white chocolate fudge base, split it into three bowls, color them, and layer them in a pan. The hardest part is waiting for the layers to set without poking them every two minutes.
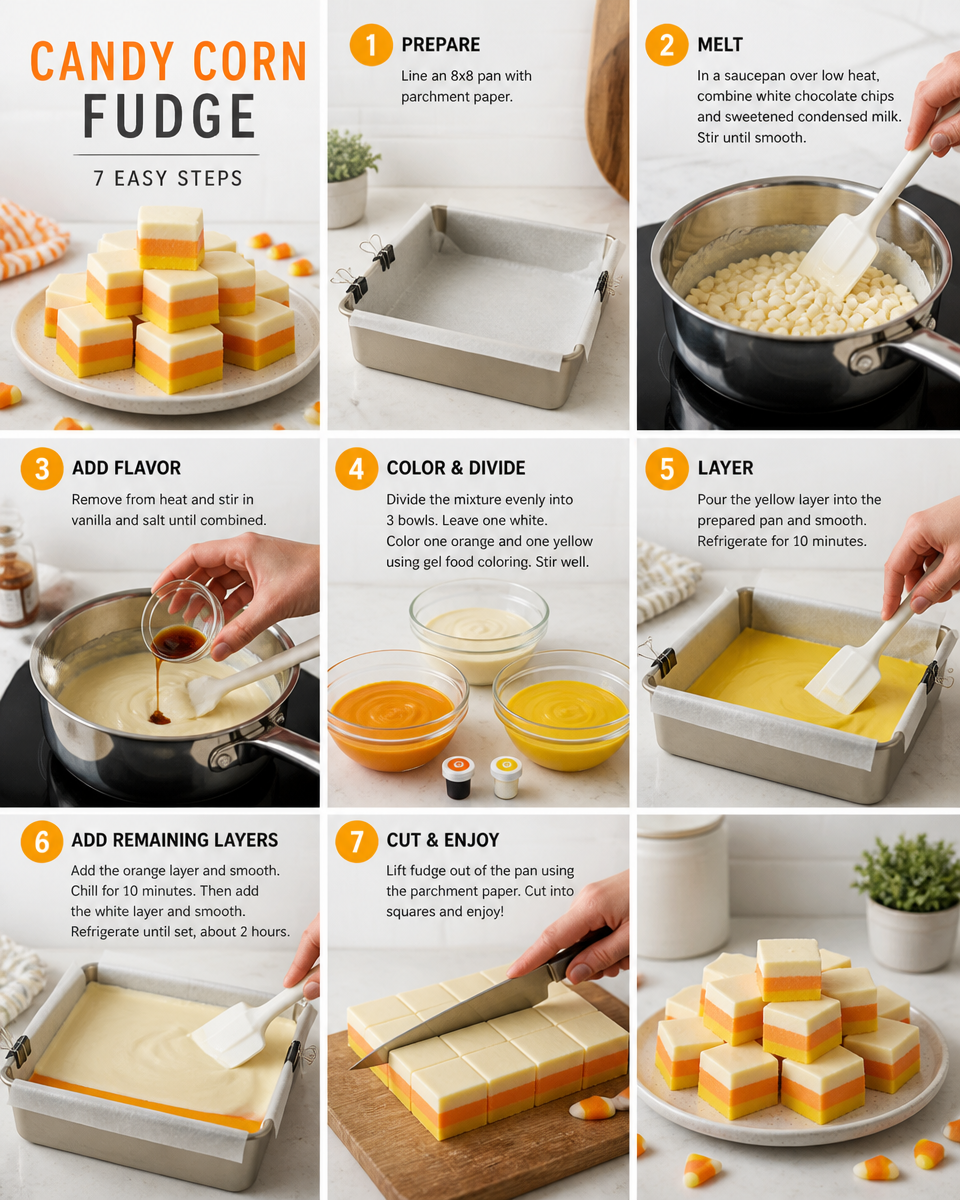
Before you start, line an 8×8 pan with parchment paper. I like leaving a little overhang so you can lift the whole slab out later. Also, make sure you have gel food coloring if possible, because it gives bold color without thinning the fudge.
Quick step by step
- Prep the pan: Line with parchment and lightly spray if your parchment is thin.
- Melt the base: In a microwave safe bowl, heat white chocolate chips with sweetened condensed milk in short bursts, stirring each time until smooth.
- Add flavor: Stir in vanilla and a pinch of salt. This is small but it really helps the sweetness taste balanced.
- Split it: Divide into three bowls as evenly as you can.
- Color it: Leave one bowl white. Color one bowl yellow. Color one bowl orange.
- Layer: Spread the yellow layer first, chill for about 10 to 15 minutes, then add orange, chill again, then add white on top.
- Chill and slice: Refrigerate until firm, then lift out and cut into small squares.
A little real life note. When I am making this for friends, I serve it with coffee, and if you want a fun pairing, try a homemade topping like this cold foam recipe. Fudge and coffee are best friends.
“I brought this to a school fall potluck and people thought it came from a bakery. The layers were so clean and it tasted like creamy vanilla candy.”
Ingredient Notes
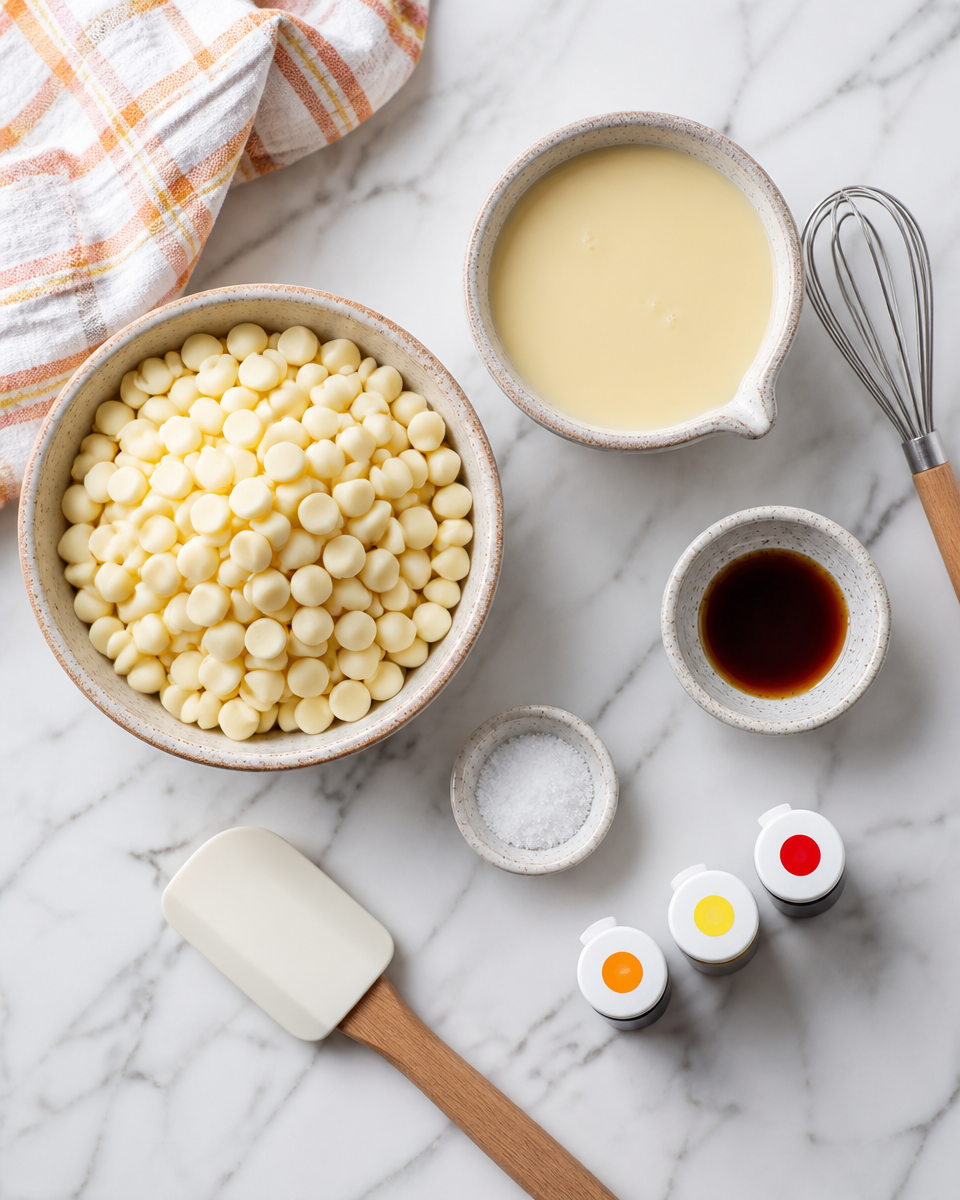
This recipe is short on ingredients, which is probably why I love it. Fewer things to measure, fewer things to mess up. Still, the brand and type of ingredient can change the final texture, so here is what actually matters.
White chocolate chips: Use a brand you like the taste of, because it is the main flavor. If your chips tend to seize, do not panic, just warm gently and stir. White chocolate can be dramatic.
Sweetened condensed milk: Make sure it is sweetened condensed milk, not evaporated milk. The cans look similar when you are in a hurry, and I have absolutely grabbed the wrong one before.
Vanilla: Regular vanilla extract is perfect. If you have vanilla bean paste, it tastes amazing, but it will add little specks which is cute, just slightly less “clean” looking for the white layer.
Salt: Just a pinch. It makes the whole thing taste less like straight sugar.
Food coloring: Gel coloring is ideal. If you use liquid coloring, use as little as possible so the fudge stays thick and sets well.
If you are planning a whole cozy menu around this, I love balancing sweet treats with something hearty earlier in the day, like this creamy chicken corn chowder. Then later you pull out the fudge and everyone suddenly has room again.
Variations and Add-ins
Once you make Easy Candy Corn Fudge 3 Color Layered the classic way, it is hard not to start playing with it. I keep the base the same and swap in little extras depending on who I am making it for.
Here are a few easy ideas that actually work without turning your layers messy:
- Sprinkle top: Add Halloween sprinkles or a few candy corn pieces right after you spread the final layer, then gently press them in.
- Texture boost: Stir mini marshmallows into the orange layer for a soft chewy vibe. Do not overdo it or slicing gets tricky.
- Cookie crunch: Add finely crushed vanilla wafers to one layer. Keep the crumbs small so the layers still look clean.
- Flavor twist: Replace vanilla with almond extract, but use a tiny amount since almond can take over fast.
- Chocolate drizzle: A thin drizzle of melted dark chocolate on top makes it look fancy with almost no effort.
If you are doing a holiday treat table later in the year, you might also like something crunchy next to soft fudge, like this Christmas cornflake brittle. Totally different vibe, but they look great together on a platter.
Tips for Making the Best Fudge
I have made this enough times to learn what can go wrong, and thankfully it is all pretty fixable. If you want those sharp clean layers and that smooth bite, these tips help a lot.
Go low and slow when melting: White chocolate scorches fast. Microwave in short bursts and stir more than you think you need to.
Measure your split: You do not need a scale, but try to eyeball evenly when dividing the mixture. If one layer is super thin it can look a little off.
Chill between layers: This is the big one. If you pour orange onto yellow that is still warm, it can blend at the edges and you lose the candy corn look. Ten to fifteen minutes in the fridge between layers usually does it.
Spread gently: When you add a new layer, dollop it across the surface first, then smooth. If you dump it all in the middle and drag it around, you can disturb the layer underneath.
Cut with a warm knife: Run your knife under warm water, wipe it dry, then slice. Repeat as needed. You get cleaner edges and fewer crumbs.
Also, I love serving this with coffee for an afternoon snack. If you want that cafe style drink at home, this is the same link again because I genuinely use it all the time: easy 3 ingredient coffee topping. It makes the whole snack feel like a treat, even on a random Tuesday.
How to Store White Chocolate Fudge
This fudge is pretty sturdy, which is great because it means you can make it ahead. Since it is a white chocolate fudge base, it does best kept cool and sealed up so it does not dry out or pick up fridge smells.
In the fridge: Store in an airtight container for up to 10 days. I like separating layers with parchment if I am stacking pieces.
At room temp: If your kitchen is cool, you can leave it out for a few hours at a party. If it is warm, it will soften, so I do not push it.
In the freezer: Freeze in a tightly sealed container for up to 2 months. Thaw overnight in the fridge so it does not sweat too much.
If you are building out a full cozy fall weekend, you can do something like soup one night and sweets the next. I will link this again because it is one of my comfort recipes: easy creamy chicken corn chowder. Leftovers plus fudge is a very good plan.
Common Questions
Can I make this without food coloring?
Yes. It will still taste the same, just without the candy corn look. You can also do two layers instead of three if you want it simpler.
Why is my fudge not setting?
Most of the time it is because the ratio got thrown off, like using evaporated milk by mistake or adding too much liquid food coloring. Chill longer first, and next time use gel coloring.
Can I use white chocolate bars instead of chips?
Yes. Chop them up so they melt evenly. Bars often melt smoother than chips, so it can actually be a nice upgrade.
How do I keep the layers from mixing?
Chill between layers, and spread gently. If you are unsure, wait an extra five minutes. It is worth it for clean stripes.
What size pan should I use?
An 8×8 pan gives you thicker pieces. A 9×9 works too, but the layers will be thinner and it may set a little faster.
A sweet little wrap up
If you want a festive treat that looks adorable but is still easy enough for a weeknight, Easy Candy Corn Fudge 3 Color Layered is a solid choice. You get creamy white chocolate flavor, bright layers, and a recipe that is hard to mess up once you know the chill between layers trick. If you want to compare versions, I found good inspiration from Easy 3 Ingredient Candy Corn Fudge Recipe – Take Two Tapas and also this super approachable one from Easy Candy Corn Fudge – Mom On Timeout. Now promise me you will cut the pieces small, because it is rich, and that is part of the magic. Go make a batch, stash it in the fridge, and enjoy that moment when someone sees the layers and goes wait, you made that?
More Recipes to Try
If you are planning another homemade meal, these recipes are worth exploring next: Easy Candy Corn Fudge — 3 Color Layered, Easy Halloween Fudge Recipe, Easy Halloween Candy Bark — Spooky Mix and Easy Chocolate Lasagna — No Bake Layered Dessert.
Candy Corn Fudge
Ingredients
Method
- Line an 8×8 pan with parchment paper, leaving some overhang.
- In a microwave-safe bowl, heat white chocolate chips and sweetened condensed milk in short bursts, stirring until smooth.
- Stir in vanilla and a pinch of salt.
- Divide the fudge mixture into three bowls.
- Color one bowl with yellow gel food coloring, one with orange, and leave one bowl white.
- Spread the yellow layer in the pan and chill for 10-15 minutes.
- Add the orange layer on top, chill again for 10-15 minutes.
- Spread the white layer on top.
- Refrigerate until firm, then lift out using the parchment and cut into small squares.
