
Easy Chicken Kiev Garlic Butter Stuffed Breast is one of those dinners I pull out when I want something that feels fancy, but I really do not want a complicated night in the kitchen. You know the vibe, you are tired, you want comfort food, and you still want that little wow moment when you cut in and the butter runs out. This recipe hits all of that, and it is totally doable on a regular weeknight if you prep the butter ahead. The best part is how simple the ingredients are, and how big the payoff feels. Let me walk you through how I make it at home, with all my little shortcuts and safety nets.
What is Chicken Kiev?
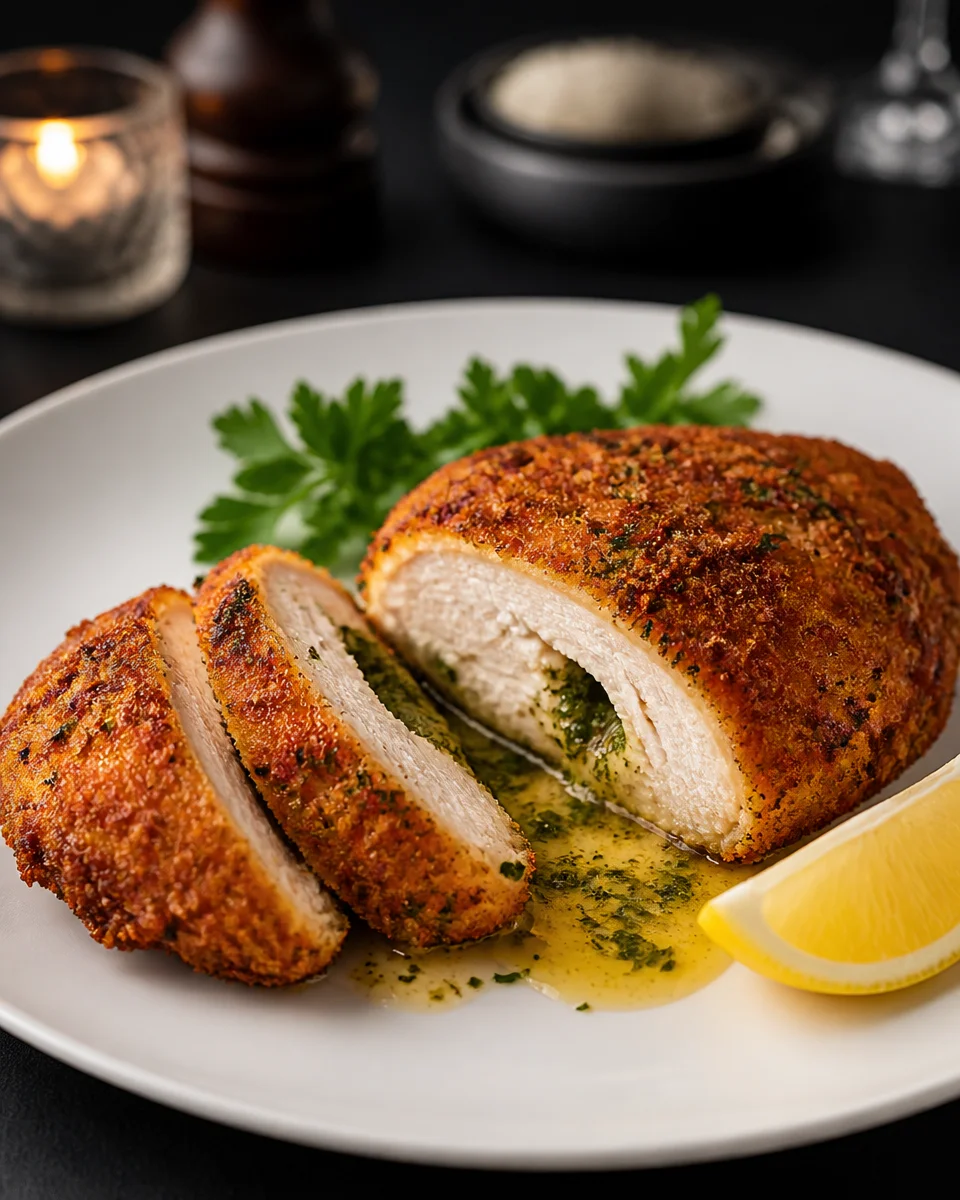
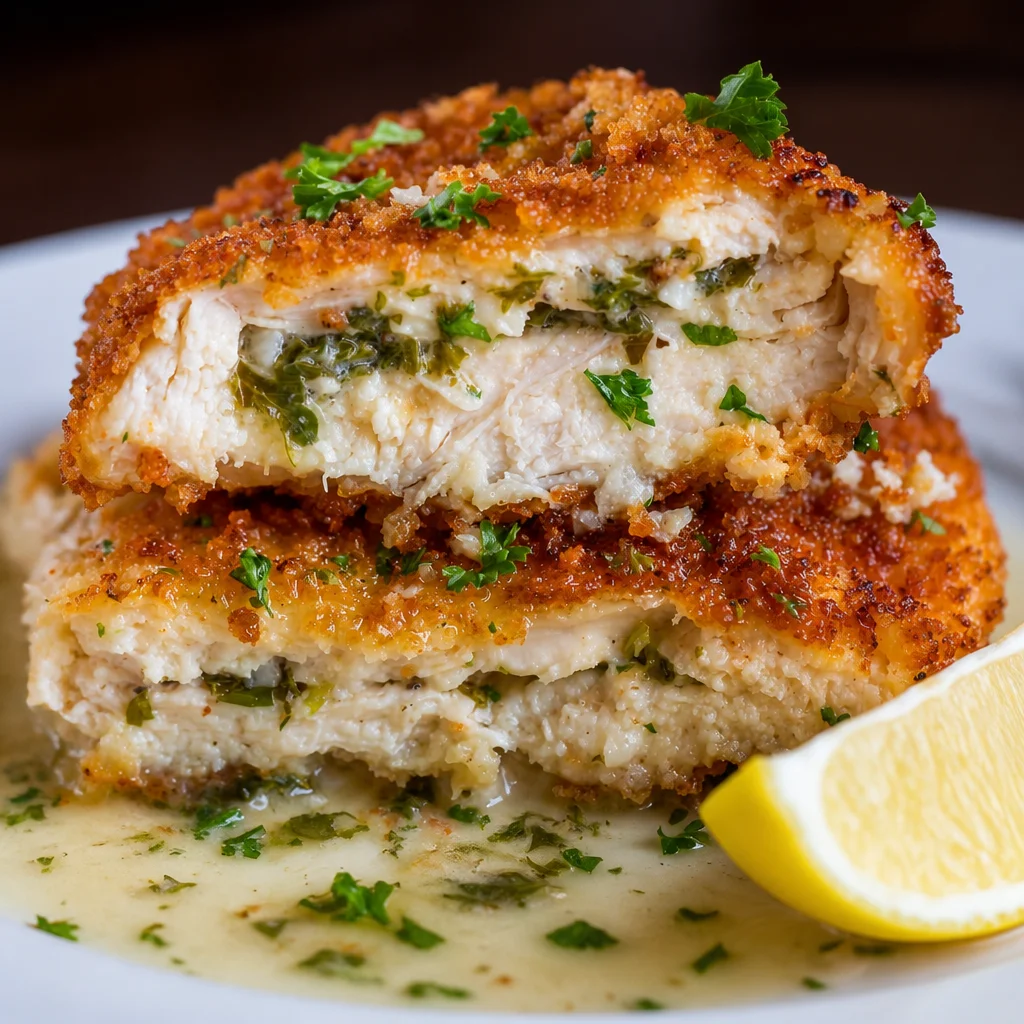
Chicken Kiev is basically a chicken breast that is stuffed with garlic herb butter, then coated and cooked until the outside is crisp and the inside stays juicy. When you slice it open, that buttery center melts into a sauce all by itself. No extra gravy needed, no fancy pan sauce, just instant goodness.
Traditionally it is breaded and fried, but I like a version that is friendly for home cooks. You can still get that golden crust without making your kitchen smell like a deep fryer for two days. It is also one of those dishes that looks like restaurant food, which is perfect if you are cooking for someone you want to impress.
If you like the whole stuffed chicken idea, you might also enjoy this easy chicken roulade stuffed rolled baked breast. Same cozy energy, different flavor direction, and it is a fun one to try when you want to switch things up.

How to Make Chicken Kiev
I am going to explain it the way I actually do it, not the way a textbook does. There are a few steps, but none of them are hard. The biggest trick is chilling the butter so it stays inside the chicken instead of escaping too early.
Step by step overview
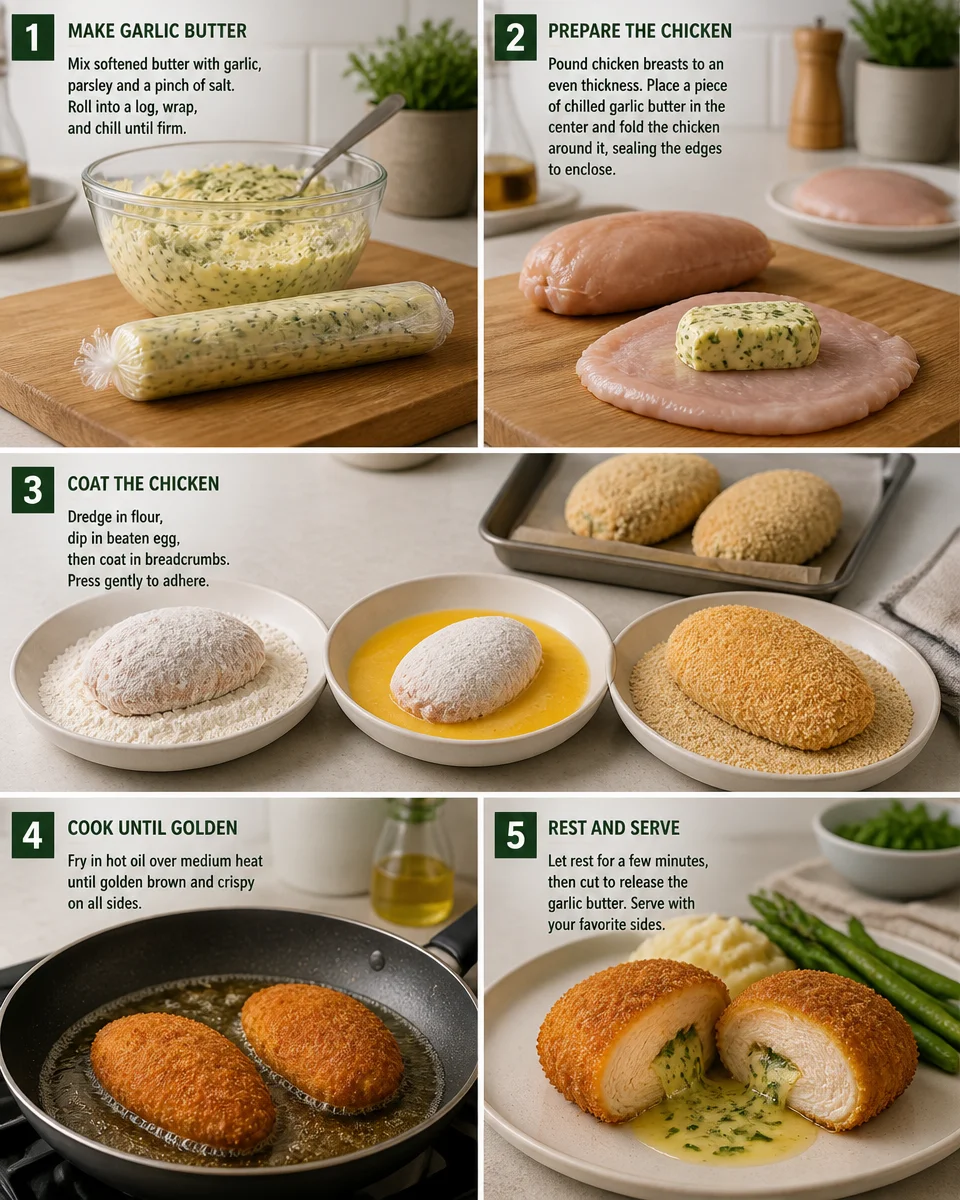
Here is the flow. Read it once, then it will feel very straightforward:
- Mix up the garlic butter and chill it until firm.
- Pound the chicken breast so it is even and easy to roll.
- Wrap the butter inside the chicken and seal it well.
- Coat it in flour, egg, and breadcrumbs.
- Bake or pan cook until crisp and cooked through, then rest before slicing.
For the cooking part, I usually bake because it is less messy and more hands off. If I have time, I will start it in a pan for a few minutes to get that extra crispy crust, then finish in the oven. If you are brand new to this, baking only is the least stressful route.
Quick safety note because it matters: chicken is done when it hits 165 F in the thickest part. A small meat thermometer makes this recipe feel way more relaxed, because you are not guessing.
Also, if you are someone who lives for garlic butter meals, you should peek at this one on another night: easy chicken scampi garlic butter pasta dinner. It is saucy, comforting, and basically made for garlic lovers.
;
Ingredients for Chicken Kiev
The ingredient list is short and normal, which is part of why I love this recipe. The only thing that really changes the game is using cold butter and plenty of garlic.
What you will need
- Chicken breasts, medium to large, boneless and skinless
- Butter, softened for mixing, then chilled until firm
- Garlic, minced or grated
- Fresh parsley, chopped, or dried parsley in a pinch
- Salt and black pepper
- Flour
- Eggs
- Bread crumbs, panko for extra crunch or regular for a tighter crust
- Optional: a squeeze of lemon for serving
I usually mix the butter with garlic, parsley, salt, and pepper, then shape it into a little log on plastic wrap or parchment. Pop it in the freezer for 15 to 25 minutes. You want it firm, not rock hard. That is the sweet spot.
Chicken sizing matters more than people say. If the breast is massive, I sometimes cut it in half horizontally to make two thinner pieces. It cooks more evenly and is easier to roll without tearing.
Tips for Making Perfect Chicken Kiev
This is the section that saves dinners. I have made every mistake at least once, so you do not have to.
My best real life tips
1. Chill the garlic butter well. Warm butter will leak out fast. Cold butter gives the chicken time to cook and seal.
2. Pound the chicken evenly. You do not need to destroy it, just make it an even thickness. Uneven chicken leads to dry edges and undercooked centers.
3. Seal it like you mean it. When you roll the chicken around the butter, tuck the sides in and press the seam. If you have toothpicks, you can use them, just remember to remove them later.
4. Double dip in crumbs if you want extra insurance. Flour, egg, crumbs, then egg and crumbs again. This thicker coating helps keep butter inside and makes the crust extra crunchy.
5. Let it rest before slicing. Give it 5 minutes. If you slice right away, the butter is more likely to rush out. Resting helps everything settle.
One more thing that really helps is not overcrowding your pan or baking tray. Give each piece a little space so it crisps instead of steaming.
“I tried this for my anniversary dinner and I was honestly shocked it came out so good. The garlic butter stayed inside, and the crust was crisp like a restaurant.” Jenna L.
If you like bold flavors and easy dinners, you might also like this one pot spicy garlic butter chicken tortellini easy and delicious. It is the kind of meal that makes you feel like you have your life together, even if the kitchen is a mess.
What to Serve with Chicken Kiev
Because Easy Chicken Kiev Garlic Butter Stuffed Breast is rich and buttery, I like to serve it with something simple and fresh on the side. Think of sides that will soak up that garlic butter, or sides that cut through it with a little brightness.
Here are a few of my go to pairings:
Starchy sides that love butter
Mashed potatoes are the classic for a reason. Rice works too, especially if you fluff it up and spoon the garlic butter over the top. Roasted baby potatoes are also great if you want something hands off.
Veggies that keep the plate balanced
Steamed green beans, roasted broccoli, or a simple salad with lemony dressing all work. If you have asparagus, it feels a little fancy without any extra effort.
Quick bread situation
A slice of crusty bread is perfect for swiping up the leftover butter. I do not always serve bread, but when I do, nobody complains.
And if you are in the mood for another chicken dinner that feels special but is super practical, this deliciously easy bacon wrapped air fryer chicken breast recipe is a fun one. It is crispy, salty, and the air fryer makes it easy.

Common Questions
Can I make Chicken Kiev ahead of time?
Yes. You can assemble and bread the chicken, then keep it covered in the fridge for up to 24 hours. I actually think this makes it easier because everything firms up.
Why does the butter leak out?
Usually it is because the butter was too soft, the chicken was not sealed well, or it was cut too soon after cooking. Chilling the butter and resting the chicken helps a lot.
Can I bake it instead of frying?
Absolutely. Baking is my normal method. Brush or spray the outside with a little oil or melted butter so it browns nicely.
What temperature should I bake it at?
I like 400 F. It gives you a crisp coating without drying the chicken too much. Cook time depends on thickness, so check for 165 F inside.
Can I use chicken thighs?
You can, but it is trickier to stuff and seal because of the shape. If you try it, use boneless skinless thighs and roll them tightly, then chill before cooking.
A cozy final note before you cook
If you have been wanting a dinner that feels a little special, Easy Chicken Kiev Garlic Butter Stuffed Breast is the one to try. Once you get the hang of sealing the butter and chilling it, the rest is easy and honestly kind of fun. If you want to compare methods or see another home cook make it, check out Chicken Kiev (with Video) – Natasha’s Kitchen for extra visuals and tips. Now go grab that garlic, stash the butter in the freezer for a bit, and make yourself a plate that feels like a treat.
Easy Chicken Kiev Garlic Butter Stuffed Breast
Ingredients
Method
- Mix softened butter with minced garlic, parsley, salt, and pepper. Shape it into a log using plastic wrap or parchment and chill it in the freezer for 15 to 25 minutes until firm.
- Pound the chicken breasts to an even thickness for easy rolling.
- Wrap the chilled garlic butter inside the pounded chicken breasts, ensuring they are sealed well.
- Coat each stuffed chicken breast first in flour, then dip it in beaten eggs, and finally coat it with bread crumbs. For extra crunch, dip it again in egg and then in bread crumbs.
- Preheat the oven to 400°F (200°C). Bake the coated chicken breasts until they are crispy and cooked through, ensuring the thickest part reaches 165°F (75°C).
- Allow the chicken to rest for about 5 minutes before slicing to avoid the butter leaking out too soon.