
Easy Red Velvet Cheesecake Cake Two Layer Recipe is my go to move when I want something that looks fancy but doesn’t make me stress out in the kitchen. You know those moments when you need a birthday dessert, a holiday dessert, or you just promised to bring “something good” and now you’re panicking? Yep, this is for that. It’s rich, it’s soft, and it has that creamy cheesecake layer that makes people go quiet after the first bite. I’ve made this for family nights and potlucks, and it always disappears fast. If you’ve ever felt nervous about baking a layer cake, I’m going to keep this super simple and walk you through it.
Why Youll Love Red Velvet Cheesecake Cake
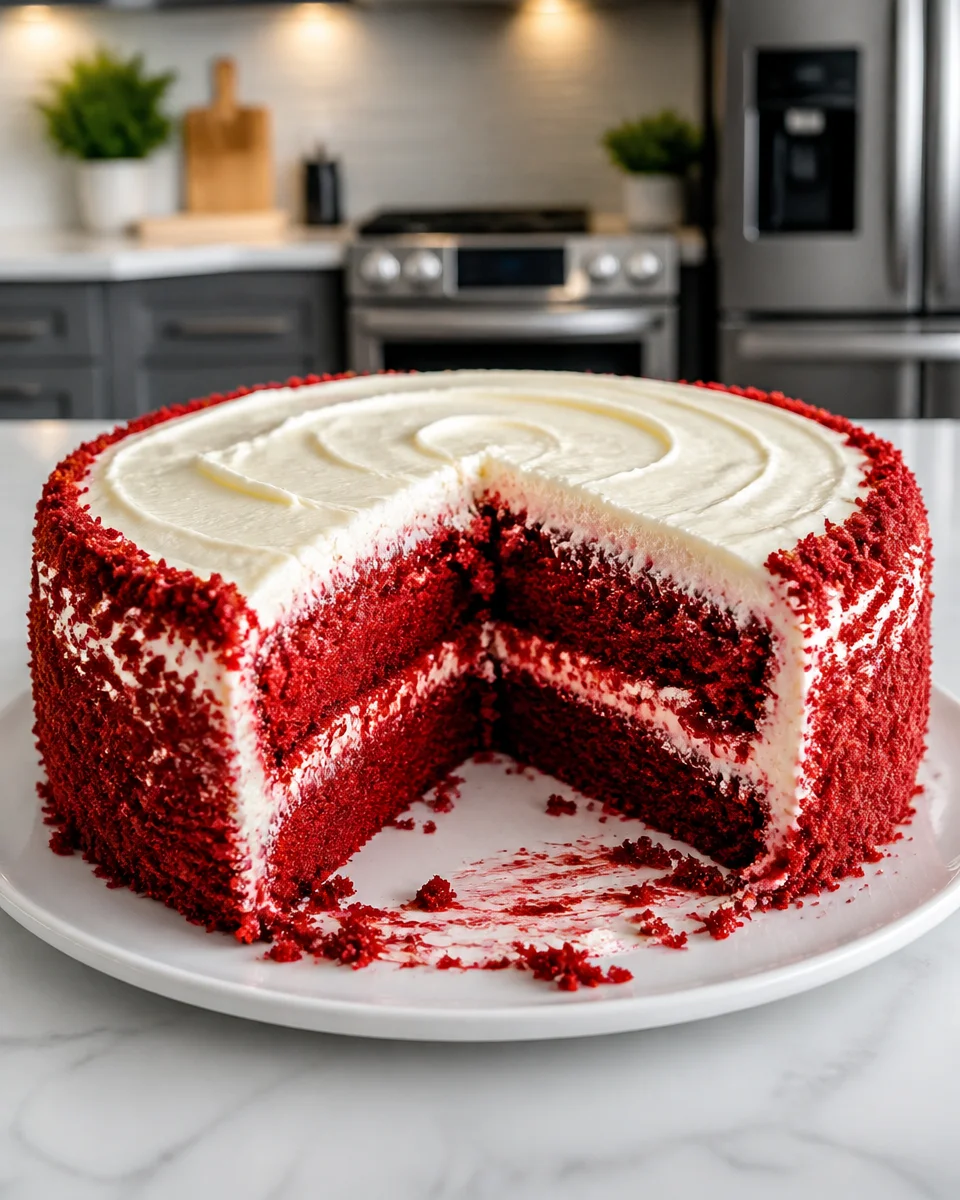
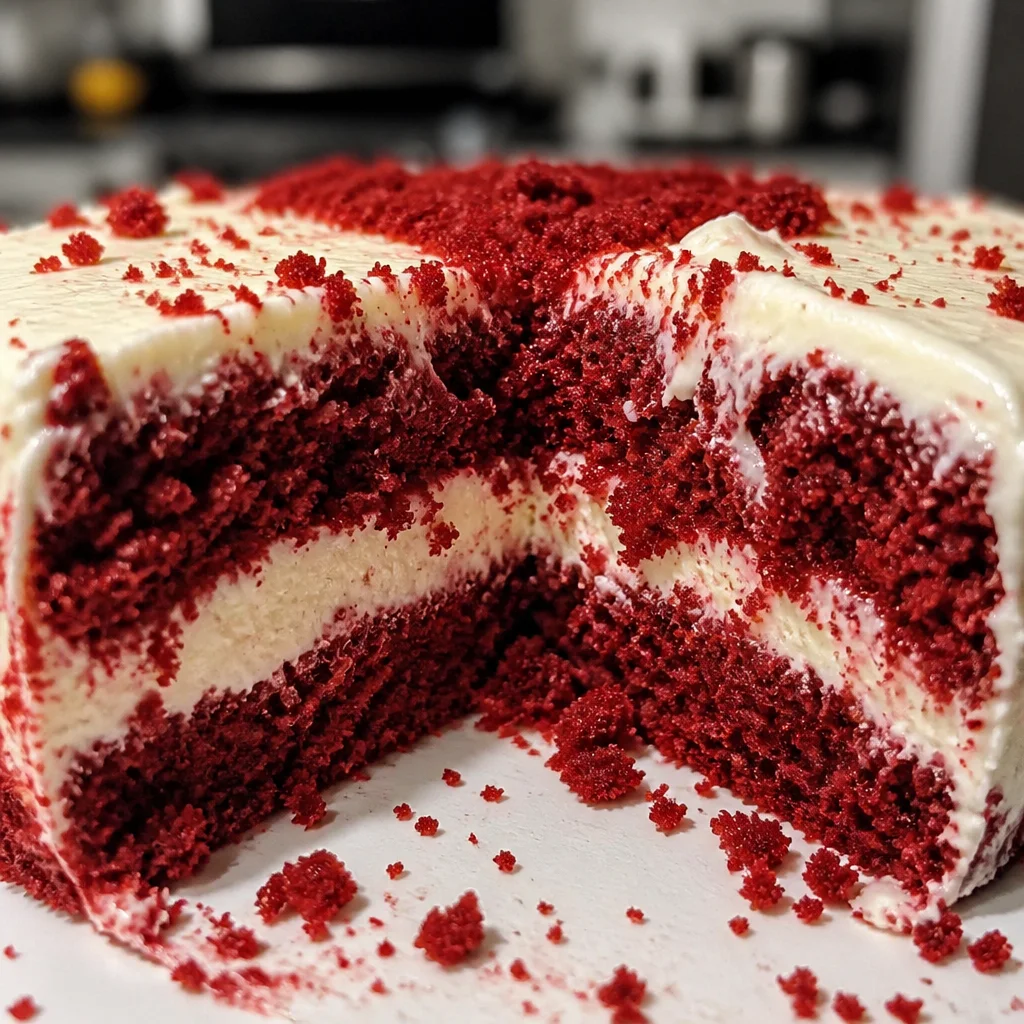
First of all, the combo just works. Red velvet has that light cocoa flavor and a soft crumb, and the cheesecake layer adds a creamy tang that balances the sweetness. When you stack them together, it feels like a bakery dessert without the bakery price.
Here’s why I think this one becomes a repeat recipe:
- Two layers, big payoff: one red velvet cake layer plus one cheesecake layer feels special, but it’s not complicated.
- Make ahead friendly: the cheesecake layer actually likes being chilled, which helps you plan.
- Perfect for holidays: it’s naturally festive. If you love seasonal bakes, you might also like this Christmas red velvet cheesecake idea for December parties.
- That wow slice: when you cut in and see the layers, everyone suddenly wants a picture.
I also love that you can decorate it however you want. Keep it simple with cream cheese frosting, or add a drizzle, crumbs, or even chocolate curls. If you’re the type who enjoys layered desserts, my obsession started with stuff like easy chocolate lasagna, and this cake gives the same satisfaction but in a classic layer cake form.
Tips for Success
I’ve made this enough times to learn what actually matters and what doesn’t. These tips are the difference between “pretty good” and “please bring that again.”
Little things that make a big difference
Use room temp cream cheese. If it’s cold, you’ll fight lumps forever. I set mine out for about an hour.
Line the cheesecake pan. I like parchment on the bottom. It helps you release it cleanly so your cheesecake layer doesn’t crack and stick.
Don’t overbake the cheesecake. You want the center to still have a slight wiggle when you turn off the oven. It sets more as it cools and chills.
Chill the cheesecake layer fully. This is non negotiable. If you try stacking while it’s soft, it’ll slide around and you’ll be annoyed. I chill at least 4 hours, overnight is even better.
Level your cake layer if needed. If your red velvet cake domes, just trim the top so stacking is easy and frosting doesn’t look lopsided.
If you’re into fun variations, you can totally play with color themes too. Around October, I’ve seen people switch the vibe with darker tones like this black velvet Halloween cake, and it’s such a cool look for parties.
“I made this for my sister’s birthday and everyone thought it came from a bakery. The cheesecake layer was the best part, and it sliced so clean after chilling overnight.”
How to Make Red Velvet Cheesecake Cake
This is a true two part situation: bake the cheesecake layer first, chill it, then bake the red velvet cake layer. After that, it’s just stack, frost, and try not to eat the frosting straight from the bowl.
What you will need
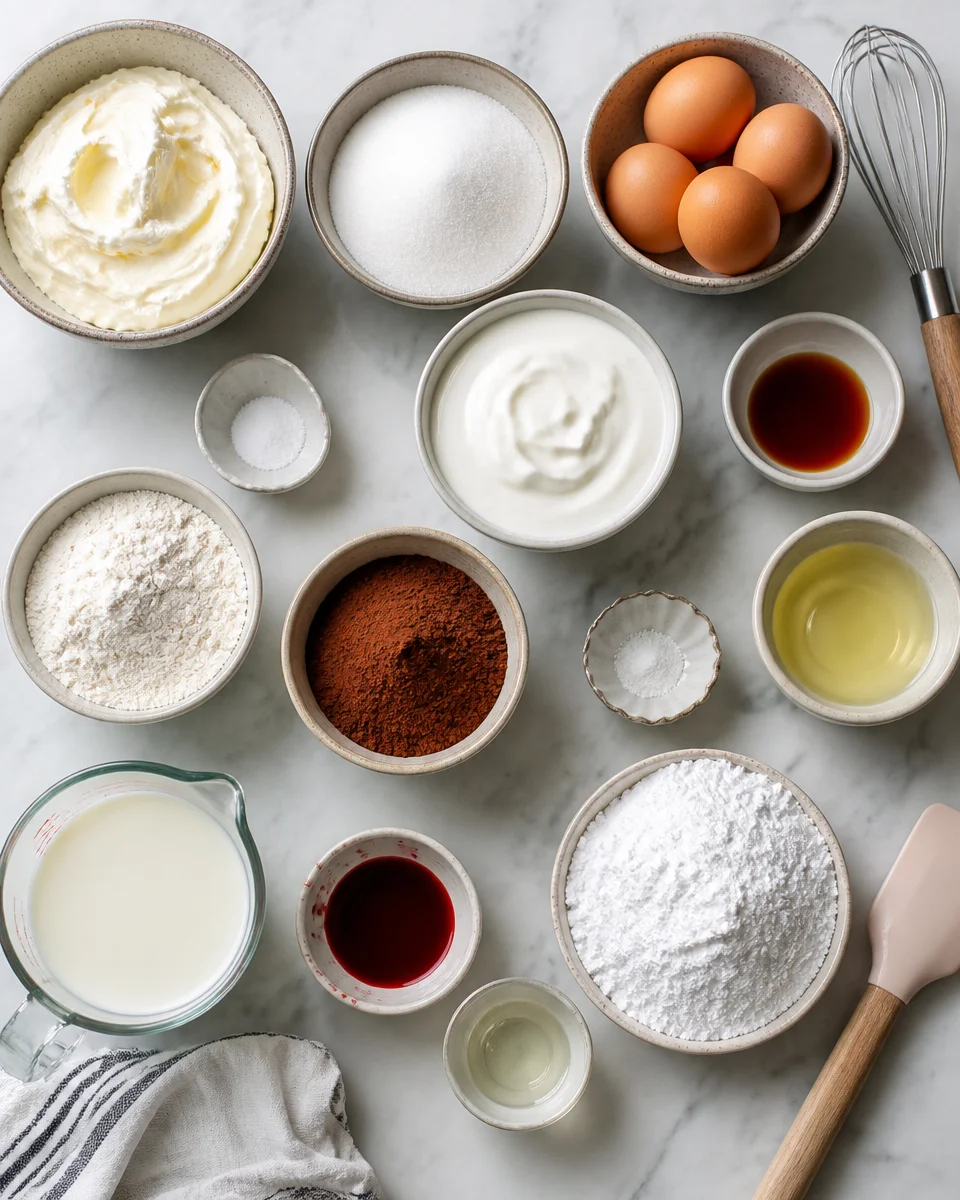
- For the cheesecake layer: cream cheese, sugar, eggs, vanilla, a little sour cream (optional but nice), pinch of salt
- For the red velvet cake layer: flour, sugar, cocoa powder, baking soda, salt, oil, buttermilk, egg, vanilla, red food coloring, vinegar
- For the frosting: cream cheese, butter, powdered sugar, vanilla, pinch of salt
Quick note: if you don’t have buttermilk, you can make a simple substitute with milk plus a bit of vinegar or lemon juice. Let it sit 5 minutes, then use it.
Step by step directions
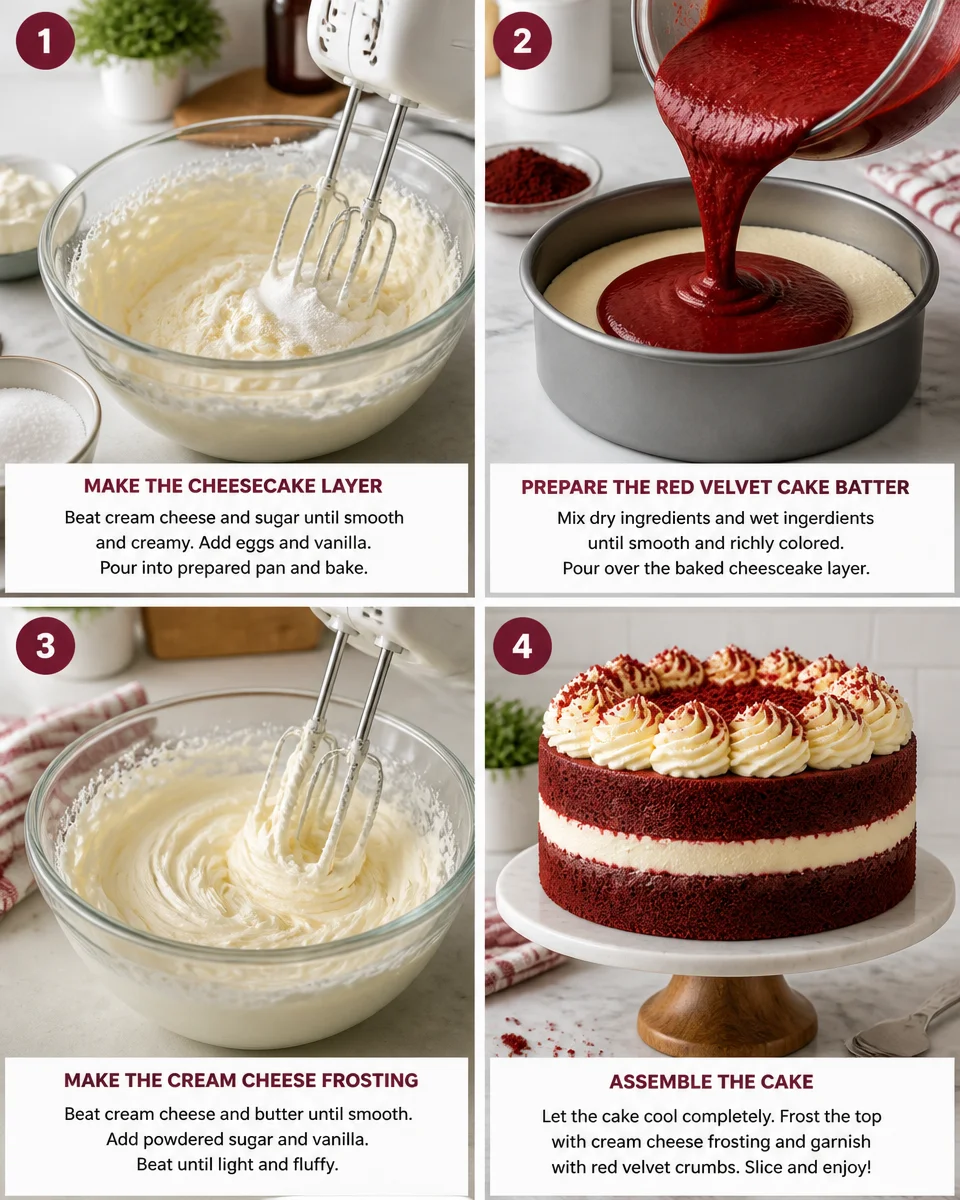
1. Bake the cheesecake layer
Preheat your oven to 325 F. Grease a 9 inch cake pan or springform pan and line the bottom with parchment. Beat the cream cheese until smooth, then mix in sugar. Add eggs one at a time, then vanilla and sour cream if using. Pour into the pan and bake about 35 to 45 minutes, depending on your oven. The edges should look set and the center should still jiggle slightly. Cool at room temp, then cover and chill for at least 4 hours or overnight.
2. Bake the red velvet cake layer
Preheat oven to 350 F. Grease and line a 9 inch cake pan. In a bowl, whisk flour, cocoa, baking soda, and salt. In another bowl, whisk sugar, oil, buttermilk, egg, vanilla, vinegar, and red food coloring. Combine wet and dry just until you don’t see dry flour. Pour into the pan and bake about 25 to 35 minutes, until a toothpick comes out clean. Cool completely.
3. Make the cream cheese frosting
Beat butter and cream cheese until smooth. Add powdered sugar slowly so it doesn’t explode everywhere. Add vanilla and a pinch of salt. If it feels too soft, chill it 15 to 20 minutes before frosting.
4. Assemble
Place the red velvet cake layer on your cake stand or plate. Unmold the chilled cheesecake layer and set it on top. Frost the top and sides. I like a simple swirl on top, nothing too perfect. If you want a cute finish, crumble a little trimmed red velvet on top for that pop of color.
This is the part where I always sneak a little taste of the cheesecake layer as I’m stacking. I call it quality control. Also, if you’re looking for another super easy dessert for a busy week, this 4 ingredient blueberry dump cake is basically effortless and still feels like a treat.
One more thing: if you love cheesecakes and want a different method, like something you can set and forget, I’m a fan of this Instant Pot salted caramel cheesecake. Totally different vibe, but so good.
Proper Storage
Because of the cheesecake layer and cream cheese frosting, this cake needs to be treated like a “keep it cold” dessert.
In the fridge: Store it in an airtight cake container or loosely covered. It’ll keep well for about 4 to 5 days. The flavor is honestly even better after the first day because everything settles together.
In the freezer: You can freeze slices. Wrap each slice in plastic wrap, then add foil, then place in a freezer bag. Freeze up to 2 months. Thaw overnight in the fridge.
For serving: I like letting a slice sit on the counter for 10 to 15 minutes so it softens slightly. Not too long though, you still want that cheesecake layer to stay firm.
If you end up with extra cream cheese frosting (it happens), I won’t judge if you use it on cupcakes or sandwich cookies. Or just keep it in the fridge and “accidentally” take spoonfuls. I’ve been there.
Watch How To Make It {video_youtube}
If you’re a visual learner, watching the layers come together makes this feel way less intimidating. The key moments to watch for are the cheesecake jiggle test, the cake batter color before baking, and how chilled the cheesecake should be before stacking. When you see someone lift that cheesecake layer cleanly out of the pan, it’s like a little confidence boost.
If you’re making this for a party, I also recommend mixing up a fun coffee to serve with it. A sweet topping like this cold foam recipe is super easy and makes a plain coffee feel special next to a slice of cake.
Common Questions
Can I make Easy Red Velvet Cheesecake Cake Two Layer Recipe ahead of time?
Yes, and you should. Make the cheesecake layer the day before. You can also bake the cake layer a day before, wrap it well, and assemble the next day.
What if I don’t have a springform pan?
A regular 9 inch cake pan works. Just line the bottom with parchment and grease the sides well so it releases easier.
Do I have to use red food coloring?
Nope. The flavor will still be great. The cake just won’t have that classic bright red look. You can also use a natural coloring if you prefer.
Why did my cheesecake layer crack?
Usually it’s from overbaking or cooling too fast. Don’t bake until fully firm in the center, and let it cool gradually before chilling. Cracks are also not a big deal because frosting hides everything.
How do I get clean slices?
Chill the cake well, then use a sharp knife wiped clean between cuts. It sounds extra, but it works.
Your next baking win
If you’ve been wanting a dessert that feels like a celebration, Easy Red Velvet Cheesecake Cake Two Layer Recipe is the one to try. You get that soft red velvet cake, that creamy cheesecake layer, and a frosting that makes it all feel cozy and rich. Take your time with the chilling step and you’ll be rewarded with neat slices and tons of compliments. If you want to compare fun variations and methods, check out Red Velvet Cheesecake Cake – Recipe Girl and Red Velvet Cheesecake Cake Recipe | Life, Love and Sugar for more inspiration. Now promise me you’ll save yourself a slice before you set it out, because it goes fast. 
Easy Red Velvet Cheesecake Cake
Ingredients
Method
- Preheat the oven to 325°F (163°C). Grease a 9-inch cake or springform pan and line the bottom with parchment.
- For the cheesecake, beat the cream cheese until smooth, then mix in sugar. Add the eggs one at a time, then vanilla and optional sour cream. Pour into the prepared pan and bake for 35 to 45 minutes.
- Cool at room temperature, then cover and chill in the fridge for at least 4 hours or overnight.
- Preheat the oven to 350°F (177°C) and grease a 9-inch cake pan.
- In a mixing bowl, whisk together the flour, cocoa powder, baking soda, and salt.
- In another bowl, mix together the sugar, oil, buttermilk, egg, vanilla, vinegar, and red food coloring. Combine the wet and dry ingredients until just combined.
- Pour the batter into the pan and bake for 25 to 35 minutes or until a toothpick comes out clean. Cool completely.
- Beat the softened butter and cream cheese together until smooth, then gradually add the powdered sugar.
- Mix in vanilla and a pinch of salt. If too soft, chill for 15 to 20 minutes before frosting.
- Place the red velvet cake layer on a cake stand or plate. Unmold the chilled cheesecake layer and set it on top.
- Frost the top and sides with cream cheese frosting. Optionally, garnish with crumbled red velvet on top.