
Andes Mint Cheesecakes are the kind of dessert I make when I want something that feels a little fancy, but I do not want to fuss all night. You know that moment when you want chocolate, but you also want something cool and minty, and you are not in the mood for a whole cake? That is exactly where these little cheesecakes come in. They are rich, creamy, and the mint is just enough to feel refreshing without tasting like toothpaste. I started making them for holiday trays, and now I make them whenever I need a quick win dessert. If you are a chocolate mint person, you are in for a treat.
A Chocolate Mint Lovers Dream Dessert!
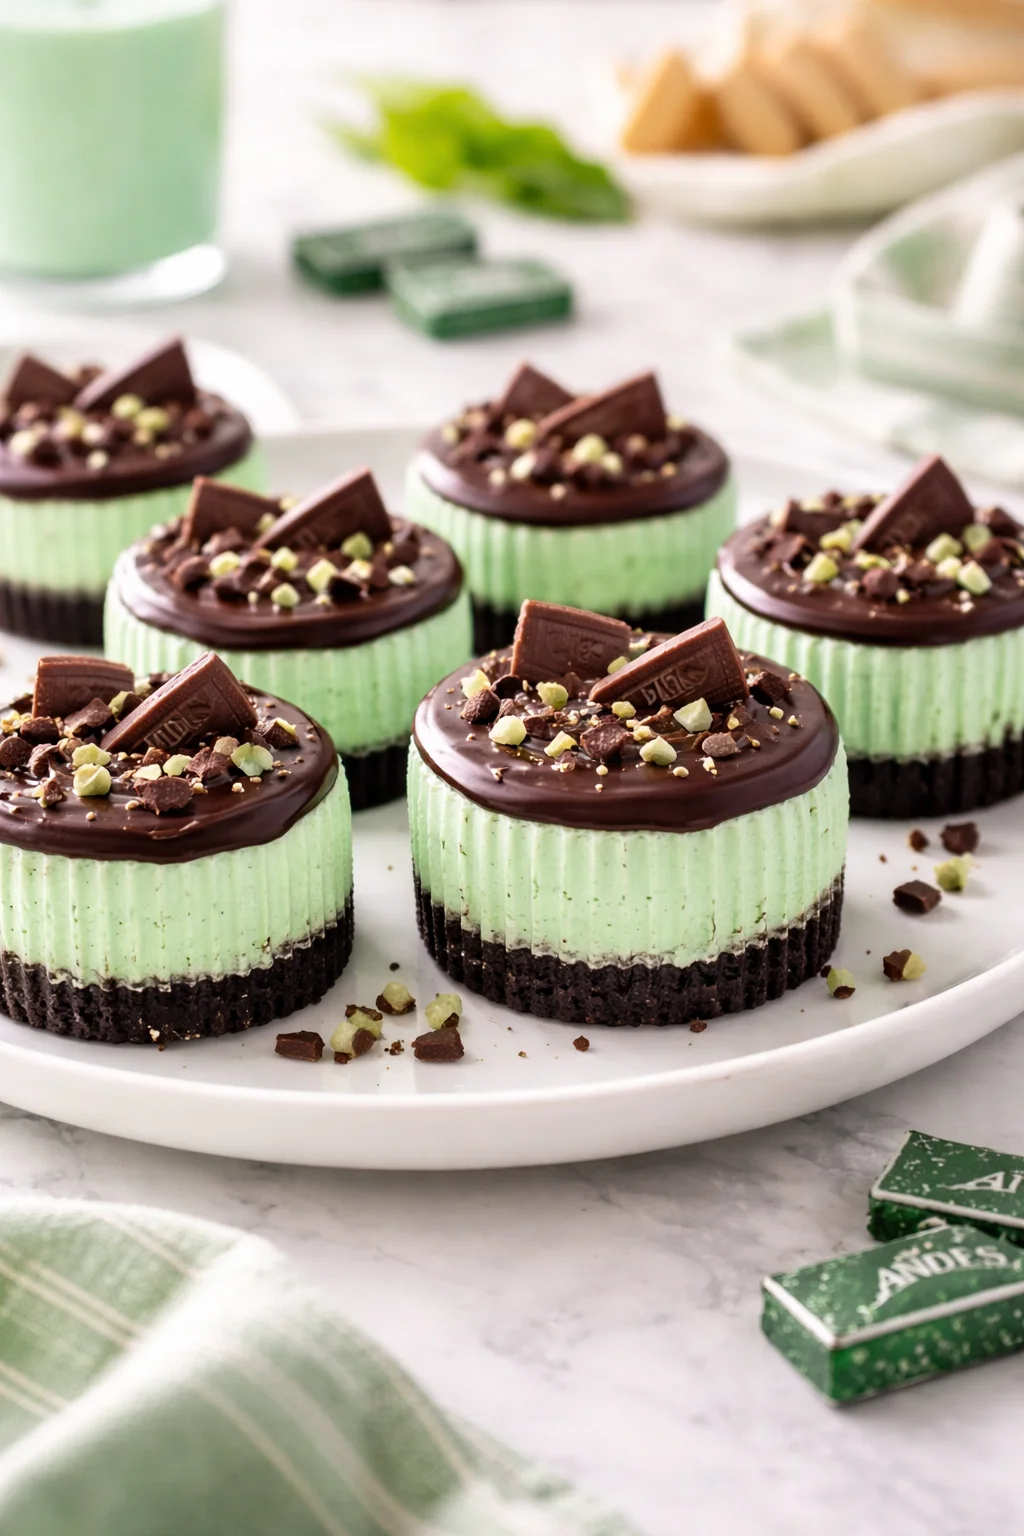
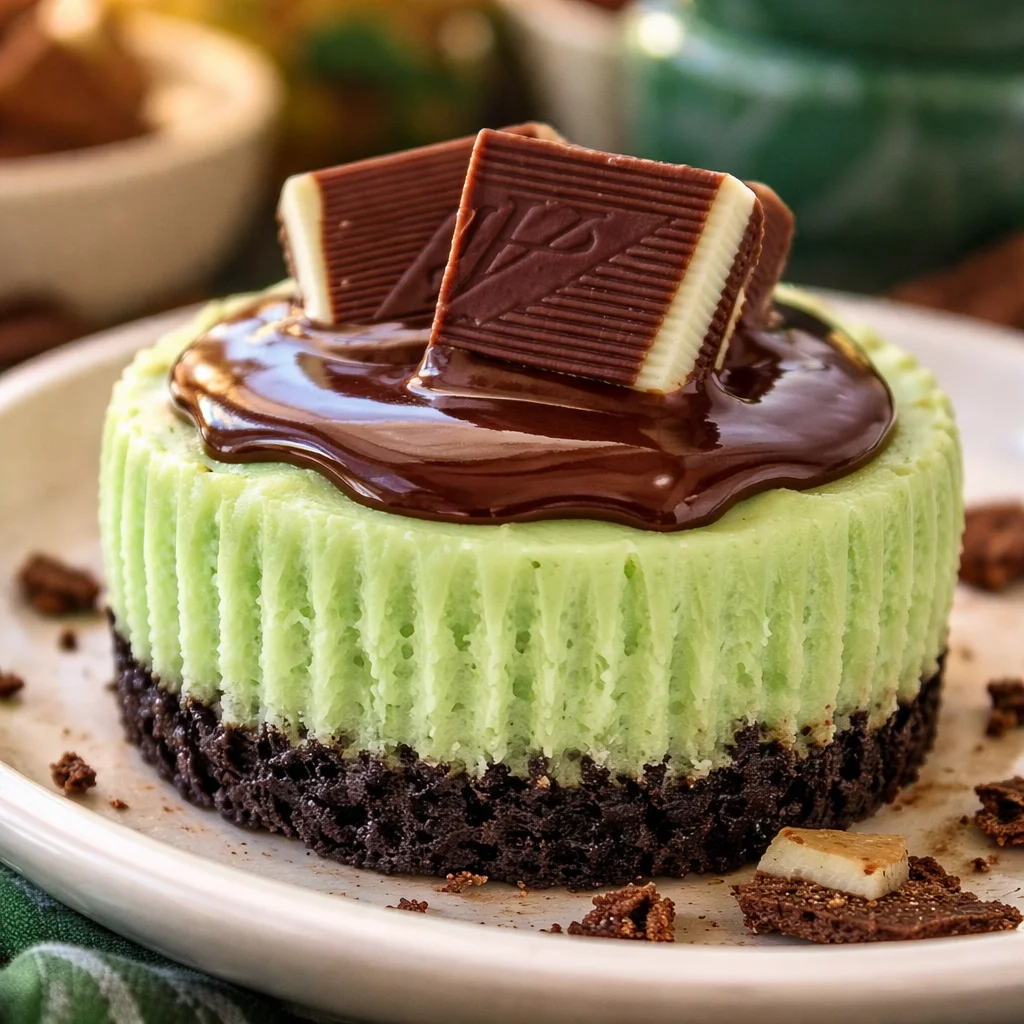
I love desserts that get people excited before they even take a bite, and this is one of them. The second you pull these out, you get that chocolate smell, plus a little minty hint that makes everyone go, ok what is that? The creamy cheesecake filling is the main event, and the Andes mints on top make them look like you did more work than you really did.
These are also perfect for parties because they are already portioned. No slicing, no messy serving, no worrying if you cut the pieces evenly. I have brought Andes Mint Cheesecakes to potlucks where people literally hover near the dessert table, waiting for the tray to open up.
If you want to see a mini version with step by step vibes, I have a similar post you can check out here: mini Andes mint cheesecakes. Same cozy flavor, same big payoff.
Also, I have to share this because it made my day the first time I hosted a holiday dinner with these:
“I thought I was just going to have one, but I ate two before dinner even started. The mint and chocolate combo is perfect, and the crust is so good.”
What Youll Love About this Recipe
This is the part where I tell you why I keep coming back to these, even when I swear I am taking a break from baking. Andes Mint Cheesecakes hit that sweet spot of being easy enough for a weekday, but impressive enough for guests.
Little reasons this recipe is a keeper
- Big flavor in a small bite, so it feels indulgent without being overwhelming
- No complicated decorating, since the candy does all the pretty work
- Freezer friendly for make ahead plans
- Great for holidays, especially when everything else is peppermint and chocolate anyway
- Easy to customize with different crusts or toppings
And if you are doing a holiday dessert spread, I love mixing in different peppermint treats so it does not feel like the same thing over and over. These pair so well with cozy drinks like this: peppermint white hot chocolate. I have done that combo for movie nights and it is dangerously comforting.
One more thing, if you want an alternate flavor in the same cute mini format, check out these mini apple cheesecakes. Totally different vibe, but they are also super party friendly.
Ingredients Youll Need for the Crust
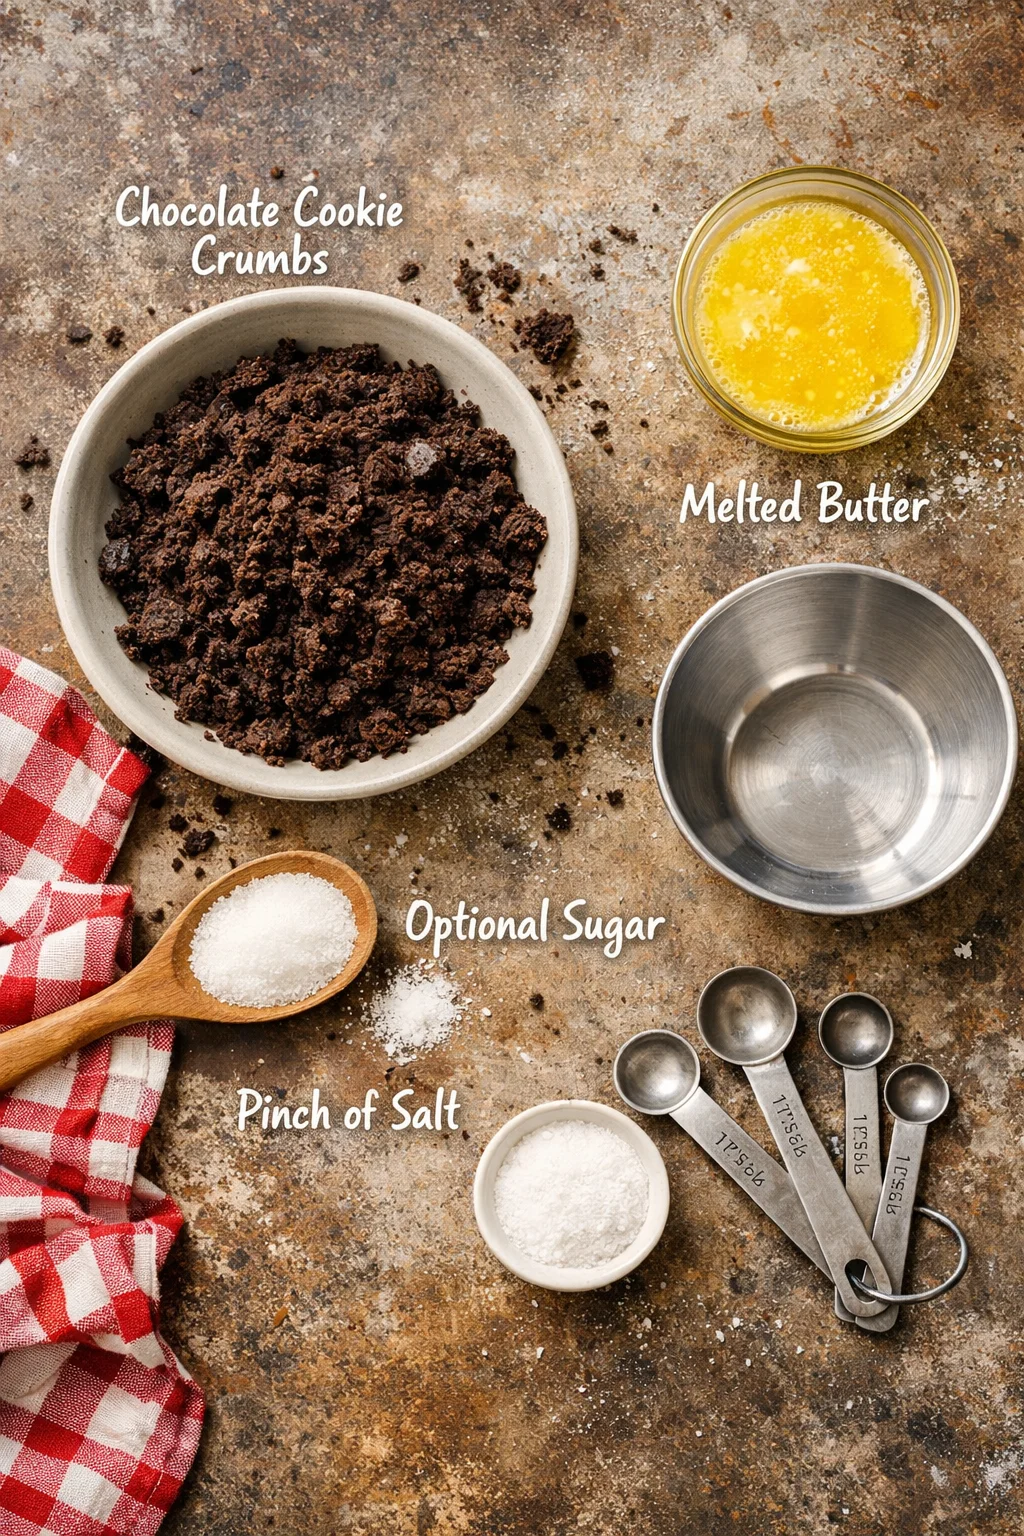
Let us talk crust, because a good crust makes the whole cheesecake feel finished. I usually go with a chocolate cookie crust, because it just makes sense with mint. You can keep it simple and it still tastes amazing.
My go to crust list
- Chocolate cookie crumbs (think chocolate sandwich cookies with the filling scraped out, or plain chocolate wafer cookies)
- Melted butter to hold it together
- A tiny pinch of salt if your cookies are super sweet
- Optional: 1 teaspoon sugar if the crumbs taste a little bitter
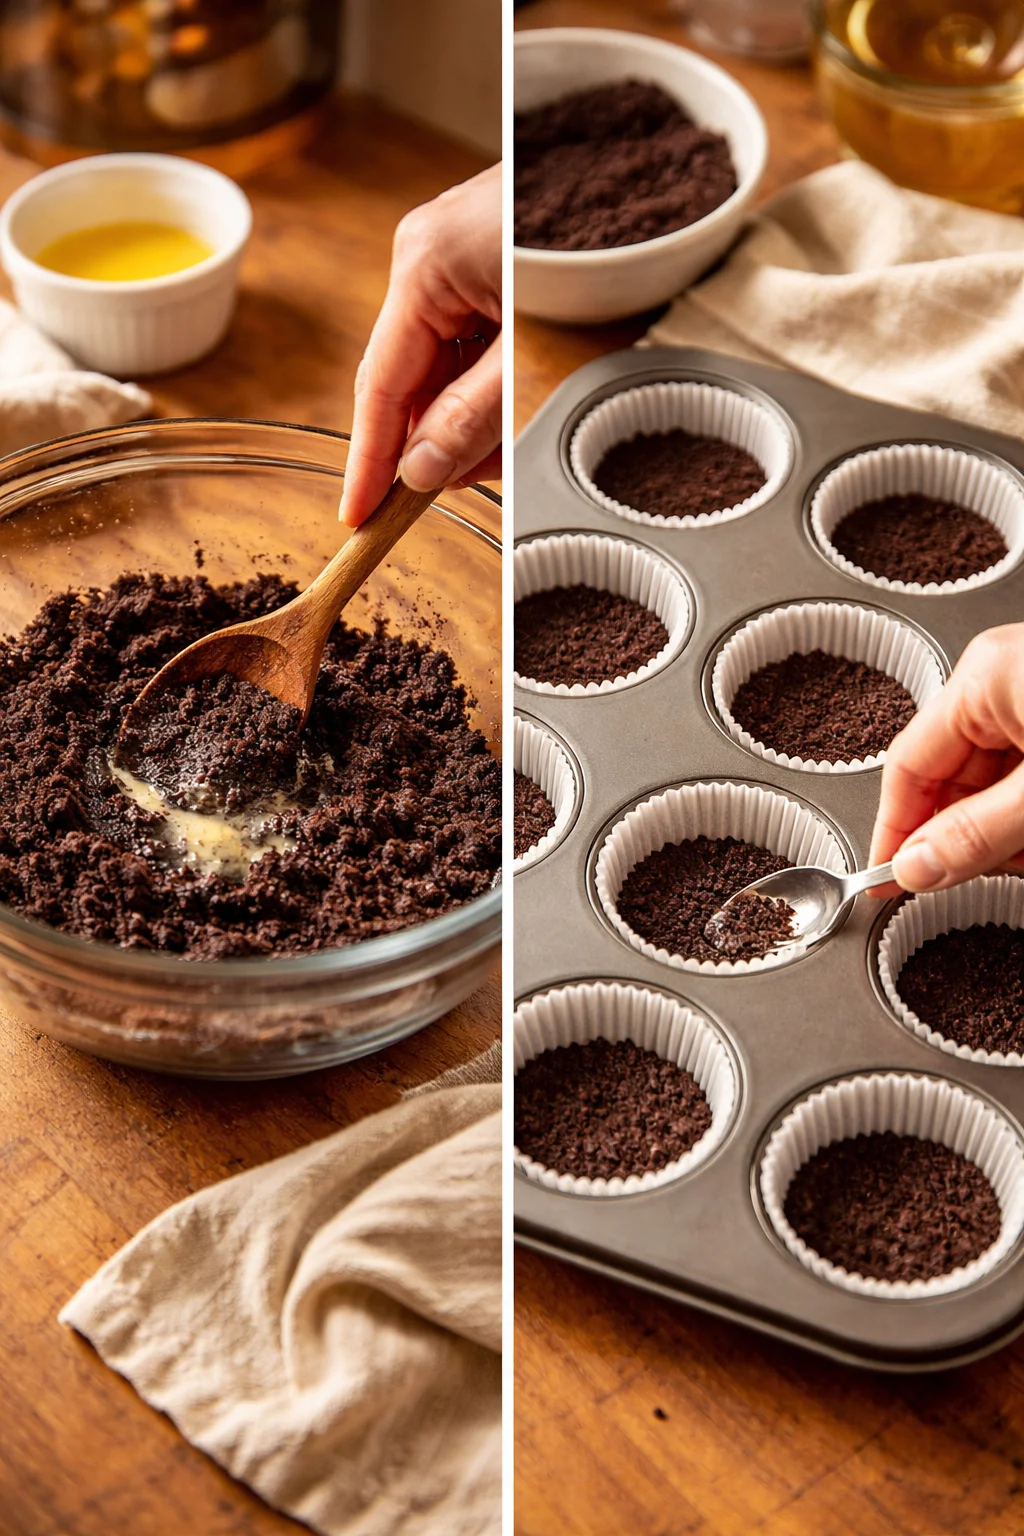
Mix the crumbs and butter until it looks like wet sand. When you press it into the liners, use the bottom of a small cup or a spoon and really pack it down. If the crust is loose, the whole cheesecake can feel messy when you peel the paper off.
Quick side note: if you are already in a peppermint mood, homemade candy treats can be a fun extra on the side. This peppermint bark recipe is great for gifting and it looks so pretty next to a plate of these cheesecakes.
And yes, you can swap the crust. Graham cracker crust is fine, but chocolate makes Andes Mint Cheesecakes taste more like a real chocolate mint dessert instead of plain cheesecake with a mint note.
Tips and Tricks for the Best Mint Chocolate Cheesecake
I have made these enough times to learn what actually matters and what does not. So here are my real life tips, the ones that save you from cracks, weird texture, or that overpowering mint situation.
Use room temperature cream cheese. This is not me being fussy. Cold cream cheese stays lumpy, and then you are stuck overmixing to fix it.
Do not overmix once the eggs go in. Mix just until the batter looks smooth. Too much air can cause the tops to puff and then sink.
Go easy on the mint. You can always add a tiny bit more next time, but you cannot un mint a cheesecake.
Chop some Andes mints for inside. I like to fold a small handful of chopped pieces into the batter so you get little surprise bites. Then I press a piece on top after baking or right before serving.
Let them cool slowly. After baking, let them sit in the pan for a bit, then move to the fridge. Rushing the cooling can mess with the texture.
One of my favorite serving tricks is adding a tiny swirl of whipped cream, then topping with a chopped Andes mint. It looks like a bakery dessert but takes about ten seconds.
Also, if you are building a holiday treat box, you can add something like this white chocolate peppermint fudge next to the cheesecakes. The flavors do not fight each other, and it makes the box feel generous.
Mint Extracts vs Peppermint Extract
This part matters more than people think, because the wrong extract can make the flavor feel off.
Peppermint extract is sharper and more classic holiday tasting. It is the one that screams candy cane. If you love that clean, bold mint, peppermint is your pick.
Mint extract usually tastes a little softer and more balanced, sometimes like a mix of spearmint and peppermint. For Andes Mint Cheesecakes, I personally like mint extract because it plays nicer with the chocolate and feels closer to the candy flavor.
My practical suggestion: if you are unsure, start with a smaller amount than the recipe calls for, taste the batter carefully, then add a drop or two more. Extracts can vary by brand, and mint is one of those flavors that can take over fast.
Common Questions
Can I make these ahead of time?
Yes, and they are honestly better after chilling overnight. The flavor settles and the texture gets more creamy.
How do I store Andes Mint Cheesecakes?
Keep them in the fridge in a covered container for up to 4 or 5 days. If they are topped with whipped cream, add that right before serving if you can.
Can I freeze them?
Yep. Freeze them without whipped cream, wrapped well, for up to 2 months. Thaw overnight in the fridge.
What if I do not have Andes mints?
You can use chopped mint chocolate pieces or another mint chocolate candy. The flavor will change a bit, but it will still be good.
Why did my cheesecakes crack?
Usually it is from overmixing, baking too long, or cooling too fast. The good news is the topping hides a lot, and they still taste great.
A Sweet Little Dessert You Will Make Again
If you have been craving a cool chocolate mint treat, Andes Mint Cheesecakes are such a fun one to try because they feel special without being stressful. Keep the cream cheese soft, go easy on the extract, and give them time to chill, and you will be in a really good place. If you want more inspiration, I have seen great ideas from Andes Mint Mini Cheesecakes – Baking You Happier and this cozy take from Andes Mint Cheesecake – Audrey’s Little Farm. Now promise me you will save at least one for yourself, because these disappear fast once other people spot them.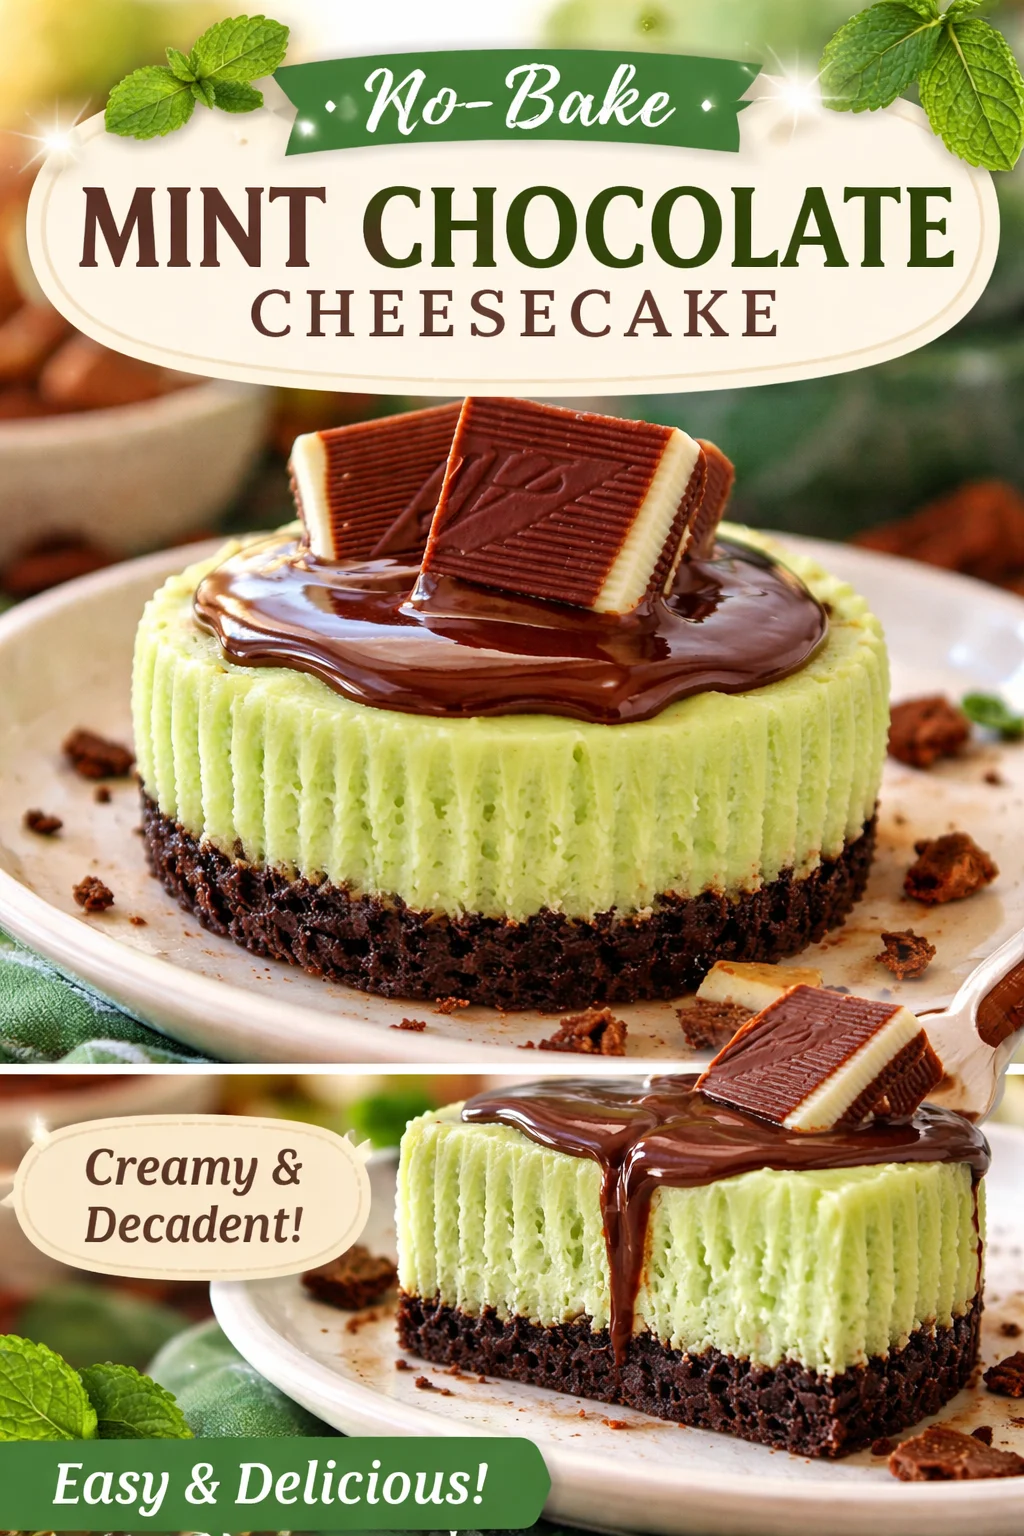
Andes Mint Cheesecakes
Ingredients
Method
- Preheat the oven to 325°F (160°C). Line a muffin tin with cupcake liners.
- In a mixing bowl, combine chocolate cookie crumbs, melted butter, salt, and sugar until it resembles wet sand.
- Press the crumb mixture firmly into the bottom of each cupcake liner.
- In another mixing bowl, beat the cream cheese until smooth.
- Gradually add sugar and vanilla, mixing until well combined.
- Add eggs one at a time, mixing until just incorporated after each addition.
- Gently fold in the mint extract and chopped Andes mints.
- Spoon the cheesecake batter over the crust in each muffin liner, filling them about 3/4 full.
- Bake for 20-25 minutes, until the edges are set but the center is still slightly jiggly.
- Remove from oven and let them cool in the pan for 10 minutes before transferring to the fridge to chill for at least 3 hours.
- Before serving, top each cheesecake with a piece of Andes mint.