

Black Velvet Halloween Cake is pretty much the answer to every “What should I bake for Halloween that people will both gasp at and actually finish eating?” type of question. Let me confess straight up: last year I tried making some cute monster cupcakes…and ended up with a kitchen that looked like a toddler gone wild with food coloring. For the first time in ages, my friends wanted seconds of cake instead of just picking off gummy eyeballs. If you want a treat that delivers some spooky drama AND actual deliciousness, this Black Velvet Halloween Cake is the ticket. I mean, think dramatic dark layers, a little cocoa kick, and a finish that gets ghoulish in just the right way. And it’s honestly not as complicated as people think.
What Is Black Velvet Cake
Alright, here’s the scoop. Black Velvet Cake is like red velvet’s moody twin. You know how red velvet is slightly chocolatey and super tender? Well, swap that signature red for a deep, almost gothic black, and you land here. It’s cocoa-based, colored with gel or natural charcoal, and has a slightly tangy flavor from buttermilk. The style actually popped up as a riff on classic Southern velvet cakes, giving Halloween bakers a bold new twist.
This cake isn’t just about looks. You’ll notice the crumb is soft but a bit sturdier than angel cake. It holds up well to those thick stripes of cream cheese buttercream. I find the black color makes the whole thing feel more decadent. My nieces think it’s “poster cake for vampires.” If that’s not an endorsement, I don’t know what is.
If you’re serving a crowd that craves something different, but actually crave-able, black velvet is total showstopper territory. 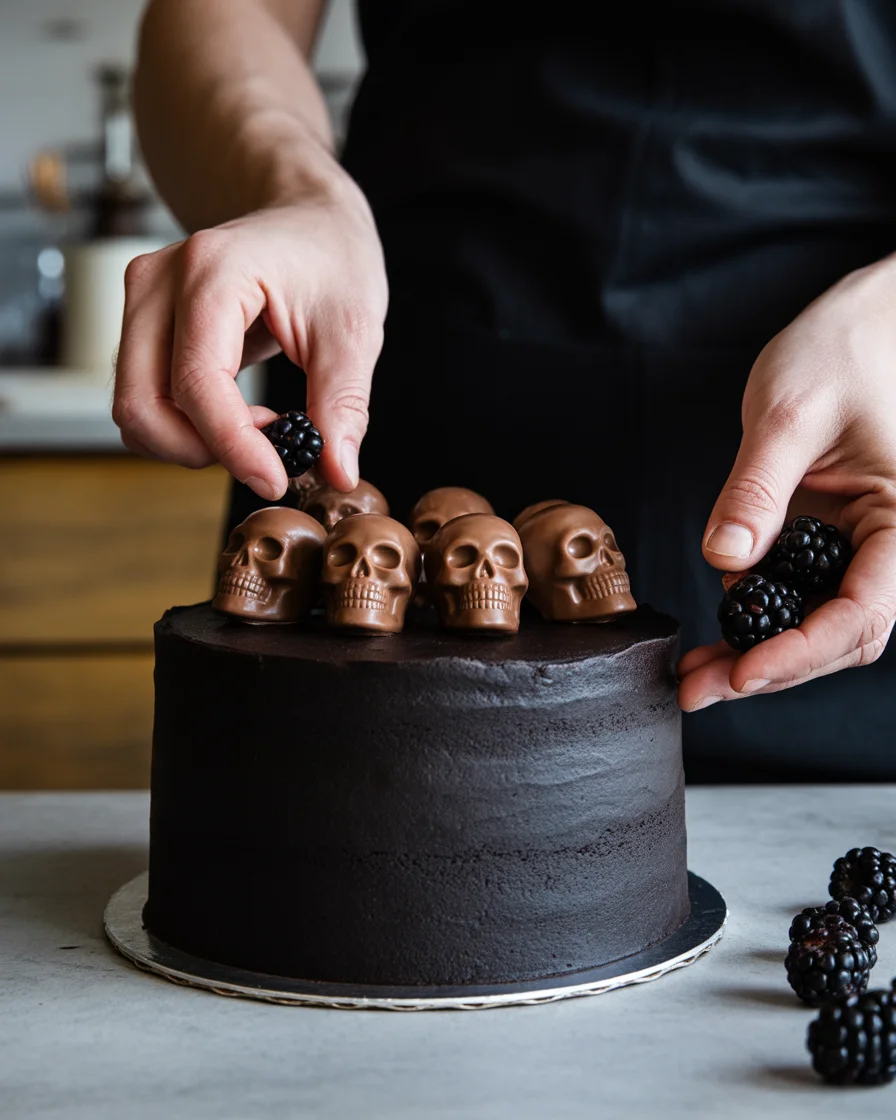
Why You’ll Love This Recipe
Okay, so here’s why I think this Black Velvet Halloween Cake belongs in everyone’s spooky season lineup. No judgment if you bake it in October and then can’t stop till December, either.
First up, the flavor. It’s got chocolate vibes without being over-the-top. That slight tang balances out the cocoa, so it’s not too sweet. You get super moist layers, pretty much five-star restaurant level but without the whole “pastry degree required” pressure. Honestly, it’s shockingly forgiving even when you, let’s say, forget to set a timer. Definitely speaking from experience.
Decor-wise, even if you’re not a frosting artist, you will impress people. The pure black canvas lets you go nuts with spooky toppers or neon candies. My best friend’s preschooler added orange gummy snakes…not a single crumb survived.
And yeah, the leftovers (miraculously) still taste good two days later. That never happens with cupcake mummies.
“I used your Black Velvet Halloween Cake recipe for my daughter’s birthday. I’ve never had a cake disappear so fast! The texture was unreal and it was the hit of her Halloween sleepover.” – Jenna, Alabama
Ingredient Substitutions
Maybe you forgot buttermilk or that bottle of black gel coloring? Don’t sweat it. I’ve swapped and hacked around these ingredients more times than I’d admit. For the black cocoa powder, dark Dutch cocoa plus a spoon of activated charcoal powder works a treat. But only a pinch – go overboard and it’ll get gritty.
No buttermilk? Add a tablespoon of vinegar or lemon juice to regular milk and let it sit five minutes. Really does work. For the coloring, black gel is classic, but activated charcoal or squid ink (yep, squid ink) gets that intense color too, especially if you’re nervous about artificial dyes.
Vegan crowd heading over? Sub in plant-based milk and a splash of apple cider vinegar. Egg allergies? Try your favorite egg replacement; the crumb turns out great as long as you don’t go wild with add-ins. Even the frosting can be switched up – butter or vegan margarine play nice in cream cheese buttercream.
I still recommend using cake flour to keep the texture nice and light. Regular flour makes it denser but still tasty. Basically, don’t stress. This cake wants you to succeed.
Expert Baking Tips
Let’s talk easy wins. Definitely prep your pans with parchment rounds. Trust me, if you try to save time and skip it, you’ll be scraping cake out with a fork and cursing my name. Been there. Sift your cocoa and flour together if possible. It’s an extra bowl but prevents those sneaky cocoa lumps.
Don’t overmix! Once the wet and dry stuff is combined, a few turns are all you need. It keeps the crumb nice. And yes, you can double this recipe for a crowd. Just up the baking time a smidge, and check for doneness with the old toothpick trick. No fancy tools required. Cool your cakes completely before frosting or you’ll get a sad, melty mess.
Chilling the cake layers in the fridge before assembling makes the frosting step about a thousand times easier. Just wrap ‘em up tight so they don’t dry out. When decorating, have fun but know that black dye stains literally everything. Old t-shirt. Paper towels handy. You’ll thank me later.
Storing and Freezing
Here’s where this Black Velvet Halloween Cake continues to score points. Once baked and frosted, wrap slices tightly in plastic wrap and chill in the fridge for up to five days. Sometimes I put a layer in a plastic container for a “secret” snack later. Still tastes like fresh magic.
For freezing, let the cake layers cool completely. Cover with cling wrap and foil, then freeze up to two months. Just thaw overnight in the fridge, and frost when you’re ready to serve. Frosted cake slices can be frozen too, but I like to add a layer of parchment between slices so they don’t stick together.
Freezer secret? I once forgot a piece for a month, and it tasted just as good. Frosting honestly keeps everything moist and delicious so no reason to panic if you need to prep ahead.
Frequently Asked Questions about Black Velvet Halloween Cake
Q: Do I have to use black food coloring?
A: Not exactly! You can use dark cocoa powder mixed with a pinch of activated charcoal or squid ink for a natural option, but gel coloring gives that super jet-black effect.
Q: Can I make it gluten-free?
A: Yup! Just swap regular flour with your favorite gluten-free blend. Double-check the baking powder is gluten-free as well.
Q: How do I stop the frosting from melting?
A: Make sure your cake layers are fully cooled, or even give them a chill in the fridge before frosting. Warm cake + soft buttercream = ooze city.
Q: What frosting goes best with Black Velvet Halloween Cake?
A: Classic cream cheese or vanilla buttercream both work. Heck, you can even do chocolate if you’re feeling wild.
Q: Can I make cupcakes instead of cake?
A: Absolutely. Bake for a shorter time (about 16-18 minutes) and check early. Works a treat for parties.
Make Your Halloween Spooky AND Sweet
So hey, if you’re looking for a cake with real drama, flavor, and a massive “Whoa!” factor — this Black Velvet Halloween Cake checks all the boxes. No master baking skills required. Just a sense of adventure and, okay, maybe an old apron. My crew can’t get enough of this wobbling, black beauty every fall. If you need even more cake-spiration or alternative decorating tricks, check out awesome ideas at Spooky Black Velvet Halloween Cake – The Epicurean Mouse, this creative approach from Black Velvet Halloween Cake – In Bloom Bakery, or the natural dye version from Spooky Black Velvet Cake Recipe (Dye-Free!) – Sugar & Sparrow. Just remember, what happens with the black frosting definitely stays with the black frosting…including your hands.
Now go and get baking – your Halloween is about to taste a whole lot cooler.
Black Velvet Halloween Cake
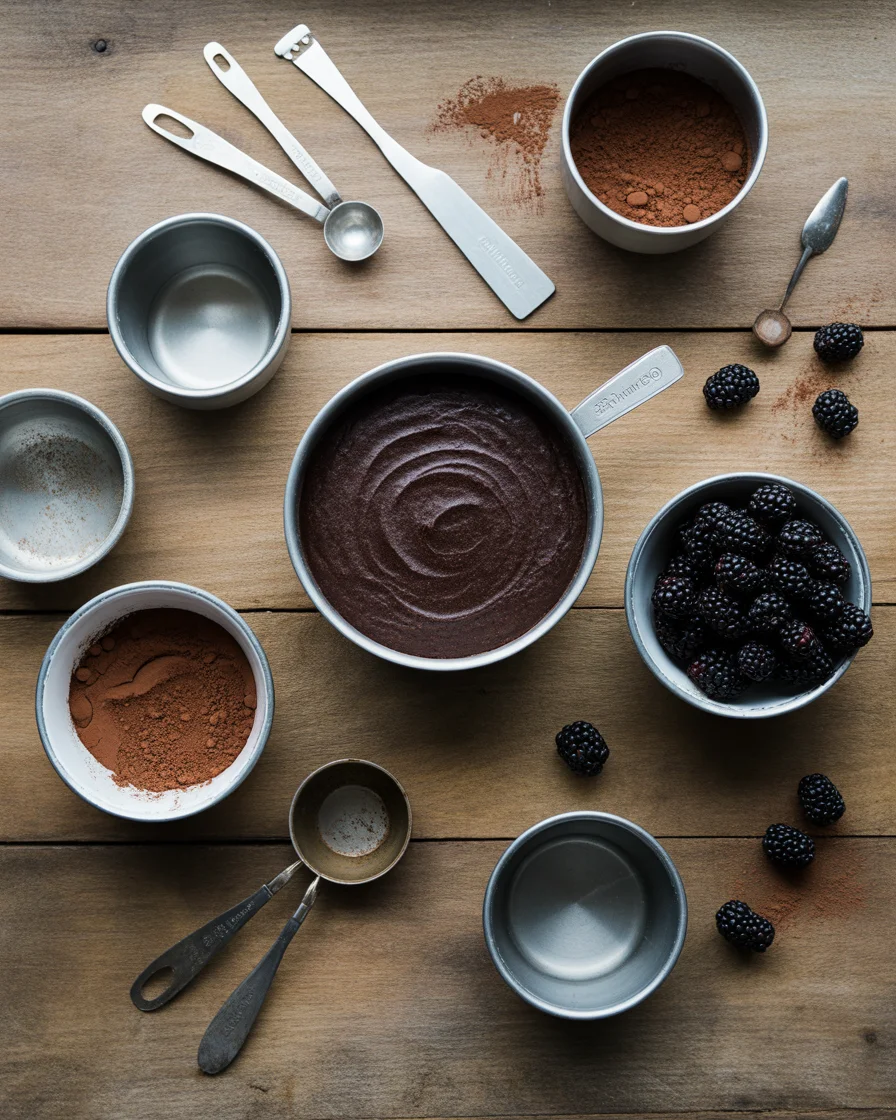
Ingredients
Method
- Preheat the oven to 350°F (175°C). Prepare two 9-inch round cake pans by greasing and lining with parchment paper.
- In a large bowl, sift together cake flour, cocoa powder, baking powder, baking soda, and salt.
- In another bowl, whisk together granulated sugar, brown sugar, vegetable oil, eggs, buttermilk, and black gel coloring until smooth.
- Gradually add the dry ingredients to the wet ingredients, mixing just until combined. Avoid overmixing.
- Divide the batter evenly between the prepared pans.
- Bake in the preheated oven for 30-35 minutes, or until a toothpick inserted in the center comes out clean.
- Allow the cakes to cool in the pans for 10 minutes, then transfer to a wire rack to cool completely.
- In a large bowl, beat together softened cream cheese and butter until smooth.
- Gradually add powdered sugar, mixing until fluffy. Stir in vanilla extract.
- Once the cakes are completely cooled, place one layer on a serving platter. Spread a layer of cream cheese frosting on top.
- Place the second layer on top and frost the top and sides of the cake.
- Decorate as desired with spooky toppers or candies.