Sometimes, you want the charm and whimsy of cake pops without the hassle of baking. That’s where Easy No Bake Cake Pops come in. These bite-sized treats are a dream come true, made with crushed cookies, cream cheese, and dipped in chocolate for a flawless finish. Whether it’s a birthday, a celebration, or a rainy afternoon project, these cake pops are pure joy on a stick.
I remember the first time I made these with my niece. She couldn’t believe we didn’t have to bake anything, and she loved rolling the mixture into perfect little balls. When we dipped them in chocolate and added sprinkles, it was like creating edible art. They were a hit at her party and are now our go-to treat for any occasion. Let’s make these no-bake wonders together!
Easy No Bake Cake Pops bring all the fun of traditional cake pops without turning on the oven. Crushed cookies and cream cheese come together to form a soft, rich base that’s rolled into balls, stuck on lollipop sticks, and dipped in melted chocolate. The result? A dessert that’s simple to make, stunning to look at, and absolutely delicious. Customize with your favorite toppings and colors for a treat that’s as unique as it is tasty.
Exciting Story
The first time I brought these cake pops to a gathering, I wasn’t sure how they’d be received. After all, they weren’t your traditional baked treat. But as soon as the platter hit the table, people couldn’t stop talking about how cute and delicious they were. Kids loved the colorful sprinkles, and adults appreciated the rich, creamy center. By the end of the night, there wasn’t a single one left—just a trail of happy smiles and a few chocolatey fingers. These no-bake cake pops have become my secret weapon for impressing without stress
Why These Easy No Bake Cake Pop
What Makes It Special
- No Baking Required: Perfect for hot days or when you want an easy dessert.
- Customizable: Change the flavors, coatings, and toppings to suit any theme or taste.
- Quick to Make: Ready in under 30 minutes, plus chilling time.
- Kid-Friendly: A fun and interactive project for little hands.
What You Need for Easy No Bake Cake Pops
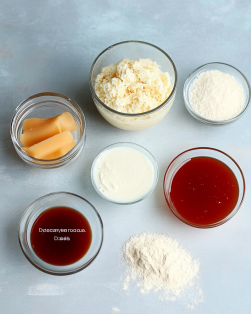
- 1 package (14 oz) sandwich cookies (e.g., Oreos), crushed
- 8 oz cream cheese, softened
- 12 oz white or semisweet chocolate, melted
- Lollipop sticks
- Sprinkles, crushed nuts, or candy decorations (optional)
How to Make Easy No Bake Cake Pops
- Crush the Cookies: Place the cookies in a food processor and pulse until fine crumbs form. Alternatively, crush them in a resealable bag using a rolling pin.
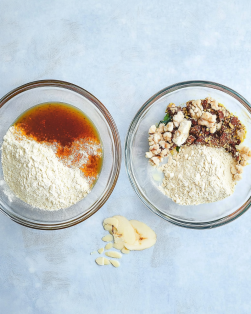
- Mix with Cream Cheese: In a large bowl, combine the crushed cookies and softened cream cheese. Mix until fully combined and a dough-like consistency forms.
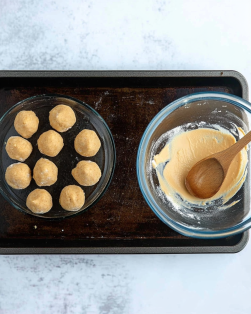
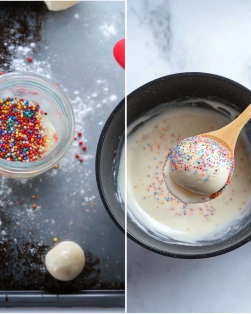
- Shape the Pops: Roll the mixture into 1-inch balls and place them on a parchment-lined baking sheet. Insert a lollipop stick into each ball. Chill in the refrigerator for at least 30 minutes to firm up.
- Melt the Chocolate: In a microwave-safe bowl, melt the chocolate in 30-second intervals, stirring between each, until smooth and glossy.
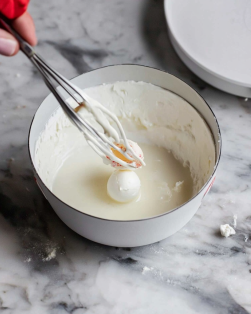
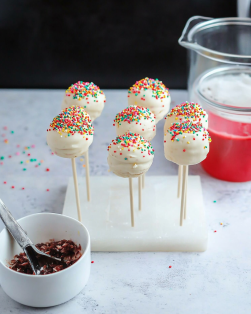
- Dip and Decorate: Dip each chilled cake pop into the melted chocolate, letting any excess drip off. Decorate with sprinkles, nuts, or candy while the chocolate is still wet. Place back on the parchment-lined sheet to set.
- Chill Again: Refrigerate the cake pops for another 15-20 minutes, or until the chocolate is fully set.
- Serve and Enjoy: Arrange on a platter or wrap individually for gifts. Enjoy!
Tips for Easy No Bake Cake Pops
- Room Temperature Cream Cheese: Ensures easy mixing and smooth texture.
- Keep the Mixture Cool: If it gets too soft while rolling, chill it for a few minutes.
- Secure the Sticks: Dip the end of each stick in melted chocolate before inserting it into the cake pop to help it stay in place.
- Customize Flavors: Try different cookies, like chocolate chip or gingersnaps, for unique variations.
- Use a Stand: A foam block or cake pop stand can help the pops dry evenly.
- Double-Dip: For extra crunch, dip in chocolate a second time after the first layer sets.
- Add Extracts: Mix a few drops of vanilla or almond extract into the cream cheese mixture for added flavor.
- Storage: Keep in an airtight container in the fridge for up to 5 days.

Substitutions and Variations
- Gluten-Free: Use gluten-free cookies for a celiac-friendly version.
- Vegan-Friendly: Swap cream cheese with a plant-based alternative and use dairy-free chocolate.
- Nutty: Roll in crushed peanuts, almonds, or pistachios for a crunchy coating.
- Colorful Swirls: Use colored candy melts instead of chocolate for a vibrant look.
- Different Cookies: Experiment with graham crackers, shortbread, or chocolate chip cookies.
- Holiday-Themed: Add holiday sprinkles or drizzle with red and green candy melts.
- Fruit Flavor: Mix in freeze-dried fruit powder for a fruity twist.
- Espresso Infusion: Add instant coffee powder to the mixture for a mocha flavor.
- Double Chocolate: Use chocolate sandwich cookies and dip in dark chocolate.
- Healthier Option: Use reduced-fat cream cheese and dark chocolate.
Make a Healthier Version
- Low-Sugar: Use sugar-free cookies and chocolate.
- Reduced Fat: Substitute regular cream cheese with a low-fat version.
- Whole Grain: Use whole-grain cookies for added fiber.
- Dark Chocolate: Opt for 70% dark chocolate for a lower-sugar coating.
- No Sprinkles: Skip sugary toppings and use crushed nuts or seeds instead.
- Smaller Portions: Roll into smaller balls for bite-sized indulgence.
- Natural Sweeteners: Use cookies sweetened with honey or stevia.
- Add Fruit: Mix in finely chopped dried fruit for natural sweetness.


Closing for Easy No Bake Cake Pops
These Easy No Bake Cake Pops are proof that dessert can be simple, fun, and absolutely delicious. Whether you’re making them for a party, a gift, or just a treat-yourself moment, these pops are guaranteed to impress. Customize them to match any theme or occasion, and watch as they disappear faster than you can say “no bake.” So grab your ingredients, roll up your sleeves, and let the cake pop magic begin. Happy no-baking!
Frequently Asked Questions for Easy No Bake Cake Pops
Can I make these ahead of time?
Yes, you can prepare them up to 2 days in advance and store them in the refrigerator.
How do I keep the pops from falling off the sticks?
Dip the sticks in melted chocolate before inserting them into the pops.
Can I freeze cake pops?
Yes, freeze them in an airtight container for up to 2 months. Thaw in the fridge before serving.
What if I don’t have a food processor?
Crush the cookies in a resealable bag using a rolling pin.
What can I use instead of cream cheese?
Try mascarpone or a vegan cream cheese substitute.
Can I use homemade cookies?
Absolutely! Just ensure they’re firm enough to crush into fine crumbs.
What if my chocolate is too thick?
Add a teaspoon of vegetable oil or coconut oil to thin it out.
Can I skip the sticks?
Yes, serve them as cake truffles instead.
How do I create smooth chocolate coatings?
Dip quickly and let the excess drip off while turning the pop gently.
Can I use candy melts?
Yes, they’re perfect for vibrant colors and easy melting.
How do I store leftovers?
Keep them in an airtight container in the fridge for up to 5 days.
What toppings work best?
Sprinkles, crushed cookies, nuts, or a drizzle of melted chocolate are all great options.
Can I make mini cake pops?
Yes, roll the mixture into smaller balls for bite-sized treats.
What pairs well with cake pops?
Serve with coffee, tea, or as part of a dessert platter.
Are these safe for kids to make?
Absolutely! This recipe is kid-friendly and perfect for little helpers.
Easy No Bake Cake Pops
Course: Cake, Dessert, Snacks4
servings30
minutes40
minutes300
kcalIngredients
1 package (14 oz) sandwich cookies (e.g., Oreos), crushed
8 oz cream cheese, softened
12 oz white or semisweet chocolate, melted
Lollipop sticks
Sprinkles, crushed nuts, or candy decorations (optional)
Directions
- Crush the Cookies: Place the cookies in a food processor and pulse until fine crumbs form. Alternatively, crush them in a resealable bag using a rolling pin.
- Mix with Cream Cheese: In a large bowl, combine the crushed cookies and softened cream cheese. Mix until fully combined and a dough-like consistency forms.
- Shape the Pops: Roll the mixture into 1-inch balls and place them on a parchment-lined baking sheet. Insert a lollipop stick into each ball. Chill in the refrigerator for at least 30 minutes to firm up.
- Melt the Chocolate: In a microwave-safe bowl, melt the chocolate in 30-second intervals, stirring between each, until smooth and glossy.
- Dip and Decorate: Dip each chilled cake pop into the melted chocolate, letting any excess drip off. Decorate with sprinkles, nuts, or candy while the chocolate is still wet. Place back on the parchment-lined sheet to set.
- Chill Again: Refrigerate the cake pops for another 15-20 minutes, or until the chocolate is fully set.
- Serve and Enjoy: Arrange on a platter or wrap individually for gifts. Enjoy!

