

This dessert combines the rich, chocolatey goodness of red velvet cake with the creamy decadence of cheesecake. Baking this cheesecake is more than just creating a dessert; it’s about delighting in every velvety bite and savoring moments of pure indulgence. Let’s dive into making this irresistible Red Velvet Cheesecake that’s perfect for any celebration!
Resume of the Recipe:
Baking a Red Velvet Cheesecake is a journey into creating a dessert that’s as stunning to look at as it is delicious to eat. The layers of moist red velvet cake complemented by a silky smooth cheesecake layer create a harmonious blend of textures and flavors. Enjoy the process of baking and presenting this cheesecake, sure to impress friends and family with its decadent allure.
Exciting Story:
The inspiration for this Red Velvet Cheesecake came from a family tradition of celebrating special occasions with red velvet cake. Combining this beloved flavor with the creamy richness of cheesecake was a stroke of genius. Each slice of this cheesecake tells a story of shared moments and celebrations, making it a cherished dessert in our home.
Why This Red Velvet Cheesecake:
Why This Red Velvet Cheesecake?
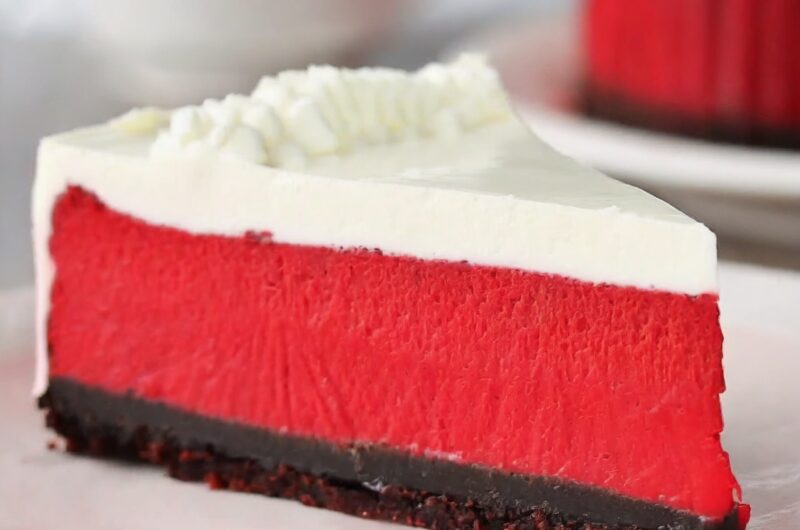
- Decadent Combination: Red velvet cake layered with creamy cheesecake.
- Visual Appeal: Stunning red and white layers for a festive presentation.
- Perfect for Celebrations: From birthdays to holidays, this cheesecake is a showstopper.
Tips:
- Ensure all ingredients are at room temperature for smooth blending of the cheesecake batter.
- Use gel food coloring for vibrant red velvet cake layers without altering the texture.
- For a gluten-free version, use a gluten-free flour blend for the red velvet cake layer.
Substitutions and Variations:
- Substitute the sour cream in the cheesecake layer with Greek yogurt for a tangy twist.
- Experiment with different cake and cheesecake flavor combinations, such as chocolate cake with raspberry cheesecake.
Make a Healthier Version:
- Use reduced-fat cream cheese and sour cream for a lighter cheesecake layer.
- Reduce the amount of sugar in both the red velvet cake and cheesecake layers, or use a sugar substitute.
Closing:
There you have it! Red Velvet Cheesecake that’s sure to impress with its luxurious layers of red velvet cake and creamy cheesecake. Whether for a special occasion or simply to satisfy a sweet craving, this cheesecake is a decadent delight. Enjoy baking and sharing this irresistible Red Velvet Cheesecake with your loved ones!
Frequently Asked Questions:
- Can I freeze Red Velvet Cheesecake? Yes, you can freeze individual slices of cheesecake wrapped tightly in plastic wrap and aluminum foil for up to 1 month. Thaw in the refrigerator before serving.
- How do I prevent cracks in the cheesecake? Bake the cheesecake in a water bath (wrap the springform pan in foil and place in a larger pan filled with hot water) to create a moist baking environment.
- Can I use a different cake flavor for the base? Yes, you can experiment with different cake flavors like chocolate, vanilla, or even a lemon cake base.
- What is the best way to store leftover cheesecake? Store leftover cheesecake covered in the refrigerator for up to 5 days. Serve chilled.
- Can I use natural food coloring for the red velvet cake layer? Yes, you can use natural red food coloring alternatives like beetroot powder or raspberry juice for a natural coloring option.
- Can I add a cream cheese frosting on top of the cheesecake? Yes, you can pipe or spread a layer of cream cheese frosting on top of the cooled cheesecake for extra sweetness and decoration.
Red Velvet Cheesecake
Course: All Recipes, Cake, Dessert4
servings30
minutes40
minutes300
kcalIngredients
- For the Red Velvet Cake Layer:
1 1/2 cups all-purpose flour
1/2 tsp baking soda
1/2 tsp salt
1 tbsp unsweetened cocoa powder
1/2 cup unsalted butter, softened
1 cup granulated sugar
2 large eggs
1 tsp vanilla extract
1/2 cup buttermilk
1 tbsp red food coloring (adjust to desired color)
- For the Cheesecake Layer:
24 oz (three 8 oz packages) cream cheese, softened
1 cup granulated sugar
1 tsp vanilla extract
3 large eggs
1/2 cup sour cream
Directions
- Prepare the Red Velvet Cake Layer:
- Preheat your oven to 350°F (175°C). Grease a 9-inch springform pan and line the bottom with parchment paper.
- In a medium bowl, whisk together the flour, baking soda, salt, and cocoa powder.
- In a large bowl, cream together the softened butter and sugar until light and fluffy.
- Add the eggs one at a time, mixing well after each addition. Stir in the vanilla extract.
- Gradually add the dry ingredients to the butter mixture, alternating with the buttermilk, beginning and ending with the dry ingredients.
- Stir in the red food coloring until evenly distributed. Pour the batter into the prepared springform pan and spread evenly.
- Prepare the Cheesecake Layer:
- In a large bowl, beat the softened cream cheese until smooth and creamy.
- Add the granulated sugar and vanilla extract, beating until well combined.
- Add the eggs one at a time, mixing well after each addition.
- Stir in the sour cream until smooth and creamy.
- Assemble and Bake:
- Pour the cheesecake batter over the red velvet cake batter in the springform pan, spreading evenly.
- Place the springform pan on a baking sheet to catch any potential leaks.
- Bake in the preheated oven for 60-70 minutes, or until the cheesecake is set and the top is lightly browned.
- Remove from the oven and let cool completely in the pan on a wire rack.
- Chill and Serve:
- Once cooled to room temperature, refrigerate the cheesecake for at least 4 hours, preferably overnight, to set completely.
- Before serving, run a knife around the edge of the cheesecake to loosen it from the pan. Remove the springform ring.
- Slice and serve chilled. Optionally, garnish with whipped cream or chocolate shavings.