

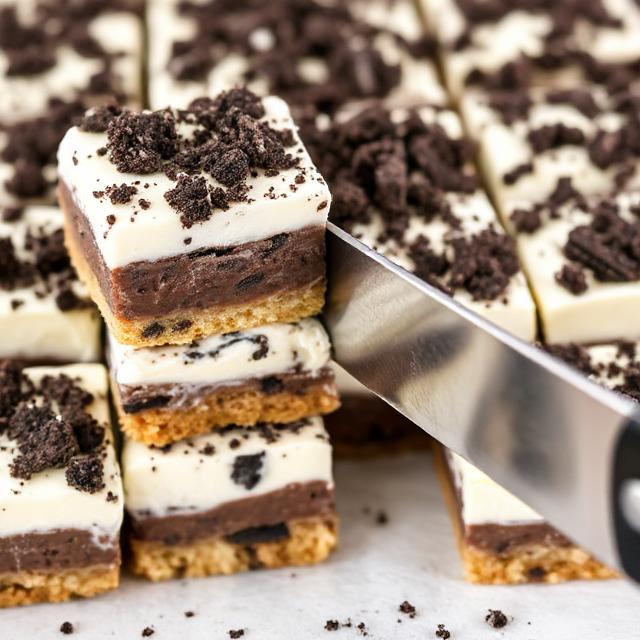
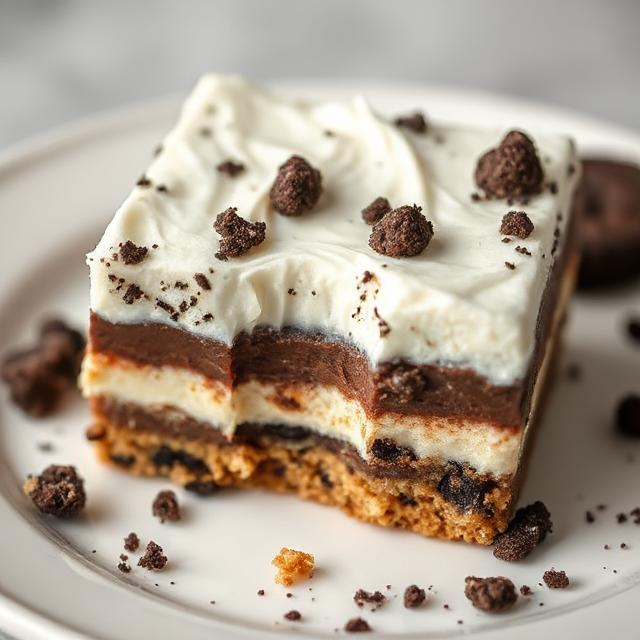
Some recipes are more than just food—they’re a celebration of indulgence, simplicity, and the joy of sharing. Easy Cookies & Cream Dream Bars are one such recipe. This decadent dessert is a delightful combination of a buttery cookie crust, a creamy filling, and a topping loaded with crushed cookies. Imagine a treat that’s rich yet light, sweet yet balanced, and perfect for everything from birthday parties to late-night cravings. It’s a dessert that feels like a dream, no matter where you are.
The first time I made these bars, it was for a friend’s potluck. I wanted something quick, easy, and guaranteed to please a crowd. As I layered the ingredients, the kitchen filled with the irresistible aroma of cookies and cream, and my family couldn’t stop sneaking bites of the crushed cookies. When I finally brought the bars to the potluck, they disappeared within minutes. “These are incredible!” my friend said, reaching for a second piece. Since then, Easy Cookies & Cream Dream Bars have become my go-to dessert for any occasion, and they never fail to impress.
The first time I served these bars, it was at a holiday party. My cousin, who’s known for her elaborate desserts, had brought her famous chocolate truffle cake, and I was a little nervous to present my humble Cookies & Cream Dream Bars. But as soon as I set them on the dessert table, people started gathering around. “What’s this?” my niece asked, eyeing the creamy layers. “Easy Cookies & Cream Dream Bars” I said, trying to sound confident.
When the first bite was taken, the room went quiet. Then came the murmurs of approval. “These are amazing!” my uncle said, reaching for another piece. Even my cousin, the dessert queen, nodded in approval. “You’ve got to give me this recipe,” she said with a smile. That day, my Cookies & Cream Dream Bars became a family favorite, and they’ve been a staple at every gathering since.

Why These Easy Cookies & Cream Dream Bars
Selling Points:
- Quick and Easy: With just a few simple ingredients and minimal prep time, these bars are perfect for busy bakers.
- Irresistible Flavor: The combination of buttery crust, creamy filling, and crunchy cookies is a match made in dessert heaven.
- Crowd-Pleasing: Loved by both kids and adults, these bars are a guaranteed hit at any gathering.
- Versatile: Serve them at parties, potlucks, or even as a sweet treat after a weeknight dinner.
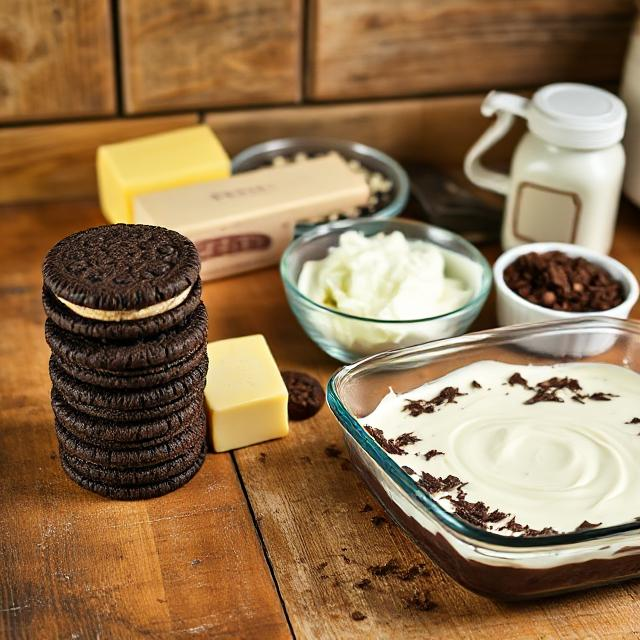
What You Need for Easy Cookies & Cream Dream Bars
Ingredients
For the Crust:
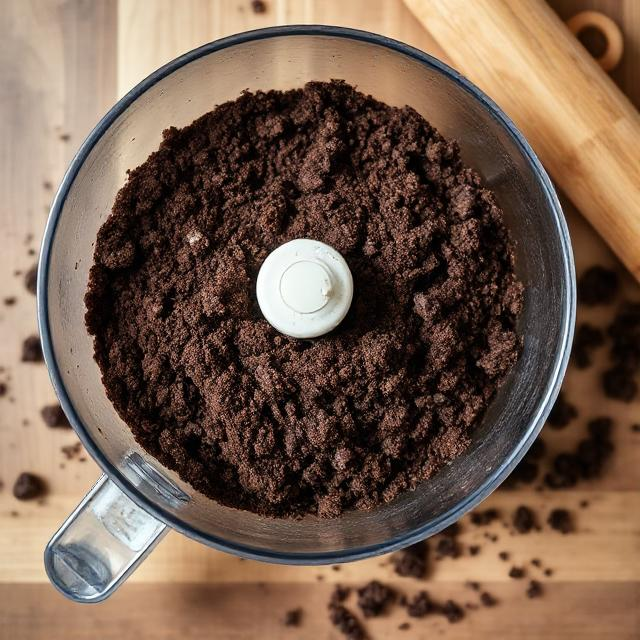
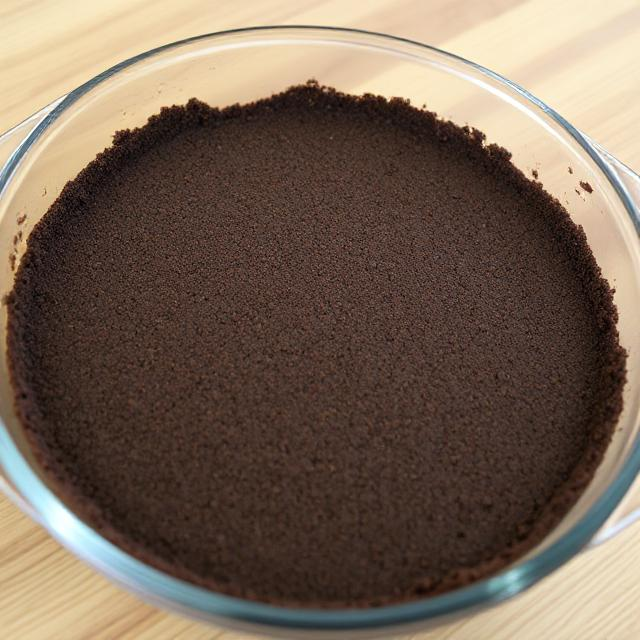
- 2 cups crushed chocolate sandwich cookies (about 24 cookies)
- 1/4 cup unsalted butter, melted
For the Filling:
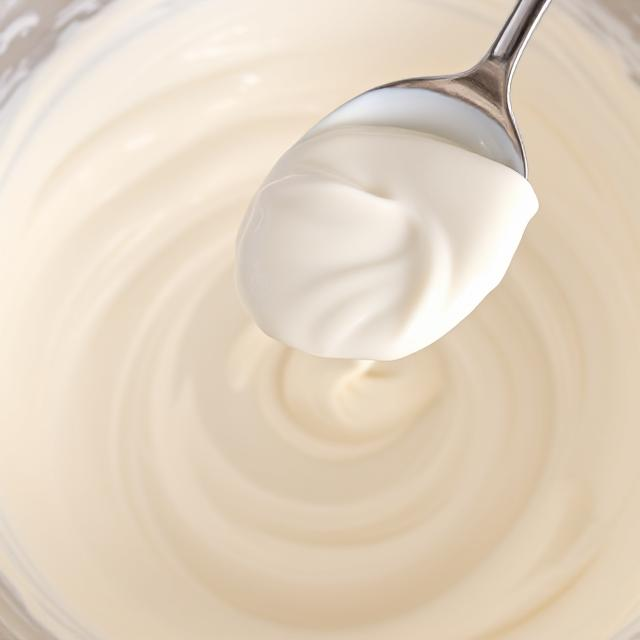
- 1 package (8 oz) cream cheese, softened
- 1/2 cup granulated sugar
- 1 tsp vanilla extract
- 1 container (8 oz) frozen whipped topping, thawed
For the Topping:
- 1 1/2 cups crushed chocolate sandwich cookies (about 18 cookies)
- 1/2 cup semi-sweet chocolate chips (optional, for extra indulgence)
How to Make Easy Cookies & Cream Dream Bars
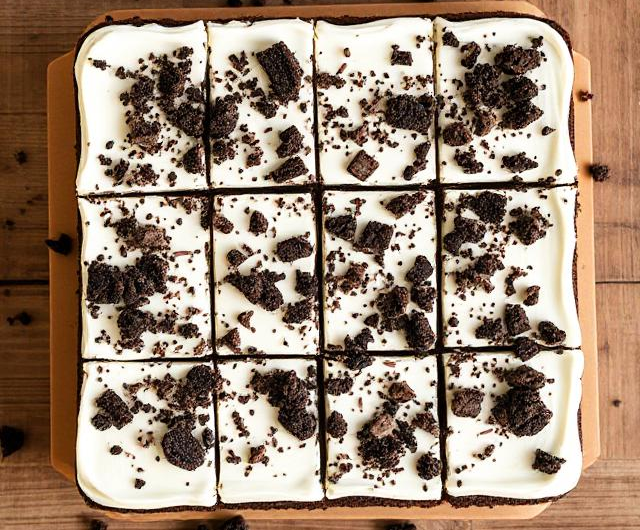
- Prep the Pan: Line an 8×8-inch or 9×9-inch baking pan with parchment paper, leaving an overhang for easy removal.
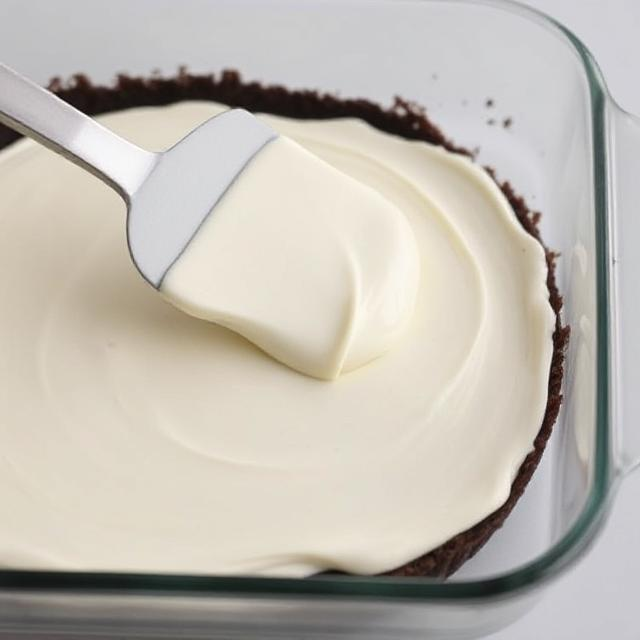
- Make the Crust: In a medium bowl, combine the crushed cookies and melted butter. Press the mixture firmly into the bottom of the prepared pan to form an even crust.
- Prepare the Filling: In a large mixing bowl, beat the cream cheese, sugar, and vanilla extract until smooth and creamy. Gently fold in the whipped topping until well combined.
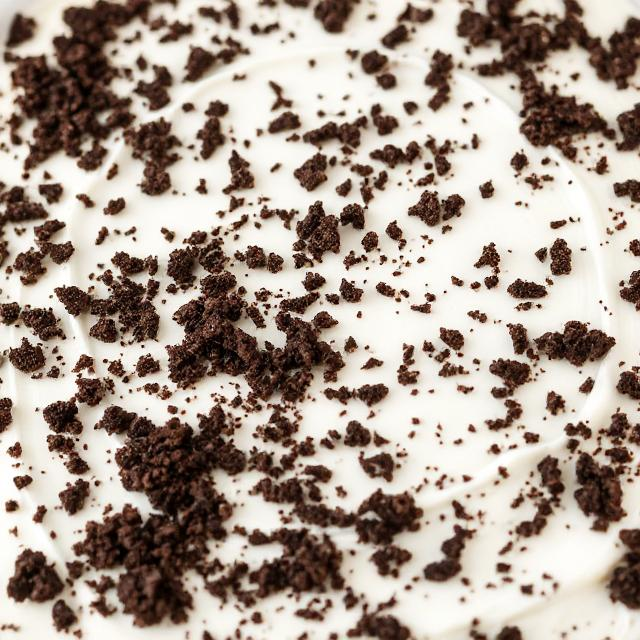
- Assemble the Bars: Spread the cream cheese mixture evenly over the crust. Sprinkle the remaining crushed cookies and chocolate chips (if using) over the top.
- Chill and Set: Refrigerate for at least 4 hours, or until the bars are firm.
- Serve: Lift the bars out of the pan using the parchment paper overhang. Cut into squares and enjoy!
Tips for the Perfect Cookies & Cream Dream Bars
- Room Temperature Cream Cheese: This ensures a smooth and lump-free filling.
- Don’t Overmix: Fold the whipped topping gently to maintain a light and fluffy texture.
- Chill Thoroughly: Let the bars set completely in the fridge for clean, neat slices.
- Add a Drizzle: Melt some white chocolate and drizzle it over the top for an extra touch of elegance.
Substitutions and Variations
- Gluten-Free: Use gluten-free chocolate sandwich cookies.
- Dairy-Free: Substitute the cream cheese and whipped topping with dairy-free alternatives.
- Different Cookies: Try using golden Oreos, mint Oreos, or even peanut butter cookies for a unique twist.
- Lighter Version: Use reduced-fat cream cheese and light whipped topping.
Make a Healthier Version
- Low-Sugar: Use sugar-free cookies and a sugar substitute in the filling.
- Whole Grain: Opt for whole grain or almond flour-based cookies for the crust.
- Reduced Fat: Use low-fat cream cheese and skip the chocolate chips.
Closing for Easy Cookies & Cream Dream Bars
These Easy Cookies & Cream Dream Bars are more than just a dessert—they’re a celebration of indulgence and the joy of sharing something sweet with loved ones. Whether you’re serving them at a party, a potluck, or just as a treat for yourself, these bars are sure to bring smiles to everyone’s faces. Don’t forget to let us know how your batch turns out, and consider checking out some of our other recipes for more culinary inspiration. Happy baking!
Frequently Asked Questions For Easy Cookies & Cream Dream Bars
Can I make these bars ahead of time?
Yes, you can prepare them up to 2 days in advance and store them in the fridge until ready to serve.
Can I freeze these bars?
Absolutely! Freeze them in an airtight container for up to 2 months. Thaw in the fridge before serving.
Can I use homemade whipped cream?
Yes, substitute the frozen whipped topping with 2 cups of homemade whipped cream for a fresher taste.
How do I store leftovers?
Store the bars in an airtight container in the fridge for up to 5 days.
Can I make these bars in a larger pan?
Yes, use a 9×13-inch pan for thinner bars, and adjust the ingredient quantities accordingly.
What can I use instead of chocolate sandwich cookies?
Try using graham crackers, vanilla wafers, or even shortbread cookies for a different flavor.
Can I add other toppings?
Yes, drizzle with caramel sauce, sprinkle with nuts, or add a layer of fresh berries for extra flair.
How do I make these bars gluten-free?
Use gluten-free cookies and ensure all other ingredients are gluten-free.
What’s the best way to cut these bars?
Use a sharp knife dipped in hot water for clean, smooth slices.
Can I make these bars vegan?
Yes, use vegan cream cheese, dairy-free whipped topping, and vegan cookies.
These Easy Cookies & Cream Dream Bars are a testament to the magic of simple, wholesome ingredients coming together to create something truly special. Whether you’re a seasoned baker or just starting out, this recipe is a must-try. So, gather your ingredients, grab your favorite cookies, and get ready to bake a treat that’s sure to become a family favorite. Happy baking!
Easy Cookies & Cream Dream Bars
Course: All Recipes4
servings30
minutes40
minutes300
kcalIngredients
- For the Crust:
2 cups crushed chocolate sandwich cookies (about 24 cookies)
1/4 cup unsalted butter, melted
- For the Filling:
1 package (8 oz) cream cheese, softened
1/2 cup granulated sugar
1 tsp vanilla extract
1 container (8 oz) frozen whipped topping, thawed
- For the Topping:
1 1/2 cups crushed chocolate sandwich cookies (about 18 cookies)
1/2 cup semi-sweet chocolate chips (optional, for extra indulgence)
Directions
- Prep the Pan: Line an 8×8-inch or 9×9-inch baking pan with parchment paper, leaving an overhang for easy removal.
- Make the Crust: In a medium bowl, combine the crushed cookies and melted butter. Press the mixture firmly into the bottom of the prepared pan to form an even crust.
- Prepare the Filling: In a large mixing bowl, beat the cream cheese, sugar, and vanilla extract until smooth and creamy. Gently fold in the whipped topping until well combined.
- Assemble the Bars: Spread the cream cheese mixture evenly over the crust. Sprinkle the remaining crushed cookies and chocolate chips (if using) over the top.
- Chill and Set: Refrigerate for at least 4 hours, or until the bars are firm.
- Serve: Lift the bars out of the pan using the parchment paper overhang. Cut into squares and enjoy!